Corrective Blendshapes
Like twist bones, corrective blendshapes help greatly with deformation, at the cost of needing a sender and receiver slot on your avatar. They are common on knees, elbows and shoulders in animation spaces but can be used in a lot of scenarios
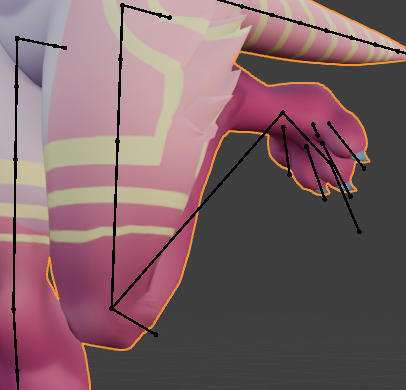
To get started, pose your avatar with symmetry OFF in a position where you want the corrective blendshape to happen. Create a new blendshape (I tend to name any corrective blendshape with the prefix “Cor_”).
Go to sculpt mode and select your newly created blendshape.
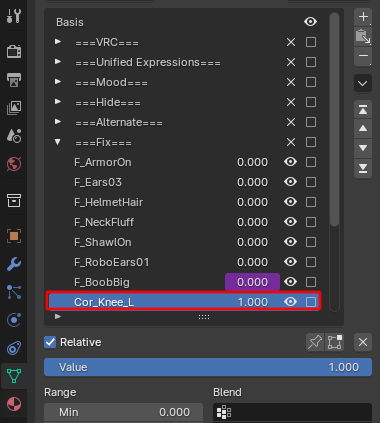
Note
The Shapekeys list is different because it uses an addon called Shapekeys +, which organizes shapekeys through folders. This addon has not been maintained and often scrambles folders, so I would not recomment it anymore. A similar (paid) addon I would recommend is Quick Shape Keys.
When in sculpt mode, the blendshape you have selected is the one that gets affected by sculpting. If the blendshape isn’t set to 1, nothing will happen when trying to sculpt. Now, with your avatar posed and with symmetry set to off in sculpt mode, attempt to sculpt the shape you want the mesh to look like when the corrective blendshape is active. References here can help a lot.
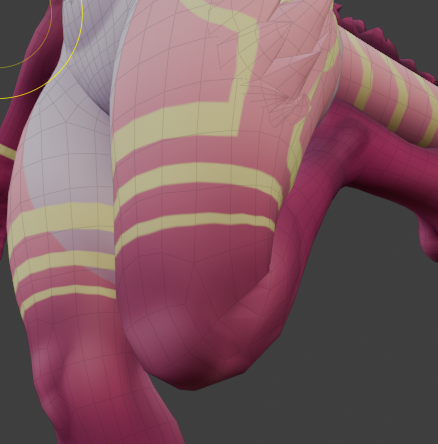
Once you’re done, make sure no other blendshapes are active, and with the corrective blendshape set to 1, make a new shape from mix and mirror it to get the other side (assuming your avatar is properly symmetrical)
You can now export your model to Unity.
Once in Unity, you will need to make 2 animations. One for turning the corrective blendshape to 100, and one for when it’s at 0.
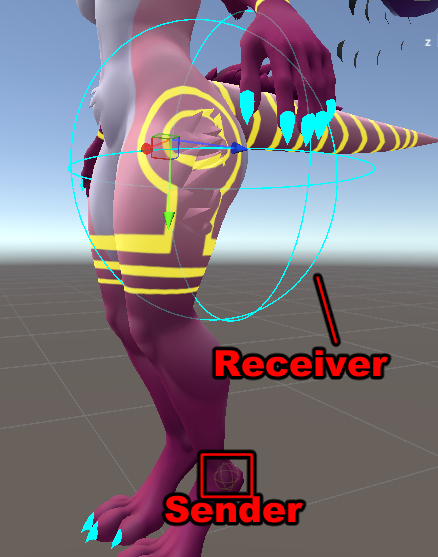
Then, add a receiver to whichever bone is appropriate for your corrective blendshape. For example, if you’re doing a corrective blendshape for a knee, the receiver would be in the top of the upper leg, and the sender would be on the bottom of the lower leg.
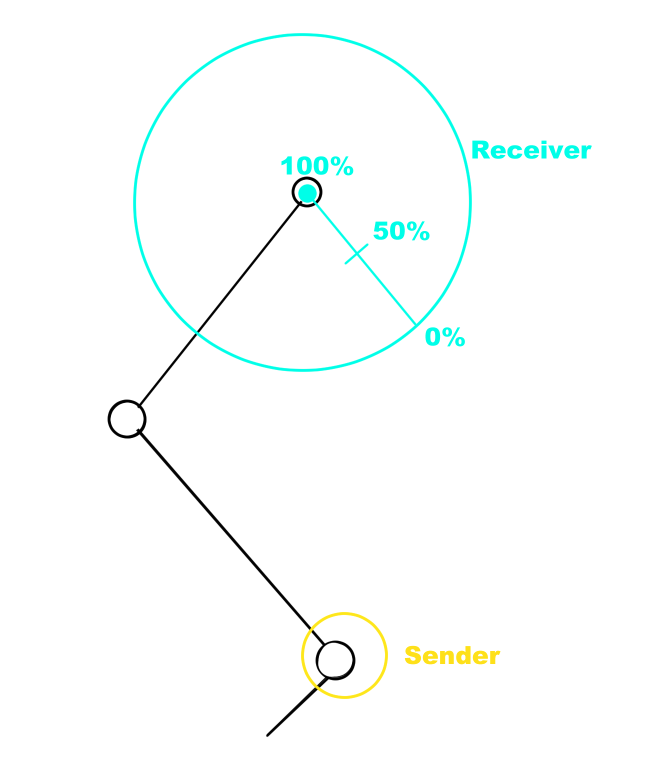
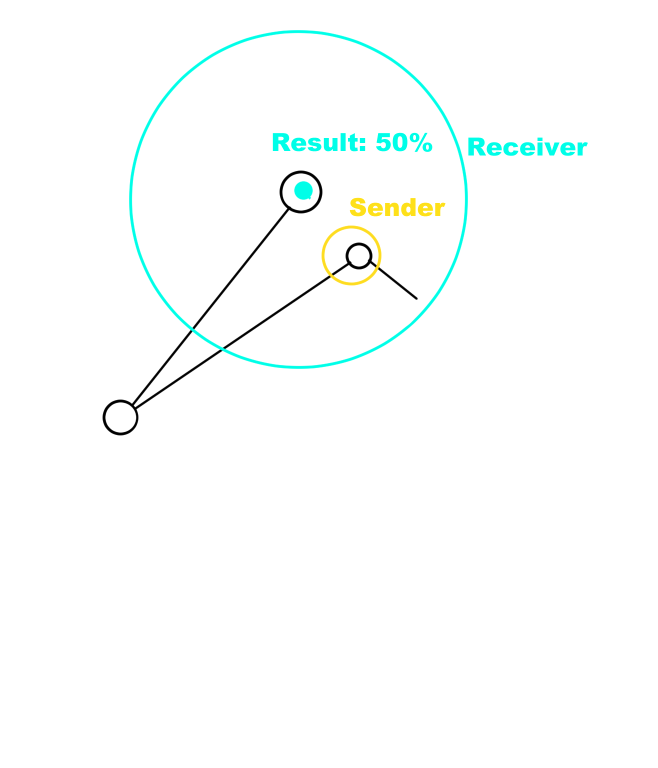
The position and size of the receiver and sender might need to be adjusted, but just keep in mind that the bigger the receiver, the smoother the transition, but if it’s too big, it’ll activate too early and look wrong. Think about where the receiver and sender will be when the expected position for the blendshape to trigger is reached. When the sender enters the receiver’s radius, it’ll begin the transition, and when it’s in the center, it reaches the blendshape’s max value.
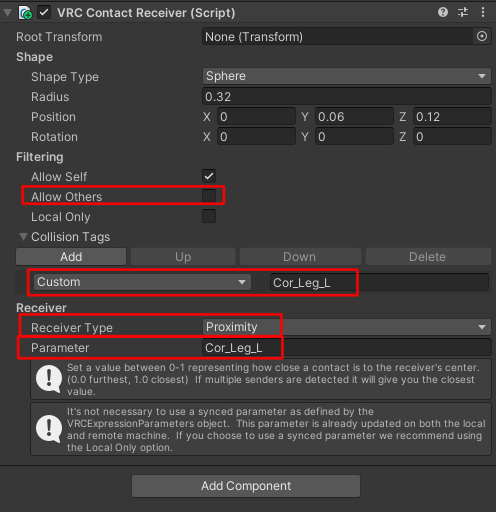
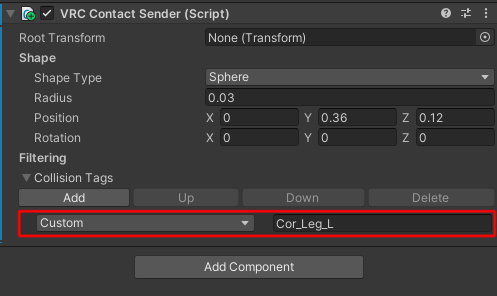
Your sender and receiver will need a matching keyword and the receiver will need their own parameter name. These can be the same. Also, set it to proximity. Make sure “Allow others” is off so others can’t activate the blendshape.
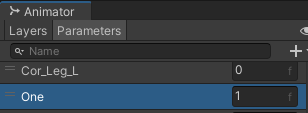
With that done, go to your FX animator controller and create a new layer. Set the weight to 1, Then create 2 new float parameters. One that matches the receiver parameter you named earlier, and the other will be “One”. “One” will simply be there to keep the direct blend tree active and avoid having to do a layer for each and every corrective blendshape you have. In the parameter list of your animator layer, make sure “One” is set to 1, otherwise your direct blend trees won’t work!
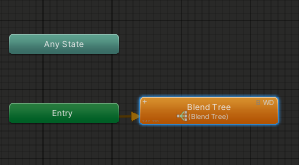
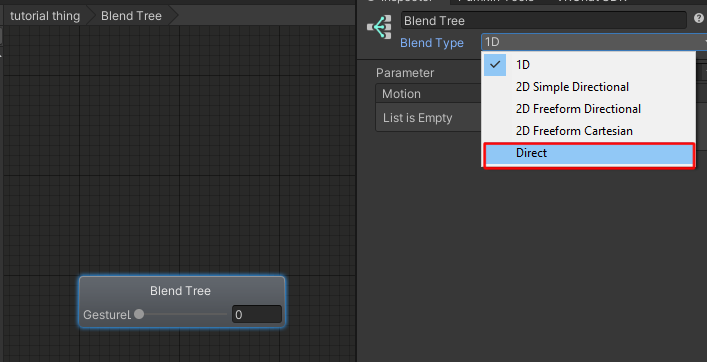
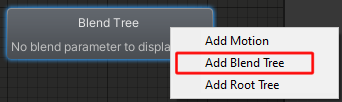
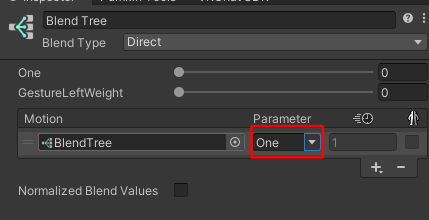
Create a new blend tree. Inside it, set it to “direct” and add a new blend tree. In the direct blend tree, set the parameter used to “one”, and inside the new blendtree, use your corrective blendshape’s parameter name.
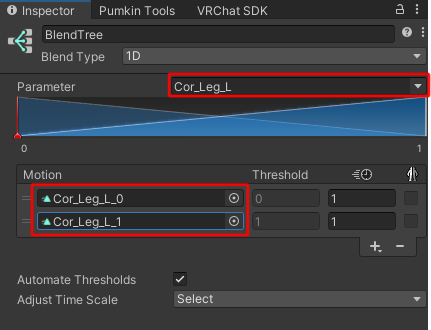
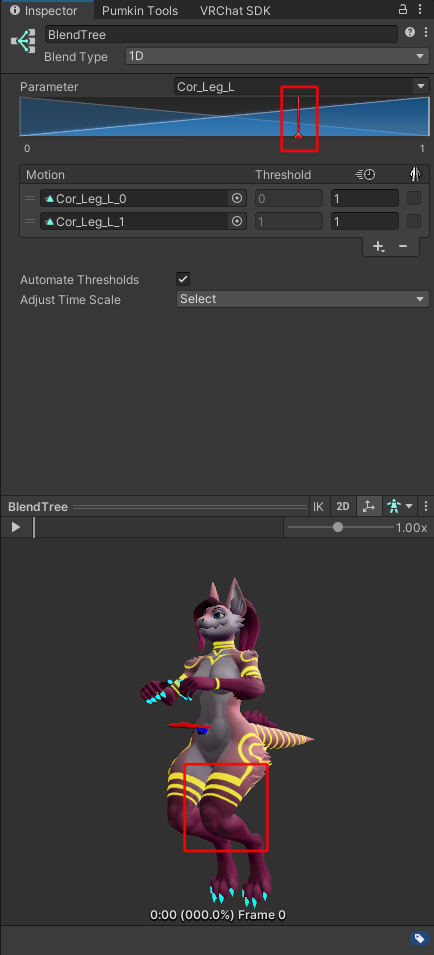
In the top slot of the blend tree, put the animation for when the blendshape is at 0, and in the second one, put the one for when it’s at 100. You should be able to test this in the preview by drag and dropping your model in from the hierarchy and moving the red bar left and right to make sure it works.
[!question] Help! it doesn't work!
I'll go over common points of failure:
Tags: Do they match between the sender and receiver?
Parameter names: Do they match between the receiver and FX layer?
Animations: Are they slotted into the blendree properly, and are the blendshapes in the animation set to 100, and NOT 1?
Senders: Are they parented to the correct bone?
Layer weight: Is the layer weight set to 1?