Note
This section assumes you've already made the Unity project, imported the 📦 Prerequisite Packages and opened the scene. If you're new to using Unity for uploading avatars, follow the 🟥 Unity And VCC Setup
The Drakonoid was made while I was still figuring a few things out. I have rewritten a few things that hopefully will make it easier to work with.
Importing custom textures to Unity
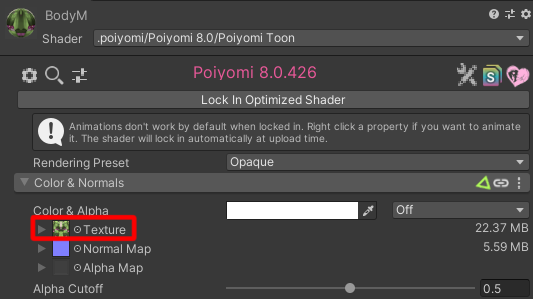
Once you’ve got all the Substance Painter maps, you can import them into Unity. Look for the matching material in the materials folder and click it, unlock the shader if it isn’t already and replace the “Texture” slot with your AlbedoTransparency map.
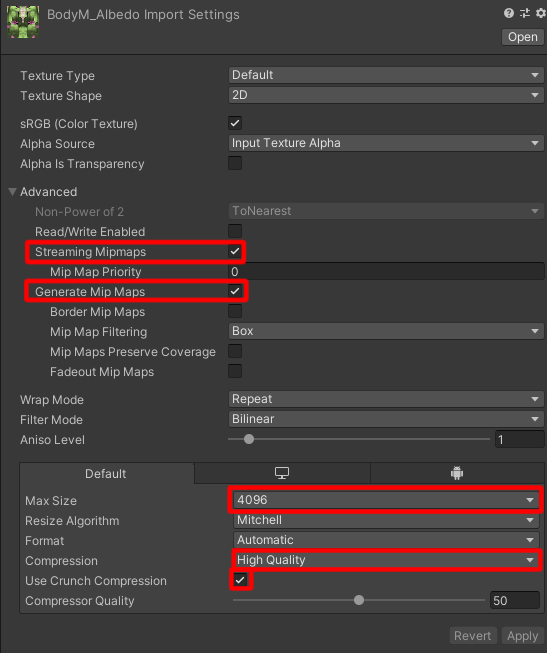
For the Body textures, you can increase the resolution and quality by clicking the texture itself in your assets and choosing these settings
Danger
Do note that only the Body Albedo has 4k textures enabled in substance. The rest are either 2k or 1k. It is not necessary (and not recommended) to have 4k textures for everything, as there will be very little improvement for something like the hair or certain maps, and it'll be a strain on everyone's PCs.
Limit your use of crunch compression. It can cause hiccups and stuttering for others when you join a world if there are too many textures that use it. Finally, Unity will always import textures at 2k, so bring the hair textures down to 1k.
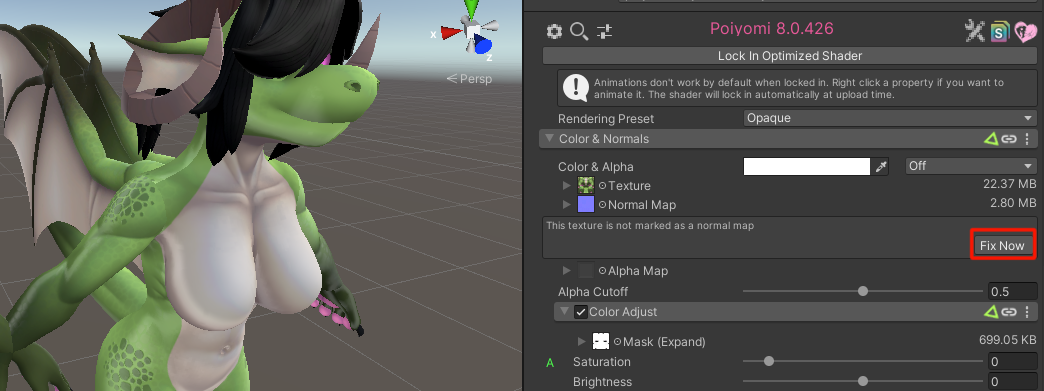
When you slot in the normal map, you might notice your character looking weird. This is because all textures are imported as sRGB, and normal maps are not meant to be sRGB. Thankfully, a popup will appear asking if you want to set the texture to be a normal map. Click “fix now” and it should look much better.
Replacing the FBX
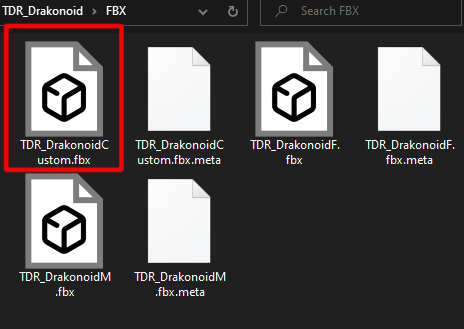
I left an FBX in Unity called “TDR_DrakonoidCustom” that already has every bone and every Physbone set up at the same time. It is there so that once you replace it with your own FBX, all the bones that don’t need to have Physbones will be discarded. This should leave you with an avatar that only has the needed Physbones and regular bones.
Unfortunately, you cannot replace the FBX directly inside the Unity application, as it will instead create a duplicate version with _1 at the end. Which is why we need to do it in Explorer. In Unity, browse to Assets>TDR_Drakonoid>FBX, right click “TDR_DrakonoidCustom” and click “Show in Explorer” to open the folder it is contained in.
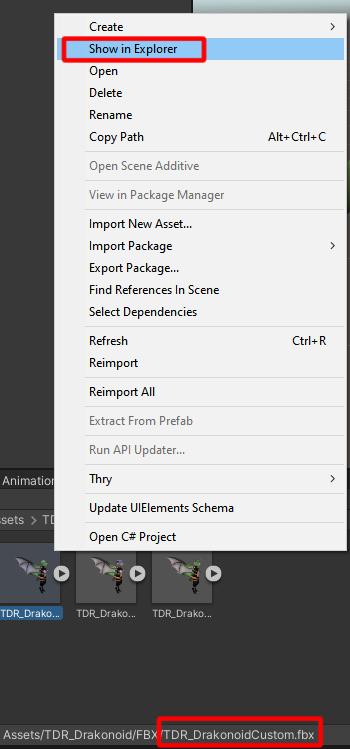
You can now take the custom Drakonoid FBX that you exported and replace the one in this folder. Don’t replace TDR_DrakonoidF or M! These only have their assigned bones and are not meant to be replaced like TDR_DrakonoidCustom is. Replacing them means any bones that differ from it won’t have physbones.
You’re almost done!
Fixing Import Issues
If you’re noticing some issues, I’ll try going over things that might go wrong.
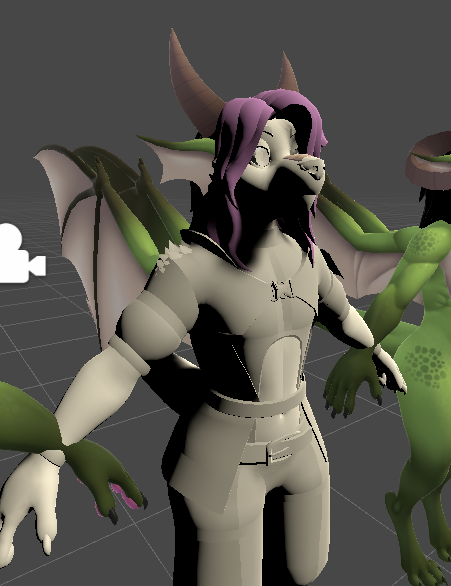
For instance, you might end up with something like this:
Materials
It shouldn’t be too much of a hassle to fix. Go to Assets>TDR_Drakonoid>Materials to find all the materials. They should be all named accordingly. You should have one material for the body, one for the outfit, one for the different options (Assorted) and one for the hair.
if one is missing, simply drag and drop it onto the corresponding mesh.
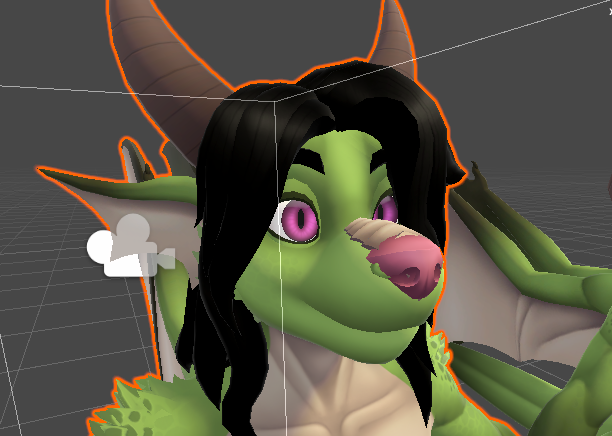
Now that everything has the right material, you might notice some things clipping together. Some of these will be fixed when uploading, like the nose and plates, however for the sake of it, I’ll show you how to fix them.
Blendshapes
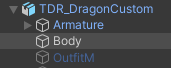
First, select the Body mesh. Then, look at the inspector tab.
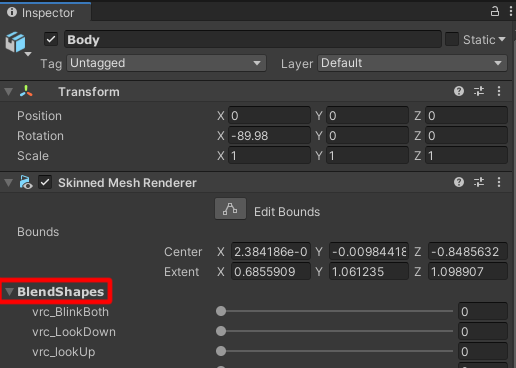
Click the “Blendshapes” arrow to reveal all the blendshapes on the model.
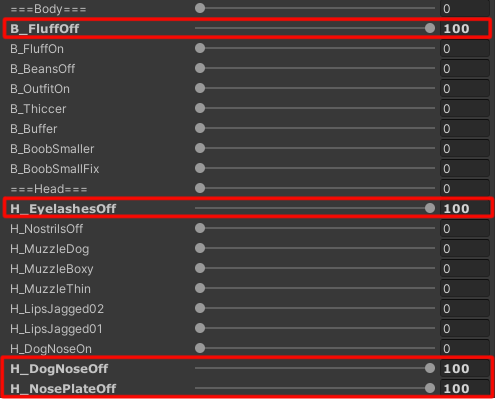
Everything should be at 0, save for these 4 Blendshapes which should be to 100, even if you want one of these on by default. Leaving one of these at 0 could remove your ability to toggle them. (especially with write defaults on) These are all controlled by the radial menu. We’ll look over how to “lock in” your favorite settings in the next section.

There should be a section for fixes at the bottom of the list. You might notice some clipping with certain horns, ears or hair combinations. I provided blendshapes that should fix all the instances of clipping on the model that I’ve come across. You should only turn them on if the choices you made back in 📤 Blender Export Process match a Blendshape’s name. Though, feel free to mess around with them if you prefer the look it gives. If you’ve chosen chest plates, there is a fix for it on the Outfit’s blendshape section.
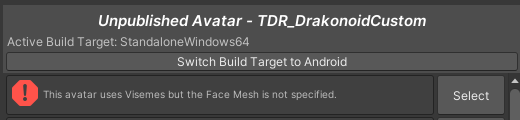
If you chose the BodyF mesh, your visemes won’t work until you assign the body mesh. To fix it, simply open the “TDR_DrakonoidCustom” object in the Hierarchy. Drag its Body mesh into the “face mesh” and “eyelids mesh” section in the avatar descriptor.
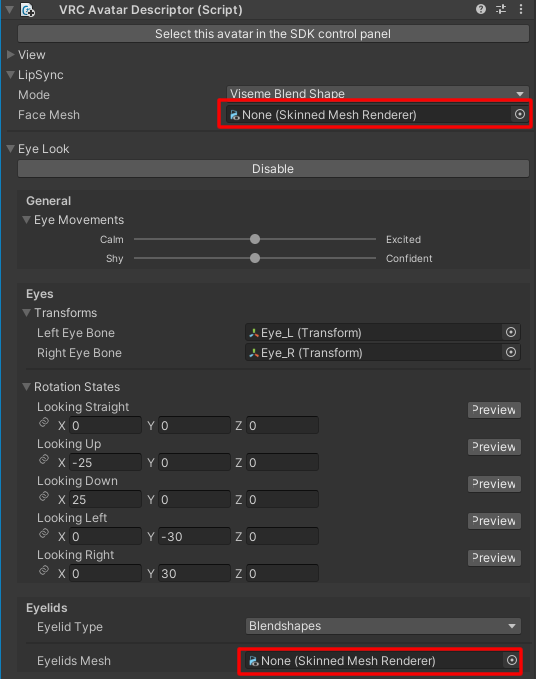
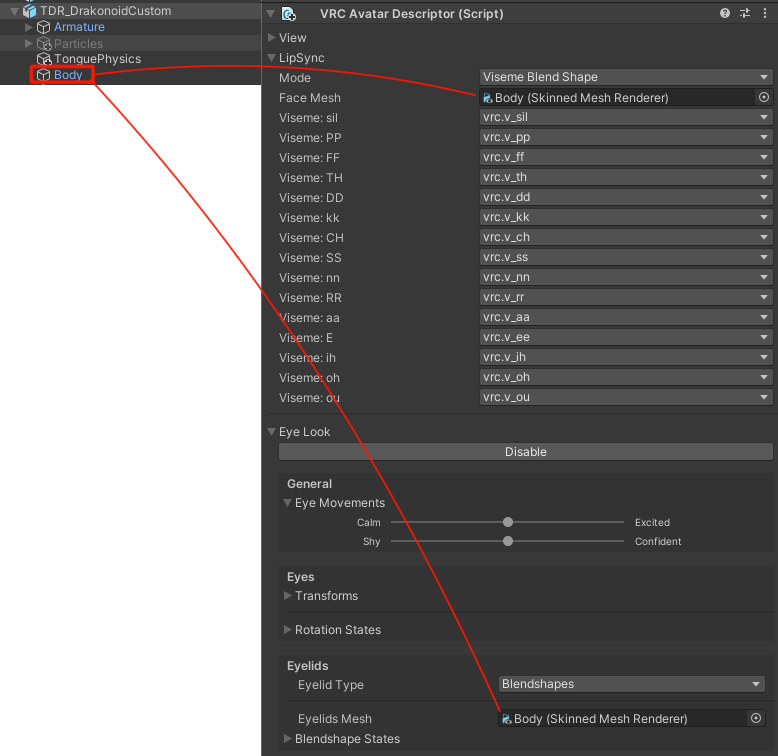

While we’re at it, make sure the eye bones are also assigned. You can click the circle on the right of the boxes to assign them if this slot is empty! During tests, this issue occurred once, somehow.

Not quite blendshape related, but make sure the Outfit is hidden by selecting it in the hierarchy and clicking the checkmark at the very top. Having it on in unity means that you won’t be able to toggle it off in-game, and clipping will occur.
Replacing the Custom FBX With Different Options
You might want to try a different hairstyle or body mesh at some point. To do so, simply reimport the Unity Package and overwrite ONLY the scene and Custom FBX. You should then be able to overwrite it again with the FBX you exported from Blender again.
Just keep in mind you'll probably have to follow this guide from the top again, and that your avatar blueprint will be reset along with any changes to the scene itself. The materials should be fine if you don't reimport them or the textures.
Success
You can now move on to 🫧 Poiyomi Features if you want a more in-depth look at the features used for this model in Poiyomi.