If you're here, you most likely already know how to use fill layers and masks, but you may be unfamiliar with some of the more advanced features in the software. I'll go over the ones I use most for my avatars.
Layer Effects
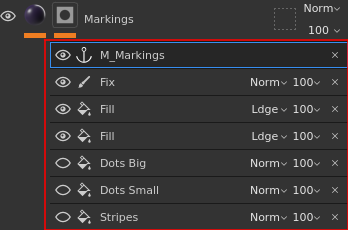
A fill layer or mask can have layered effects applied to them. They will appear as such when clicking a mask or fill layer:
Important
Be careful not to confuse Fill Layers and Paint Layers with Fill layer EFFECT and Paint layer EFFECT.
This feature allows more granular control over the fill layer or mask and only appears when the fill layer or mask is selected. Here are 2 important ones:
Fill Layer Effect
These have a paint bucket icon. It allows users to add a texture to control the mask, or to overlap multiple textures within that mask.
In some of my avatars, On the markings mask, you'll notice these fill layer effects are sometimes alternate markings which can be turned on or off if desired with the eye icon.
In my more recent projects, you'll notice these fill layers are practically on every mask. This is done for performance reasons.
Substance Painter saves every single brush stroke you make, which drastically slows down the project when hundreds of thousands of brush strokes are saved, and can cause crashing. To mitigate this, the masks are saved as textures and re-imported into fill layer effects, which gets rid of all the brush strokes.
Paint Layer Effect
Instead of being restricted to painting on the mask itself and having only one flat layer, these allow you to use multiple separate paint-able layers within the same mask. If you want to make changes to a mask but are too scared to mess it up, use a paint layer effect to make changes that are non-destructive and easily removable.
Note
Layer effects will take priority over the main mask.
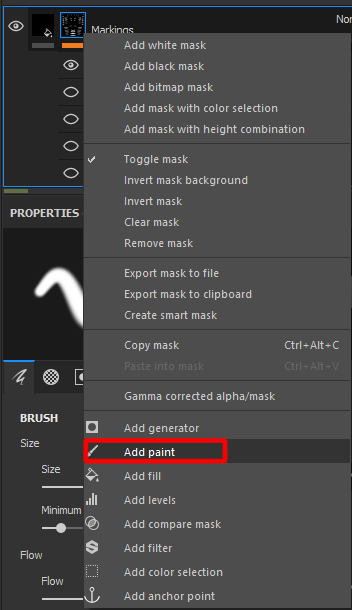
To create your own paint layer on a mask, right click the mask and click "Add paint".
| Add Paint Layer Effect |
|---|
 |
Warning
Make sure to select the paint layer effect before painting on the model!
Filter Layer Effect
Filter layer effects contain a lot of options relating to adjustments to color or brightness.
Generator Layer Effect
Generators can create gradients in 3D space, and often use the baked masks of the model to create procedural effects.
Colors and shading/lighting layers
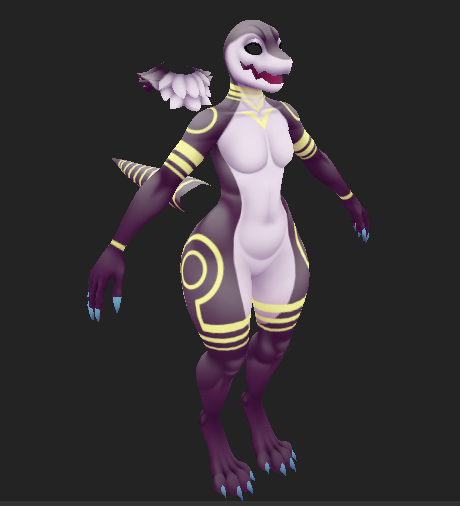
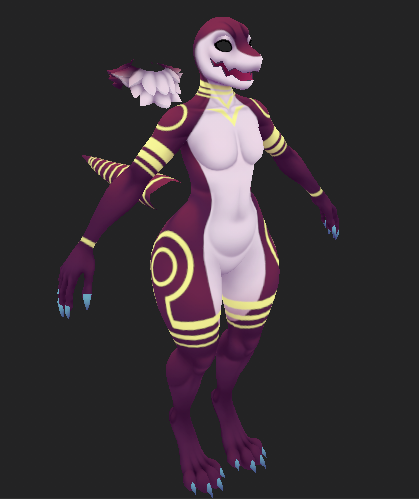
Remember that changing the base color might make the shading or lighting too bright or too dark. Your textures will end up looking much better if you also tweak the shading and lighting layers to match your own colors!
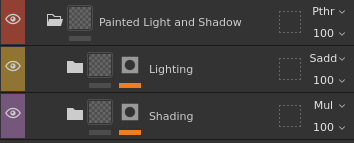
It makes a world of difference! Experiment and have fun!
| White | Light Pink |
|---|---|
 |
 |
 |
 |
In later projects, (Gouganoid, Dragoonoid) I attempted to somewhat automate this process using anchors, and it may be confusing to those unfamiliar with this function, so I'll briefly go over it.
Anchors
Anchors allow you to link a mask or a fill layer somewhere else on the material, and anything using that anchor will update automatically with it.
Note on anchor usage
You can't use an anchor for a layer if it is located underneath the anchor you created in the layer stack. The layer where it is used needs to be above where the anchor was created.
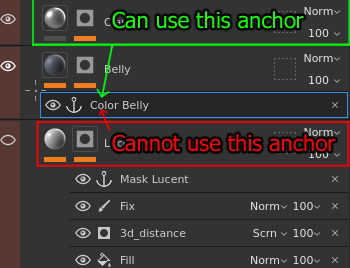
Warning
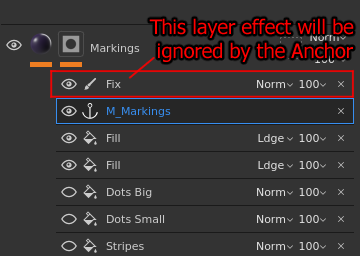
When creating an anchor on a fill layer or a mask, it usually needs to be above everything, anything above it won't be transferred to the places where that anchor is used.
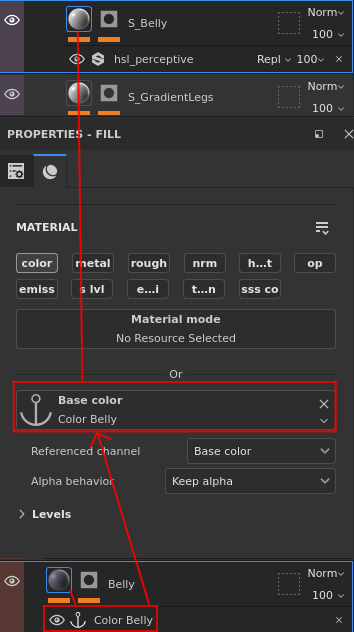
When an anchor is used, it will often be inside a masks' fill layer effect. In this example, the anchor on the belly's mask is copied in real time to the fill layer effect inside the L_Belly mask.
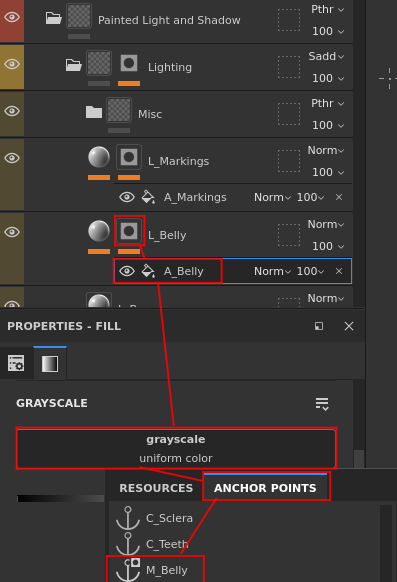
When an anchor is used for a Fill layer, it will control that fill layer's channels. For my projects, It is often located directly on the fill layer properties' Base color section, as opposed to a fill layer effect.
In this next example, the Anchor on the belly's fill layer controls the base color for S_Belly.
New Shading and Lighting setup
In my more recent projects, I've completely changed my approach to shading and lighting layers. My previous method used 2 colors: one for lighting, and one for shading. Here's some visual examples for different shading setups.
| Example Image | Description |
|---|---|
| 1. | Black for Shading, White for Lighting |
 |
While it doesn't cause many issues, this method looks a bit cold and lifeless. |
| 2. | My old shading setup |
 |
While it can give more interesting results, issues become apparent. Bright colors are more sensitive to the shading's color, and darker colors are sensitive to lighting color. |
| 3. | My new shading setup |
 |
The ideal result, we have individual control over each color's shading and lighting colors. Requires a bit more work. |
This newer method involves having a copy of every color used in the project placed inside both the Shading and Lighting folder, and having the originals control both the masks and the color. The shading/lighting itself is applied using the folder's mask. You'll find these layers usually near the top of the layer stack.
This allows precise control of the shading/lighting color and intensity for each color layer in the project, and in theory, will automatically change with any modification you make to the layers outside of the shading and lighting layers.
Fill layers in the shading/lighting folders have an HSV filter effect that allows modifying their color even if it's being controlled by the original.
In other words, changing the original colors or masks should automatically change the lighting and shading layers for you.
That being said, it might still look wrong in certain situations. If it does, feel free to modify the HSV filters under the specific color giving you trouble in the Shading and Lighting folders.
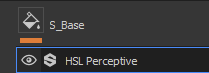
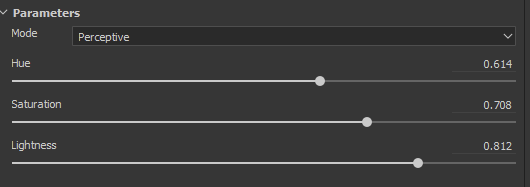
You can also remove the filter and anchor in order to use Substance's color selector.
Note
When adding a new fill layer underneath the Shading and Lighting folders, you'll notice that the color for that layer might look wrong. This stroke is meant to be pure black.
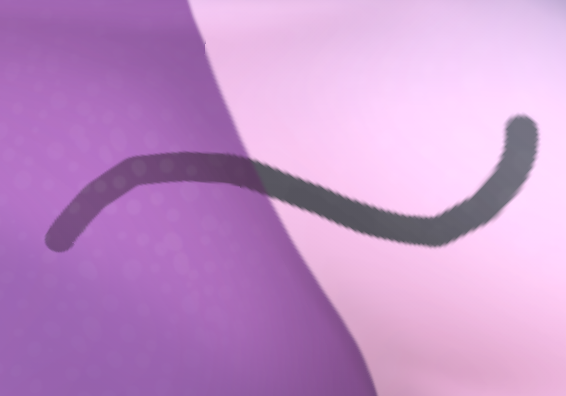 You'll need to create the matching shading and lighting layers in the respective folders.
Alternatively, put the fill layer above the shading and lighting layers, but keep in mind it won't get shading.
You'll need to create the matching shading and lighting layers in the respective folders.
Alternatively, put the fill layer above the shading and lighting layers, but keep in mind it won't get shading.
Also note that you can just create your own markings using the existing Markings layer. Use a paint layer effect and make sure it is located below the anchor!
Emissions
Emissions are commonly used to make a “glow” effect. When making an emission layer, most people would pick the color they want the glow to be, but that would make an emission MAP, not an emission MASK.
An emission MASK can be separated into 4 channels, Red, Green, Blue and Alpha.
Instead of being used to tell what color the emission will be, the emission color is used to separate each channel into their own emission “zones” that can be controlled individually using only one map.
The color of each channel will be controlled in UNITY.
In other words, if an emission channel is already included, DON’T CHANGE THE COLOR OF IT IN SUBSTANCE PAINTER.
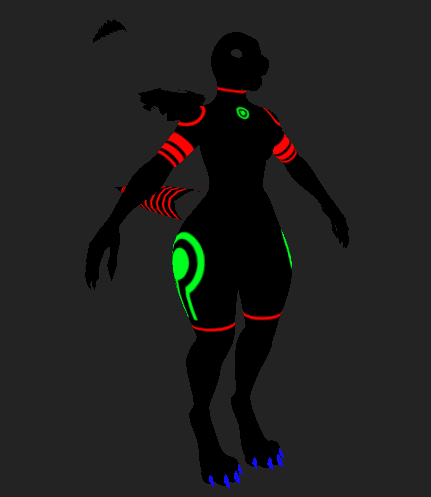
Again, use red, green, blue and alpha for different areas that you want emissions for, don't just choose the color your want it to glow. You can change the color of emissions later in Unity.
Note
The default emission channel in Substance Painter does not include an alpha channel, but this can be fixed by adding your own user channel and having a custom setup for your exporter that adds that alpha channel to the Emission map.
Instanced layers

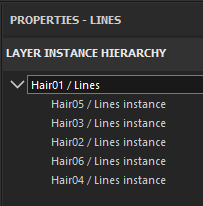
Instanced layers are layers that span across multiple materials. The downside is that only the original instance of that layer is editable. Keep that in mind when trying to modify a layer that is using this feature, such as the hair on the Protonoid.
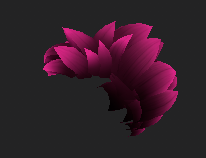
UDIM Workflow
Having the head and body separate is pretty common in games, and allows for more resolution on important parts like the head while allowing for a smaller file size, but this workflow usually means having 2 separate materials.
Normally, we can't paint across materials, but having a UDIM workflow means each UV tile gets a different texture assigned to it, which means we can work on multiple different textures within the same material.
Because the textures are exported for each tile, we can assign them to separate materials in Unity without having to paint on 2 different materials in Substance Painter.
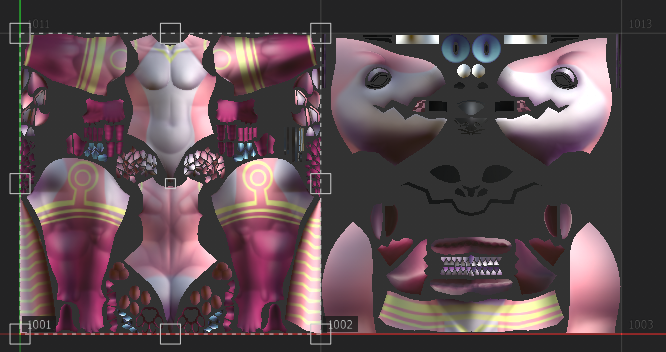
UDIMs assign a number to each UV tile (1001, 1002, 1003, etc.) these numbers will be appended to the texture file on export.
UDIM workflows also prevent the photoshop export function from working. This means every mask and color has to be exported manually, and frankly takes a lot of time to recreate, which is why a photoshop file is not always present in some of my projects.
Stacked Islands Outside the Main UV Tile
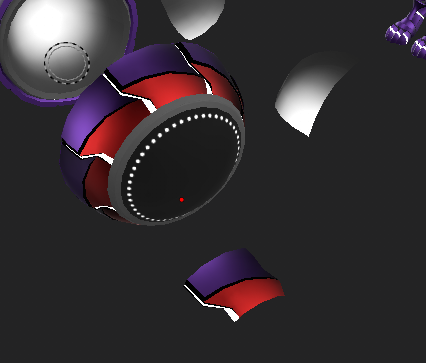
In rare scenarios, you might notice not being able to paint on certain parts. To save on UV space, multiple similar islands were stacked on the same UV area. If it can’t be painted on, it might be because the UV island for that mesh is outside of the main UV tile. It is set up this way because Substance REALLY doesn’t like when multiple UVs are stacked when baking. Having only one “real” UV island allows it to bake properly. This issue only applies to projects that weren't set up using a UDIM workflow.
UVs will repeat like a grid (Unless working with UDIMs), so having them moved 1 UV tile over will still let you “preview” what it’ll look like. In this example, this isolated segment can be painted on, but the ones that are merged on the left can't be painted on.
Export settings
Once you’re happy with your texture work, click File>"Export Textures". Use the Output template that should be there by default to export your textures, and choose a folder to export to.
Warning
If no "cached" preset is present, your Substance Painter version might be too recent to interpret it correctly. If this happens, refer to each model's guide in order to recreate the export setting required.
Export Preset
Creating a New Export Preset
Navigate to File>Export textures then click "Output Templates"

Then Click the Plus sign to create a new one.
Name it something that matches the model.
Output Maps and Channels
Clicking one of the options next to "Create:" will give you different ways to export a texture.
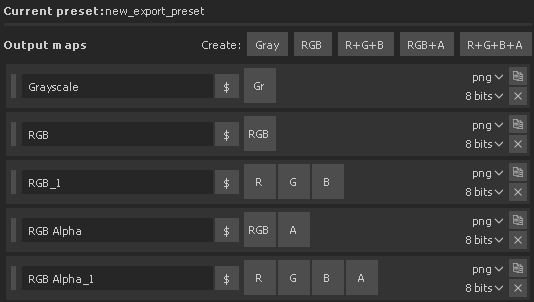
These refer to the texture channels and how they are arranged within the texture. A texture has 4 channels: Red, Green, Blue and Alpha.
sRGB8, as you can tell from the name, includes RGB channels in one place, which is what allows us to pick a specific color rather than just black and white.
Almost everything else that isn't RGB will be using "L8", and uses grayscale values between black and white. A channel will say which setting it uses under the "texture set settings" tab.
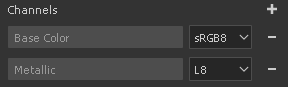
As an example, If you want to export the color of your texture, it's generally RGB+A, because the color channel is sRGB8, and opacity can be appended to the alpha channel using the grayscale value of the opacity channel.
In the vast majority of cases, we'll only need RGB+A and R+G+B+A.
Assigning Texture channels
You can drag and drop any input map, mesh map or converted map into a channel.
Doing so will open a menu that lets you select which channel of the map will be used.

Because we are mostly only working with sRGB and L8, that means dragging in a map that uses sRGB will require you to select "RGB channels", and anything else will use "Gray Channel".
You can tell which map a channel is using from the color of the square that shows up when slotted, which will match between the channel and the map.
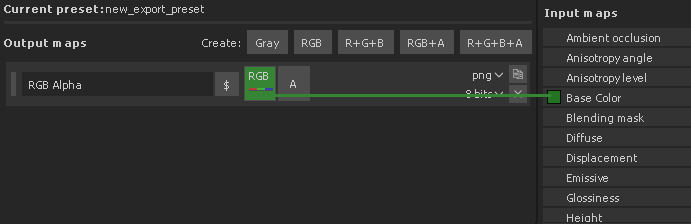
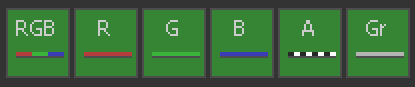
You can also tell which channel from that map is being used by the line underneath the letters in the channel. Keep this in mind when trying to recreate a template. For the sake of showing them all off, I've laid them out side by side in the example below.
Warning
Just because the output channel of the map is red does NOT meant you need to use the red channel of the input map. In the vast majority of cases, you'll be using the gray channel of an input map and slotting it in a R,G,B or A texture slot of an output map.
Texture Name
When looking at an export template, make sure it matches the name correctly. It is case sensitive!

With this, you should be able to recreate an export preset whenever I provide a picture of it. Some of the colors are sometimes a little similar, so I often provide additional info to help.