📤 Blender Export Process
Note
You should head to 📀 Blender Customization if you've never used Blender or have never customized one of my models before.
Pack selector
This slider allows you to choose between the armored version, the casual version and the “raw” version, which is mainly for Quest. Moving this slider will hide or show the pack’s respective menus and sliders. Please understand that due to the complexity of this model, the Casual outfit cannot be used with the armor at this time.
Begin by choosing a hairstyle and ears, then if using the Armor, slide the armor knob to full and choose armor ears and a visor armor for your helmet, if you want either of them. Armor ears will only be shown when the “Full Helmet” option is selected in VRChat. Both the armor and unarmored models will be exported regardless of how the model is displayed, but Unity has the armor hidden by default. Therefore, to make sure all animations are working properly, I highly recommend sliding the armor back to off when exporting, and keeping the clothes on, but only if you are exporting the “casual” version. You can also choose if you want the skull head version of the model with the Skull knob.
Warning
Body sliders should be set to default!
Exporting the Custom Protonoid
Assuming the sliders are set to options that you’re happy with, then you’re almost done. If you were to export now, the model will be very unoptimized. There’s just a thing or two left to do that will ensure everything will work great.
Before we begin though, keep note of which option you’ve chosen in the hierarchy. You’ll know which one when it’s highlighted like so:
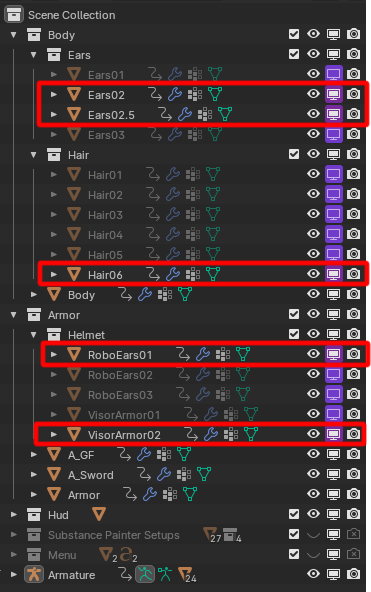
Joining the options with its associated mesh
This is EXTREMELY important.
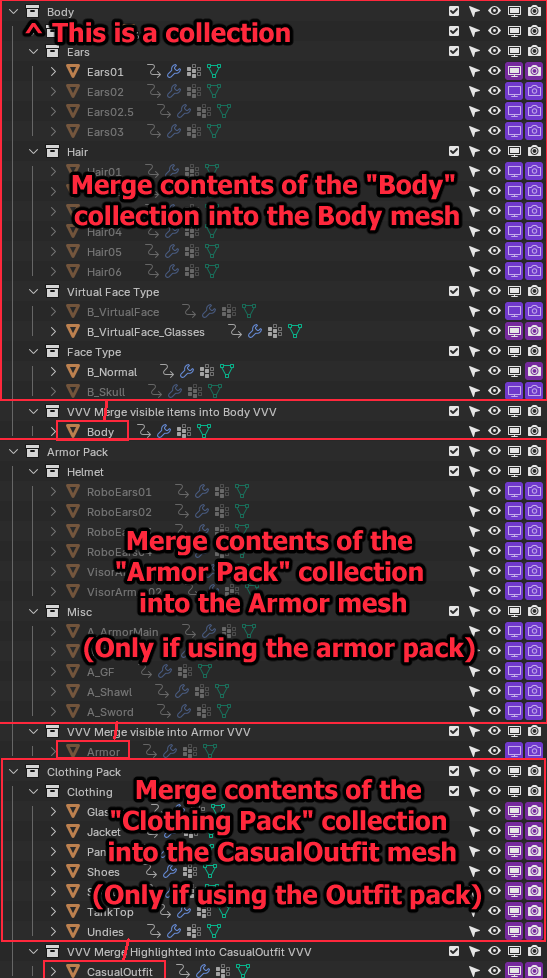
We need to combine all the options you’ve chosen in the Body section into one Body mesh, and all the Helmet options and A_GF/A_Sword into the Armor mesh.
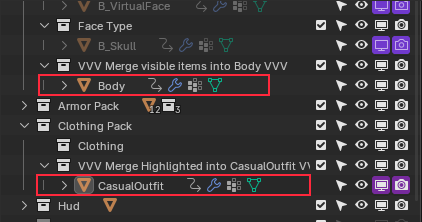
Go back to Object mode, make sure nothing is selected by clicking in empty space. In the HIERARCHY, click all the meshes in the Body section while holding CTRL, and make sure you select Body LAST. Do NOT select the Armature/Bones. You can undo a selection with CTRL+Z.
You should have something that looks like this:
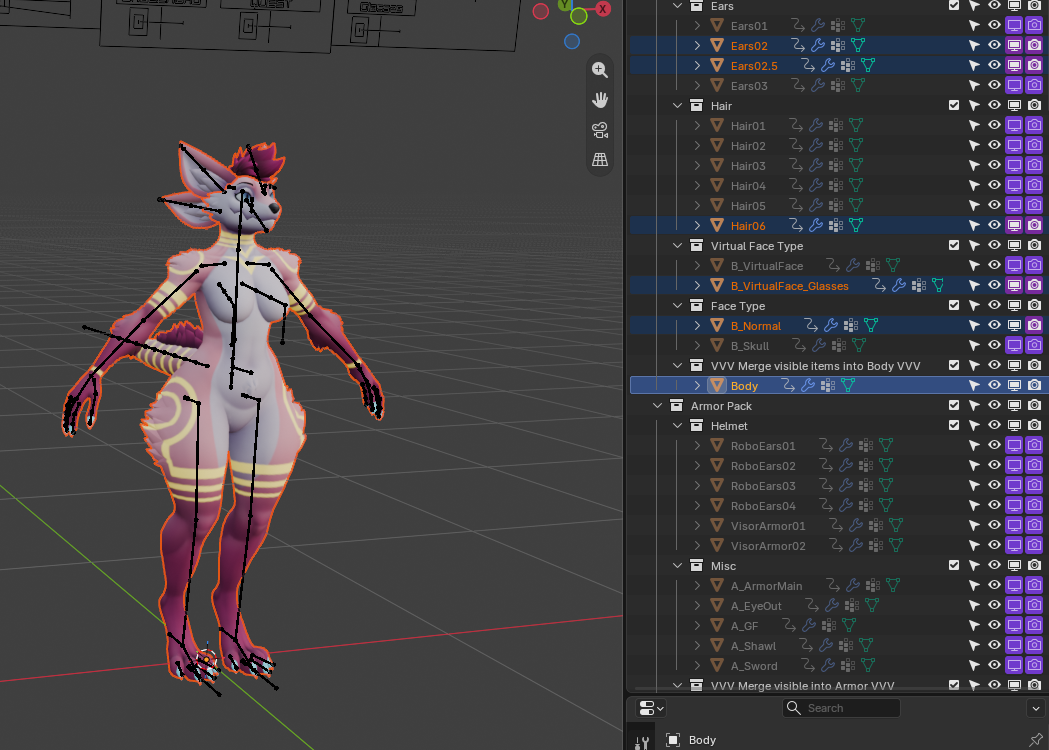
With Body selected last, put your cursor in the SCENE/VIEWPORT area, (not the hierarchy), then press CTRL+J to join the meshes into the Body. Notice how the bones are black because we are in Object mode. If they are grey, you are in pose mode and won't be able to merge!
Tip
Repeat this process for the Armor section, until you’re left with only Body and Armor. Do not merge Body and Armor together.
Warning
To be clear, Only the currently visible objects need to be merged. Ignore the greyed out ones. Also, don't merge things between collections! (VirtualFace is part of Body, not Armor)
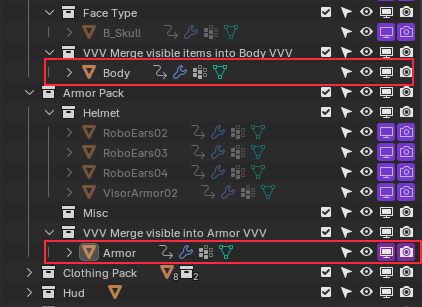
You should then have 2 objects: Body and Armor, or Body and CasualOutfit if using the Casual Outfit Pack.
| If Using Armor Pack | If Using Outfit Pack |
|---|---|
 |
 |
When merging, things might have appeared on the model. This is normal and should be ignored.
Warning
The HUD should not be merged with anything.
You are now ready to export the model! However, you need to export in a certain way in order for unity to interpret the model correctly and to ensure useless bones are not exported.
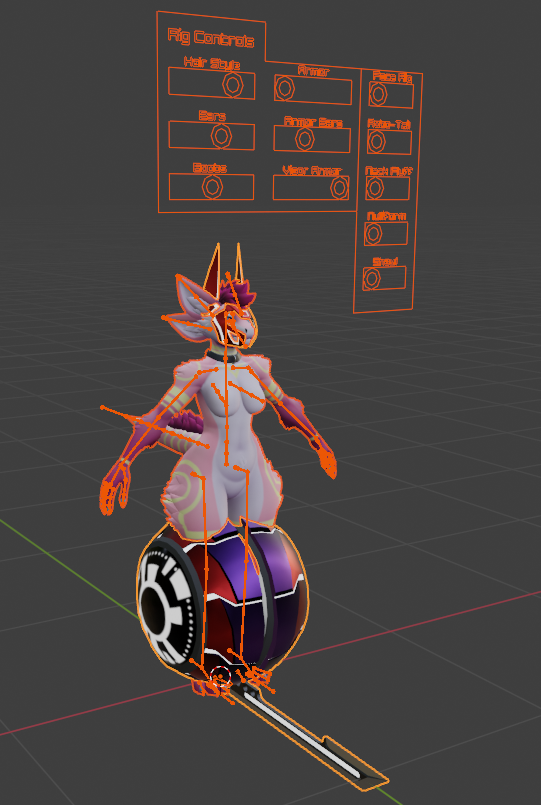
Select everything currently visible in the scene. Put your mouse in the viewport and press “A” on your keyboard until everything visible has an orange outline.
Danger
it is mandatory for the ARMATURE to be selected in this step!
Export Settings
With everything visible selected, go to the top left and click File > Export > FBX.
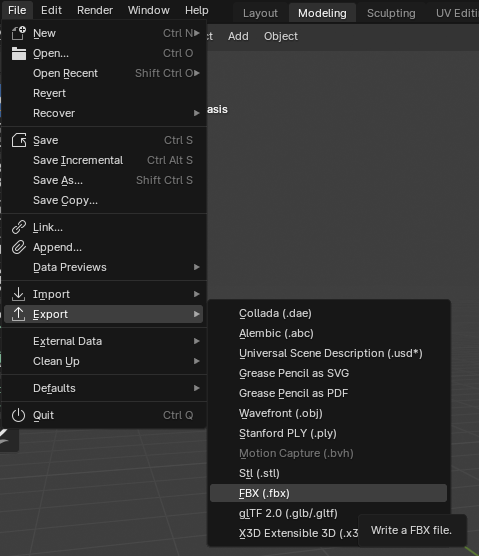
You need to save the FBX somewhere outside of your Unity project for the moment. Name it “Protonoid”. If you want to export it directly into the Unity project, make sure to replace the matching FBX file in Assets > TDR_Protonoid > FBX
Warning
you don’t need to remove the menu to export to any other platform! THE MENU AND ALL USELESS BONES ARE ALREADY DELETED ON EXPORT! Deleting the menu only makes it harder and more time consuming to work on the model!
Note
After exporting, you can go back to Blender to undo the previous merge actions. I would suggest not keeping it merged in case you want to add or remove things in the future.
Export settings Explained (Optional)
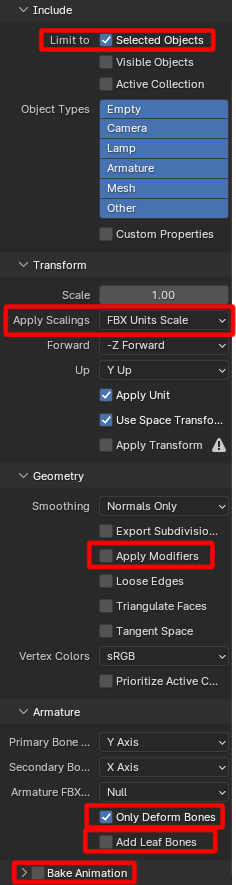
We need to make sure that only Selected Objects (or what’s visible) are exported, otherwise the entire project, including the substance setup, will be exported. We don’t want that to happen. Make sure it is CHECKED
We want the “Apply Scalings” option to be FBX Units scale, because otherwise, Unity will interpret scaling wrong, and you will end up with a grotesque stick figure.
We want “Apply modifiers” UNCHECKED, because I used mask modifiers in the project to make certain vertices invisible using the customize menu, which allows things to be hidden without toggling their viewport visibility, and exporting with apply modifiers on will delete those vertices, which aren’t supposed to be deleted.
We want to export with only Deform Bones CHECKED, because some options like hair and ears have unique sets of bones that are useless depending on what you chose and will only make your avatar unoptimized. I have used drivers to automatically set the deform value to “off” on bones that are not needed for your chosen options. they will be discarded on export thanks to this option.
Leaf bones add extra bones at the end of each chain of bones. This is normally used to get the endpoint position of a bone, as Unity can only tell where a bone starts. This is not needed and would create unnecessary bones that will hinder performance. leave it UNCHECKED
I have created all visemes and poses for the bones using animations in blender, in case I needed to access them later. Having “Bake Animation” on would export these animations. These are not needed as the required animations are already in Unity. Exporting with this option active might pose your avatar in an undesired way on export, and will take significantly longer to export. Leave it UNCHECKED.
Importing your custom Protonoid to Unity
Once you've exported from blender, you can continue to 📗 Substance Painter Projects If you want to retexture the Protonoid, go to 📗 Substance Painter Projects