Assuming you've installed the required packages, you're now ready to import the avatar package into your Unity project. Head to "Assets>Import Package>Custom Package" and browse to your downloads folder, or wherever you may have downloaded the avatar package.
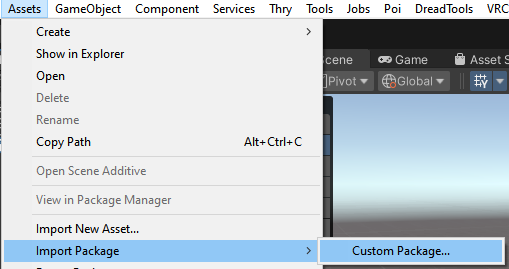
Once the package is imported, you might notice that nothing’s there. This is normal, as we need to open the Scene first.
Depending on the project, it may be in the Assets>Scene folder, or the TDR_(avatar name)>Scene folder. This is to prevent clutter when working with many different avatars.
DON'T DO THIS
DO NOT JUST DRAG IN THE FBX FILE, AS ALL FEATURES OF THE AVATAR WILL BE MISSING!
ALWAYS LOOK FOR A SCENE FILE! It's very unlikely that an avatar wouldn't come with one!
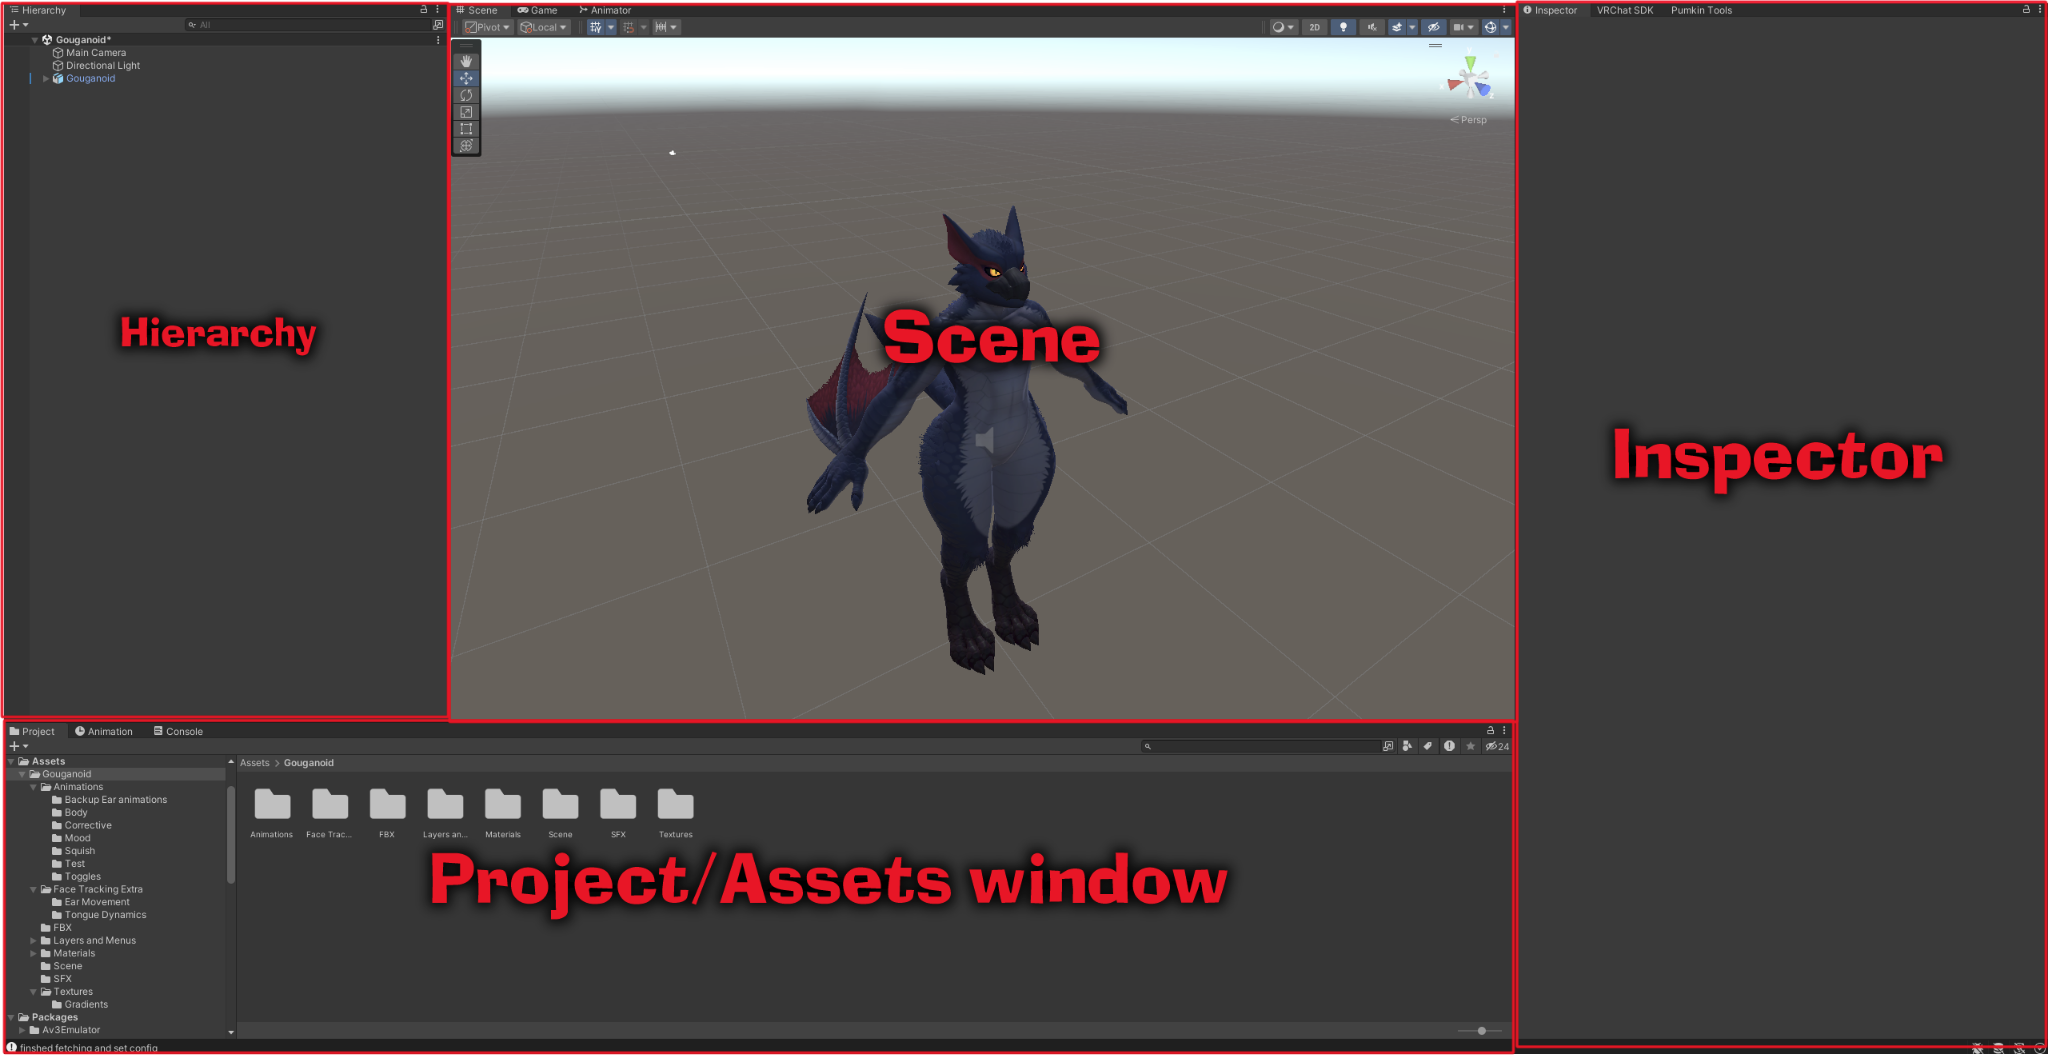
Keep the names of each window in mind, as they are important to navigating Unity.
Face Tracking
As previously mentioned in 🟥 Unity And VCC Setup, some of my avatars have face tracking functionality and require Jerry's Face Tracking Template and VRCFury.
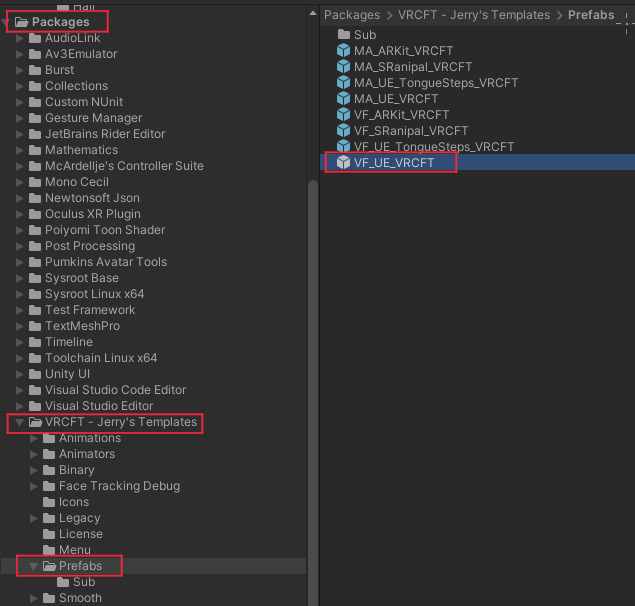
If you don't already see Jerry's Template on the avatar, drag and drop “VF_UE_VRCFT” Which is located in “Packages>VRCFT>Jerry’s Templates>Prefabs” onto your avatar's prefab.
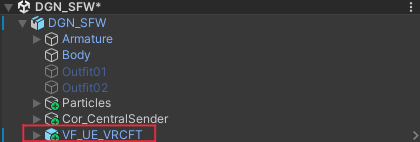
 When dragged onto the avatar's prefab:
Face Tracking Extra
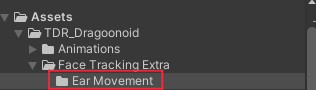
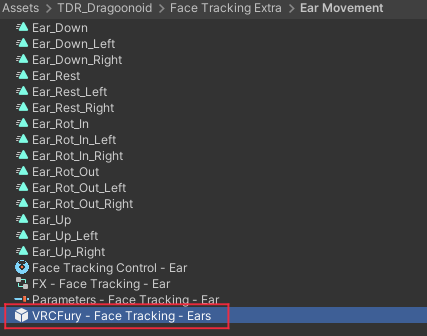
A lot of avatars that have face tracking also include an additional prefab to make your ears move with expressions and eye movement. It is located inside this folder in my avatars:
 |
 |
|---|---|
| Simply drag and drop this one onto the avatar's prefab just like we did for Jerry's template. |
Danger
The face tracking extras template is provided with empty animation files and all keys are added by avatar creators for their specific avatar. Because of this, if another avatar in your Unity project uses face tracking extras for ears, the animations might conflict with each other because they have matching file IDs.
Project Setup for Quest avatars
After creating a new avatar project, head to File>Build Settings and make sure the Android build is installed.
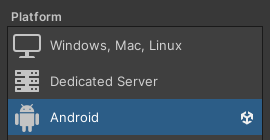
Then, you should see a "Platform" drop down menu in VRCSDK's "Build" section. Change it from "Windows" to "Android" to be able to upload to Quest.
WARNING
This assumes the avatar you're uploading is Quest compatible! Not all avatars are Quest compatible!
Info
If you want to customize the model, head to the 📀 Blender Customization section
Success
If you want to upload, head to the 🟩 Uploading the avatar section