Note
Please refer to 📚 Understanding Poiyomi for basics on how to use the shader.
Danger
If using the latest version of Poiyomi, certain features may be broken until the material itself is updated to the latest version of Poiyomi.
Decals
📚 Understanding Poiyomi#Decals
This is where the main texture for the Nulliform is located, and on the Infinity mirror, is where you would replace the logo in the center of the screen. You can keep it from rotating by changing the “rotation speed” to 0.
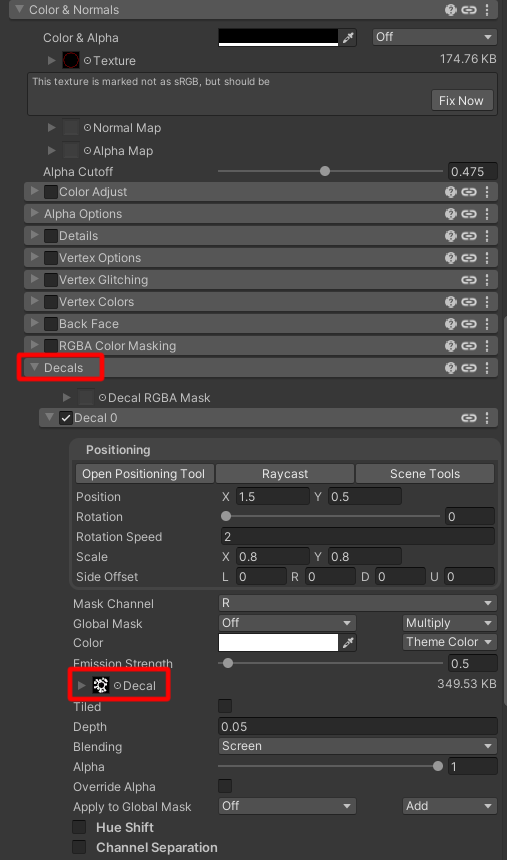
If you want to change the dots around the logo to something else, you should do so in the Internal Parallax section in special FX.
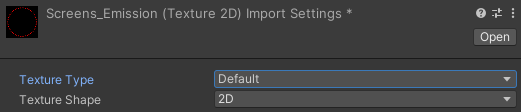
Notice how the texture is red. This is because the texture is set to only use one channel, in this case, red. This allows the texture to be significantly lighter, since the compression algorithm can focus on making red look better, while the other colors are compressed further or ignored. (at least that’s how I think it works)
Emissions
The emission mask slot is completely black as a failsafe. Some of these use Global Masks instead of the mask slot. This allows them to change when the Nulliform is active, so that markings are hidden underneath the suit.
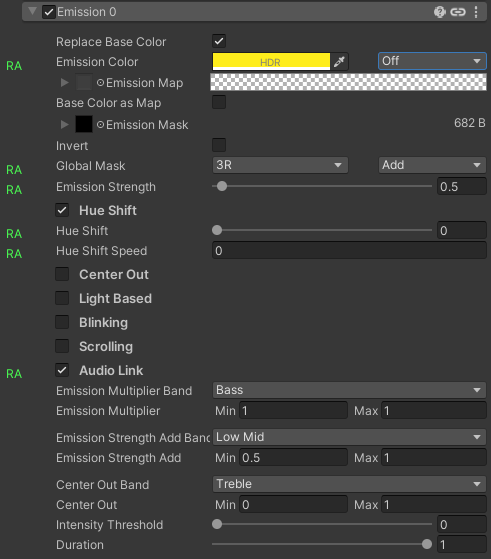
If you need to change the color for any of the emission slots, here’s a bit of a guide to what each one is.
Armor
- Emission 0= Armor highlights
Body
- Emission 0= Markings
- Emission 1= Nulliform glow
- Emission 2= Claws
Face
- Emission 0= Markings
- Emission 1= Proto Face
CoreFX:
- Emission 0: Gyroform’s “core” color.
Trail:
- Emission 0: Trail Color
If you want custom colors for the markings, make sure you change the emission color both on the FACE and BODY so that they match. Again, Make sure the material is LOCKED before testing.
Internal Parallax
📚 Understanding Poiyomi#Internal Parallax
This effect simulates the depth for the infinite mirror on the rim of the screens and on the Transparent material for when the visor opens and closes.
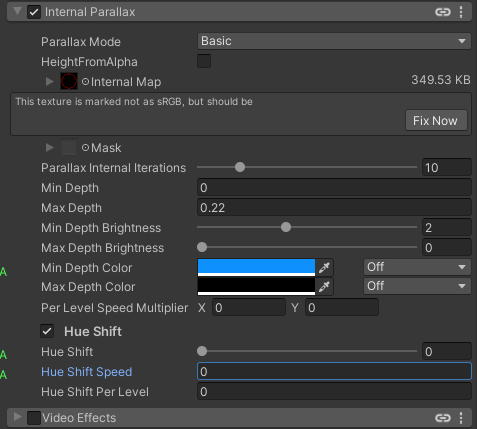
Disregard the warning about the texture not being sRGB. It’s this way in order to save space.
If you want the color to change depending on depth, you can play around with “hue shift per level” or “Max depth color”. You can also change the depth and amount of times the texture repeats with max depth and Parallax Internal Iterations.
AudioLink
📚 Understanding Poiyomi#AudioLink
This avatar comes with AudioLink options. Next to all color pickers, there’s a dropdown menu. When the AudioLink option is enabled on the avatar, this dropdown box is changed from “Off” to one of the “ColorChord” or “Audiolink Theme” options.
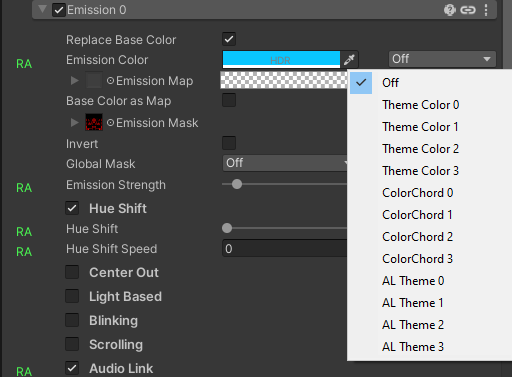
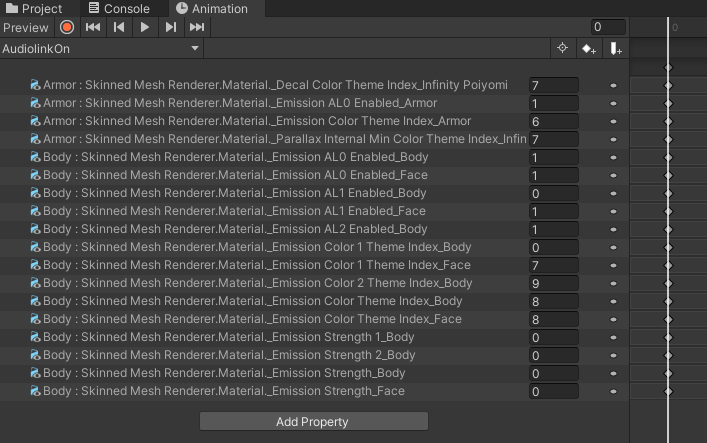
If you want to change any of these, you will need to change the dropdown menu’s value for the corresponding emission slot in the animation itself.
Those options are shown as numbers in the animation;
- 0 for Off
- 1 for Theme Color 0
- 2 for Theme Color 1, and so on
Do note that 3 separate animations exist for AudioLink, one with the Nulliform on, one for when the Nulliform is Off, and one for all of it being off.
Make sure not to accidentally make the Nulliform’s AudioLink turn on in the one where it’s meant to be off!
The screens’ Audiolink option is slightly different in that it uses a radial style visualizer. If you want to edit this, it should be at the bottom of the list, under “AudioLink”.
RGBA Mask (HSV & SEMI-HSV only)
RGBA masks can be used to separate sections of the texture into “zones” that can be modified by Poiyomi. You might have noticed the avatar being gray when turning on custom colors. This is because the texture color needs to be gray in order to prevent colors from contaminating the default values. As such, a black and white texture is slotted into each slot of the colors section. Thankfully, they all count as the same one in terms of memory space. Still, if you’re using a custom texture from substance and don’t need this option, consider using the non-HSV versions.
Also note that the V1 Face Tracking version of the avatar does not have HSV sliders in menus due to limitations in parameter space.
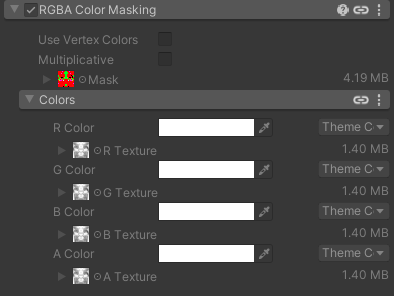
The colors in this section are being controlled by the Global Themes section.
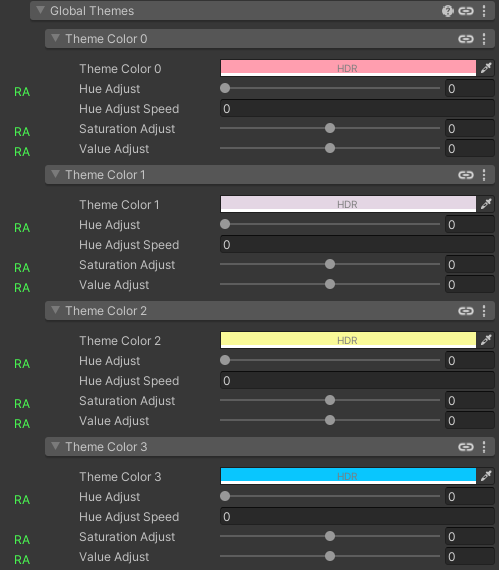
Global Themes
📚 Understanding Poiyomi#Global Themes
Opening this option shows you multiple theme colors. I’ve set these up to control some of the hue sliders for the body and armor. These can all be controlled in-game.
If these do not seem to make a difference at the moment, it’s because the alpha slider inside the drop down arrow for each of the channels in the colors section is set to -1. Setting it to 0 turns it on, NOT 1.
On V2, these are different materials, which means they are set to 0 by default.
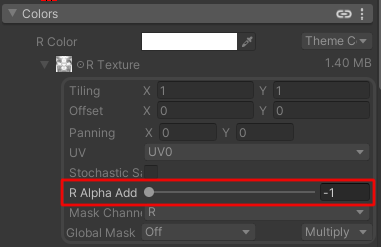
I set it to -1 by default to prevent people from having their custom textures’ colors overwritten by RGBA color masking. Do note that once turned on, it will overwrite your custom textures.
Reflections and Specular
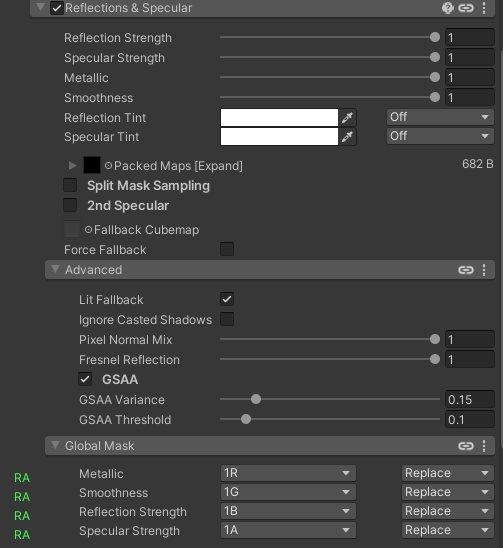
You might notice how the “packed maps” texture is black. This is a failsafe in case the global mask system screws up. You shouldn’t put your custom metallics map in here for this avatar!
Once again, Global Masks are used on this avatar to switch between different textures. In this case, when the Nulliform is turned on, the body and face switch from the first global mask to the second one in order for the outfit to look metallic and shiny.
Global masks
📚 Understanding Poiyomi#Global masks
If you wanted to manually change the emission map or the metallic map, the textures are stored here for the body and head.
- Slot 1: “Naked” Reflections and Specular
- Slot 2: Nulliform Reflections and Specular
- Slot 3: “Naked” Emissions
- Slot 4: Nulliform Emissions (includes Body Emissions)
Matcap
📚 Understanding Poiyomi#Matcap
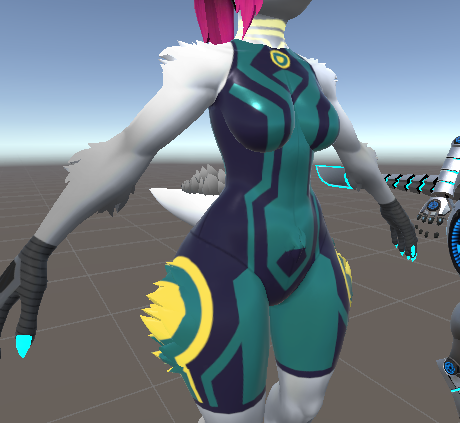
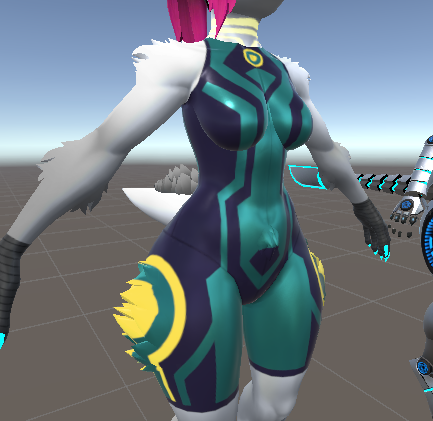
For this specific avatar, I use a matcap for the Transparent material, the Nulliform, the Hair and the Armor.
| Matcap Off | Matcap On |
|---|---|
 |
 |
Details
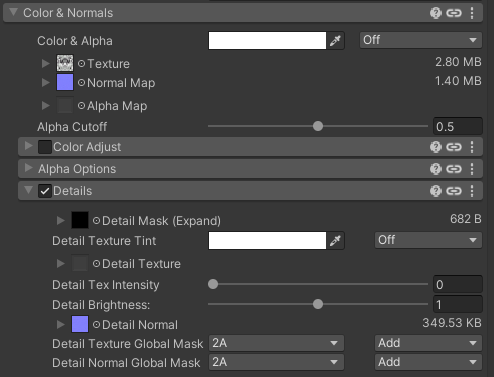
📚 Understanding Poiyomi#Detail Map
Used in the armor material for the Shawl.
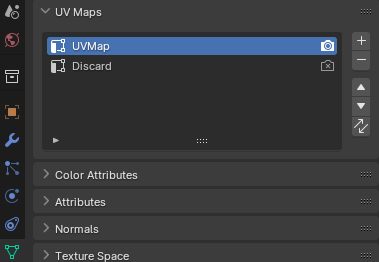
UV map slots
📚 Understanding Poiyomi#UV map slots
The first UV map in this avatar is used for textures. The second is for the UV tile discard function. This way, we don’t have to mess up the original UV map to make use of the UV discard function.
UV Tile Discard/Dissolve
📚 Understanding Poiyomi#UV Tile Discard/Dissolve (Advanced)
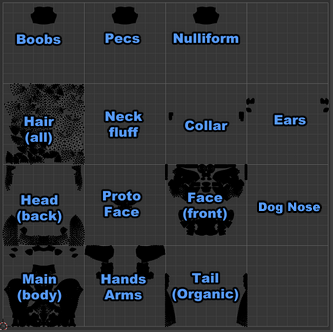
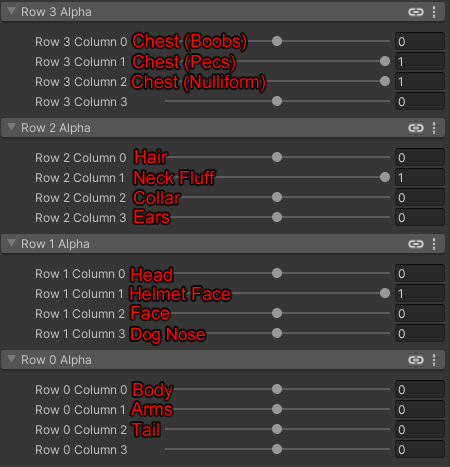
Here's a guide for what each tile contains.
| Body | Armor |
|---|---|
 |
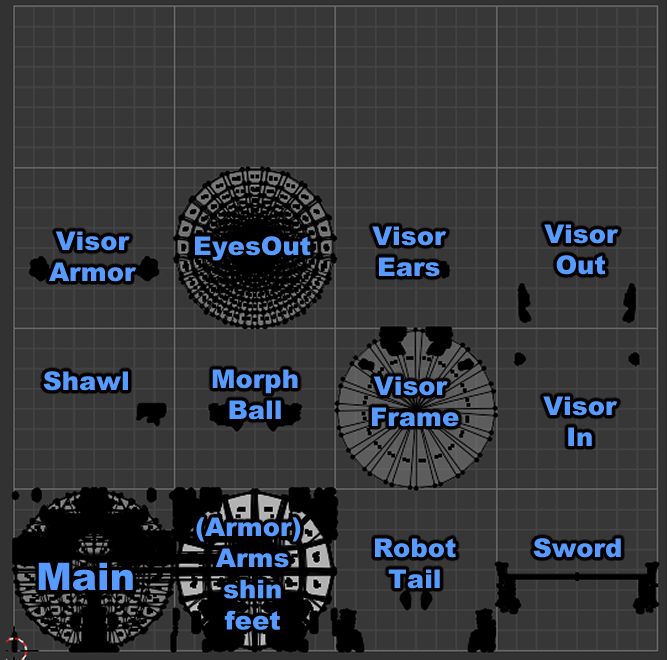 |
Here’s a bit of a visual guide for each slider. Normally, you shouldn’t mess with any of these, since they are used to hide or show certain things while the armor is on.
These sliders are located in Special FX>Dissolve>UV Tile Dissolve
Body
| Body (Linked: face & hair) | Armor (linked: infinity mirror & transparent) |
|---|---|
 |
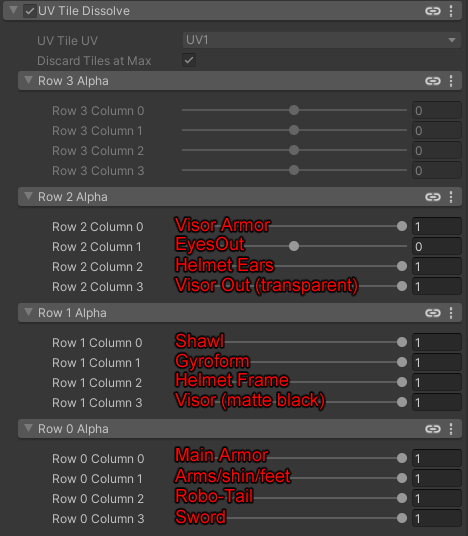 |
The Armor mesh is hidden by default. This is because if someone doesn’t have your shaders or animations turned on, then they would see everything turned on regardless of the UV tile discard/dissolve stuff, and we don’t want that. With the armor hidden, they won’t see everything clipping through you when your shaders or animations are off.
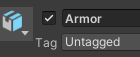
If you want to see how all parts of your armor looks, click the checkbox shown above and set all the material’s dissolve sliders to 0.
Remember to turn those back to 1 and to hide the armor once you’re done!
Material Linking
📚 Understanding Poiyomi#Material Linking
Some sections are often linked together for consistency between materials.
Renamed Animated
📚 Understanding Poiyomi#Renamed Animated (Advanced)
Always keep this in mind when messing with materials!
Vertex Colors (Advanced)
📚 Understanding Poiyomi#Vertex Colors (Advanced)
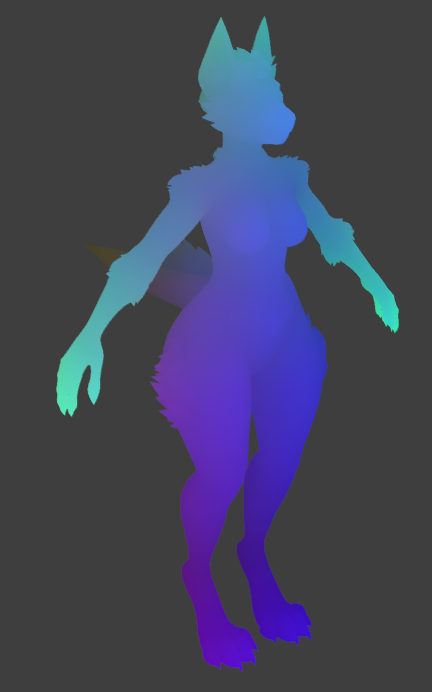
Since Poiyomi’s baker was not working properly at the time, I managed to create a geometry node preset that recreates the intended function of the baker in Blender. It should be included in the Blend file. Do note that Vertex Colors need to be added to the attributes section, and that it needs to be manually slotted into the Output Attribute section of the Geometry Nodes modifier.
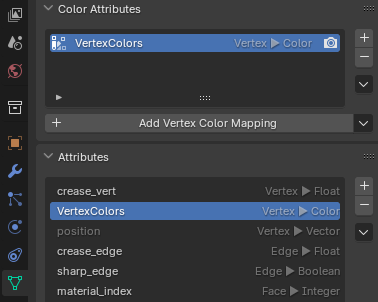
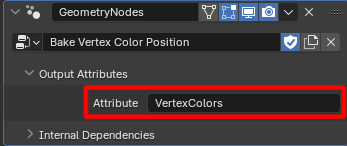
Blender might prevent you from applying this modifier if your mesh has Blendshapes. To counter this, you can duplicate your mesh, delete all Blendshapes on the copy, apply the modifier and use a data transfer modifier on the original to transfer them to the one with Blendshapes.
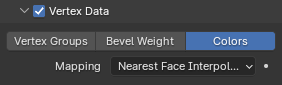
Do note that a “baking cage” might be required in order to match the same colors as the original if the asset is part of the body. Simply encapsulate the whole avatar within a cube that is merged with the object you’re trying to add vertex colors to in order to achieve a similar baking as the one I’ve made.
This is only if you plan to make your own transition animations with clothing or other props. This is not required for UV tile dissolve if there isn’t a transition animation.