Info
This section talks about the various systems or interactions that are part of the avatar, and includes information about how they function.
Face Tracking
Each prefab comes with the option for face tracking, but some setup might be required. Jerry’s Templates can be downloaded here. They also include a tutorial for setting everything up here.
The setup should be easy enough add VRCFury to your project, add Jerry’s templates to your project, drag and drop “VF_EU_VRCFT” onto your avatar. Which is located in “Packages>VRCFT>Jerry’s Templates>Prefabs”

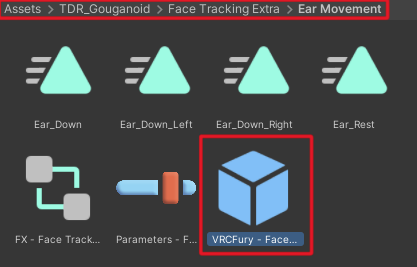
For this model, I’ve included ear rotations as part of face tracking. All that’s needed for it to work is to drag and drop “VRCFury - Face Tracking - Ears” onto the avatar, located in Assets>TDR_Gouganoid>Face Tracking Extra>Ear Movement.
Corrective bones
This avatar features multiple corrective bones that automatically help with the deformation of the mesh. Here’s a list of the ones used for this avatar, they should all be marked with an “MCH_” prefix, for “Mechanism”.
- Upper Arm Twist - Prevents Shoulder from collapsing in more extreme rotations
- Lower Arm Twist - Prevents the forearm from only rotating at the elbow.
- Thigh Twist - Helps with leg rotation and alleviates weight painting issues near crotch.
- Knees - Helps keep the knee from shrinking when bending
- Elbows - Helps keep the elbow from shrinking when bending.
- Butt - Helps to give a better shape when lifting the leg.
- Hip Lift - lifts the hips to allow a better silhouette when lifting the leg sideways
- Spine - used to rotate the belly physbone up and down with the spine
Constraints are also used to change the Boob Jiggle amount
Corrective blendshapes
In addition to corrective bones, a few corrective blendshapes are used to make things look better under certain conditions.
- Shoulder corrective blendshapes activate for the body when one arm is lifted above the head.
- Knee corrective blendshapes activate when your leg is bent to simulate your calves and thighs squishing.
- When boob bones are scaled up or down, a blendshape is activated to improve the look of the mesh.
- Physbones moving towards the center of the chest will activate multiple blendshapes to simulate a boob squish. Another set of blendshapes will also correct the shape as boobs reach a certain size.
Avatar specifics (for modifications to the model)
In this section, I’ll go into more depth here over things like the FX layer, corrective blendshapes. And other specific things related to my workflow that might make it harder to add things to the model if you’re not used to it.
Chest mesh swap
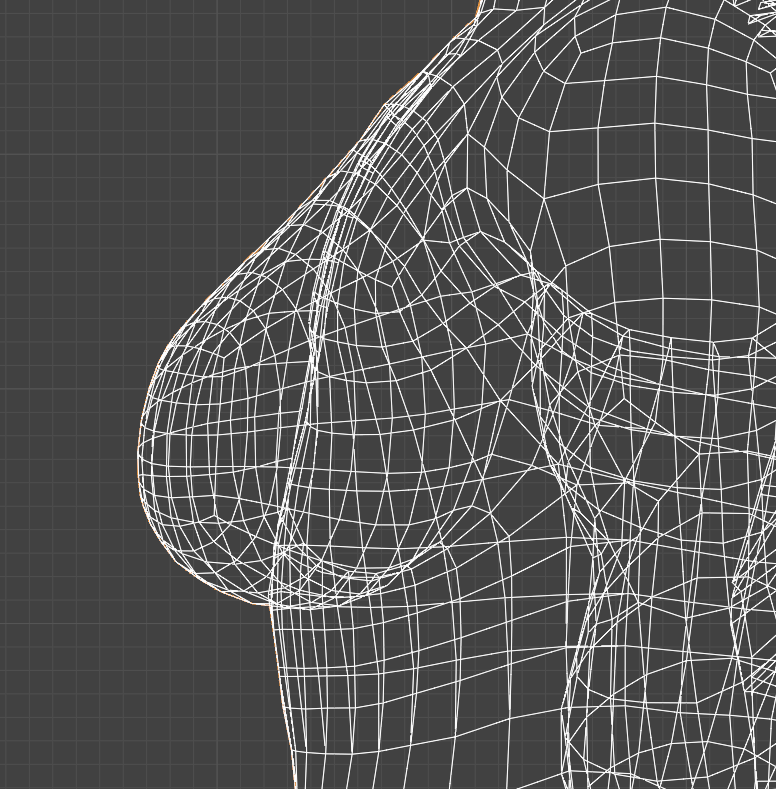
You might notice that both the breasts and pecs are overlaid on top of each other. There is a very specific reason for this that I’ll try to briefly explain.
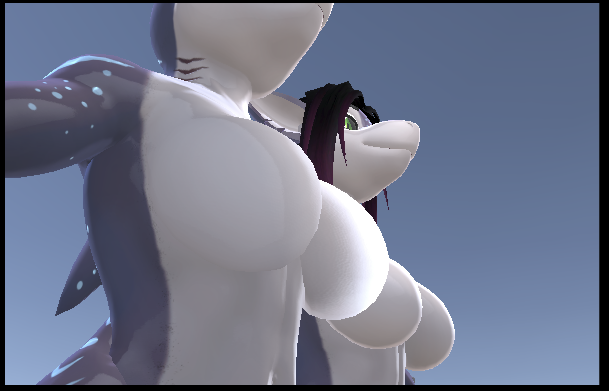
(Part of this section removed to due being out of date) Blendshape normals can now be exported from Blender, but this model was made during a time when it wasn't able to. The issue was that without blendshape normals, blendshapes like ones used on breasts would not update normals, as because of this, the normals look incorrect, as you can see on the above image on the left. The expected result is on the right for comparison.
In order to keep custom normals and mitigate the issue with normals on breasts, I came up with this system where the chest can switch between both pecs and breasts meshes. I personally think this is much better than having to work on 2 separate models entirely like I did for the Drakonoid, and better than ignoring custom normals like on my other previous models.
If you need to work on an asset for the model, just use the boob slider and be mindful of which mesh you’re working with. Note that in the Blend file, the Boob slider turns into neutral boob at exactly 0.15, so you can reset the slider’s position and then type “G 0.15” to set the slider at neutral boob size.
Working with the fur
If you want to modify the fur in any way, there’s a vertex group called “AllFur” which you can use in edit mode to select all the fur.
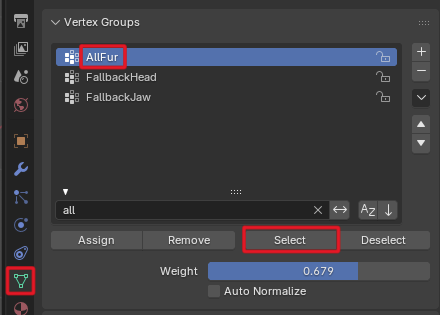
There’s also one called “Spline Factor” which is a weight paint gradient of 1 at the tip of each strand and 0 at the base.
FX Layer
Breasts Layer

When Body/Boobsize is at 0, it is the default size for pectorals (B_Pecs_Neutral). Once it reaches 0.15, it maxes out the pectorals size (B_Pecs_Big). In order to make it easier to select without going over, it stays that size until 0.2, at which point it switches to the Boob Slider blendtree (to avoid any issues with UV discard or physbones toggling) and reaches B_Boob_Small. After 0.5, it reaches B_Boob_Neutral, and B_Boob_Big at 1.
To recap:
- 0.00: B_Pecs_Neutral
- 0.150: B_Pecs_Big
- <0.20: B_Pecs_Big
- >0.20: B_Boob_Small
- 0.50: B_Boob_Neutral
- 1.00: B_Boob_Big
Body Layer
I realize some of you might be confused or intimidated by this, so let me explain.
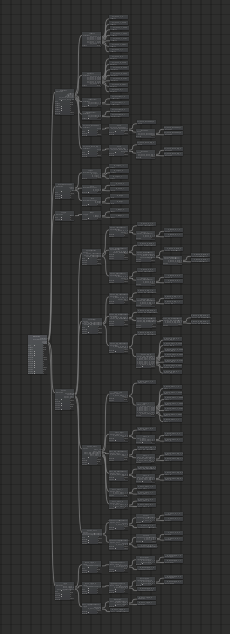
It was found that too many layers in an animator can hinder performance. Before this, I had on average 50 layers in my animator for my avatars. Multiply that by the number of people in the instance, and you can imagine how this might start to get performance intensive, especially when so many of these layers were simple toggles.
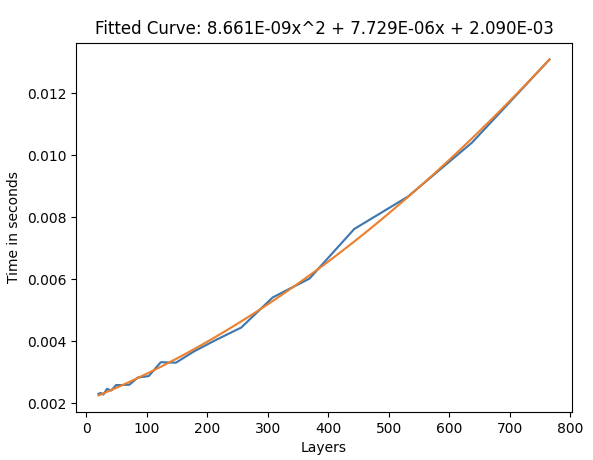
But these don’t need to be individual layers for each toggle. Everything can just be part of a big direct blend tree, which is less performance intensive! The only requirement is for the parameter to be a float. Normally, this would take up a lot of parameter space, but if you set a parameter as a boolean in VRC’s parameter list when it’s meant to be a float, it still works! VRC “Converts” the values, and so you can control the float with a bool. I suggest looking into Direct Blend Tree Combining to learn more.
Categories for this avatar’s Direct Blend Tree
- Correctives
- Body Blendshapes
- Toggles
- Squish
- Jiggle
Correctives:
This is where Corrective Blendshapes are set up.
Knees: When the knee bends, a sender and receiver control the blend tree to improve the shape of the leg.
Shoulders: when an arm is lifted above the head, a sender and receiver control a blend tree to improve the shape of the shoulder
and pectoral area.
Cor_Chub_BoobSmall: This improves the shape of B_Boob_Small when the B_Chub is active.
Cor_Chub_Boob_Big: This improves the shape of B_Boob_Big when B_Chub is active.
Body Blendshapes:
Thighs: Changes the size of the thighs and hips
Chub: Changes the body to appear more chubby. This also gradually adds jiggle to the belly.
Buff: Mainly adds muscle to the upper body.
Toggle:
Wings: Shrinks and discards the wings
Squish: This might require a bit of explanation, as it is a somewhat complicated setup.
This category is for any Blendshape that affects squishing the breasts or pectorals. There are 2 types of squishing in this category: “Press” and “In”.
“Press” refers to the chest being compressed. It is driven by a receiver for each side.
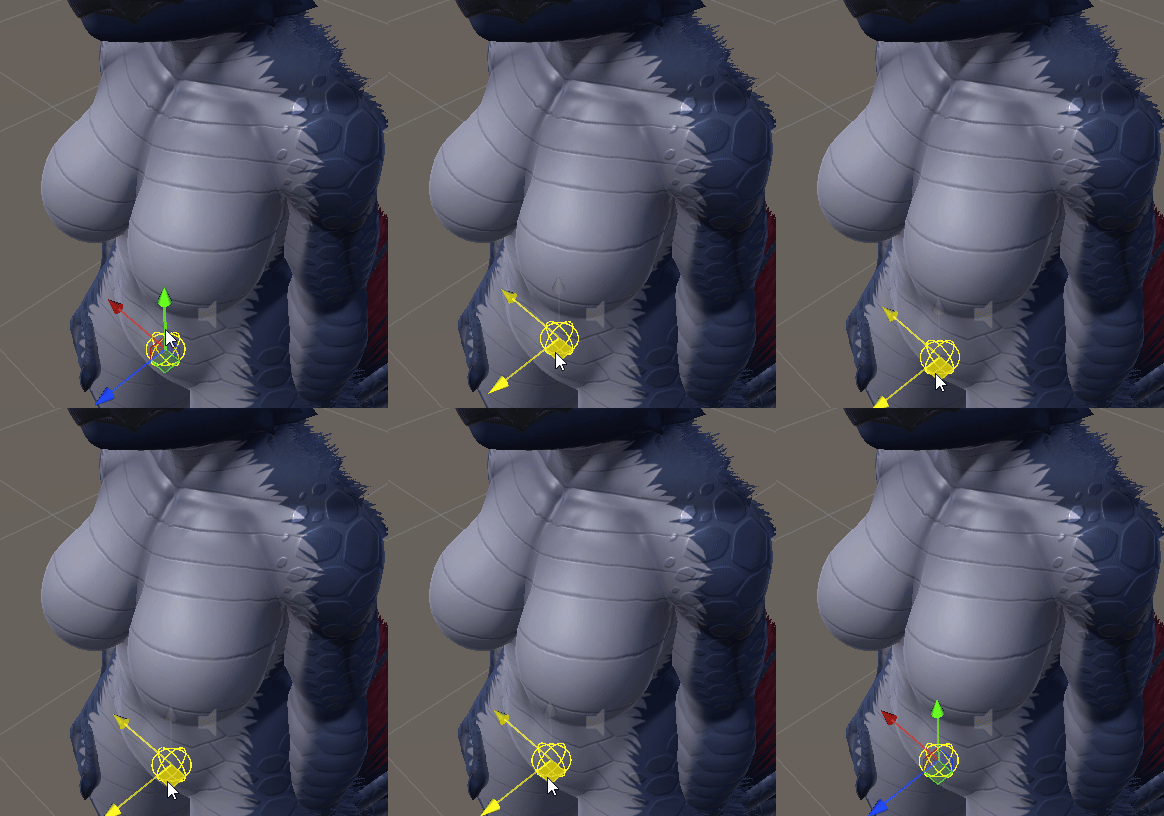
“In” refers to a physbone moving towards the center. This also requires a receiver for each side, and is driven by a sender on the breast bone.
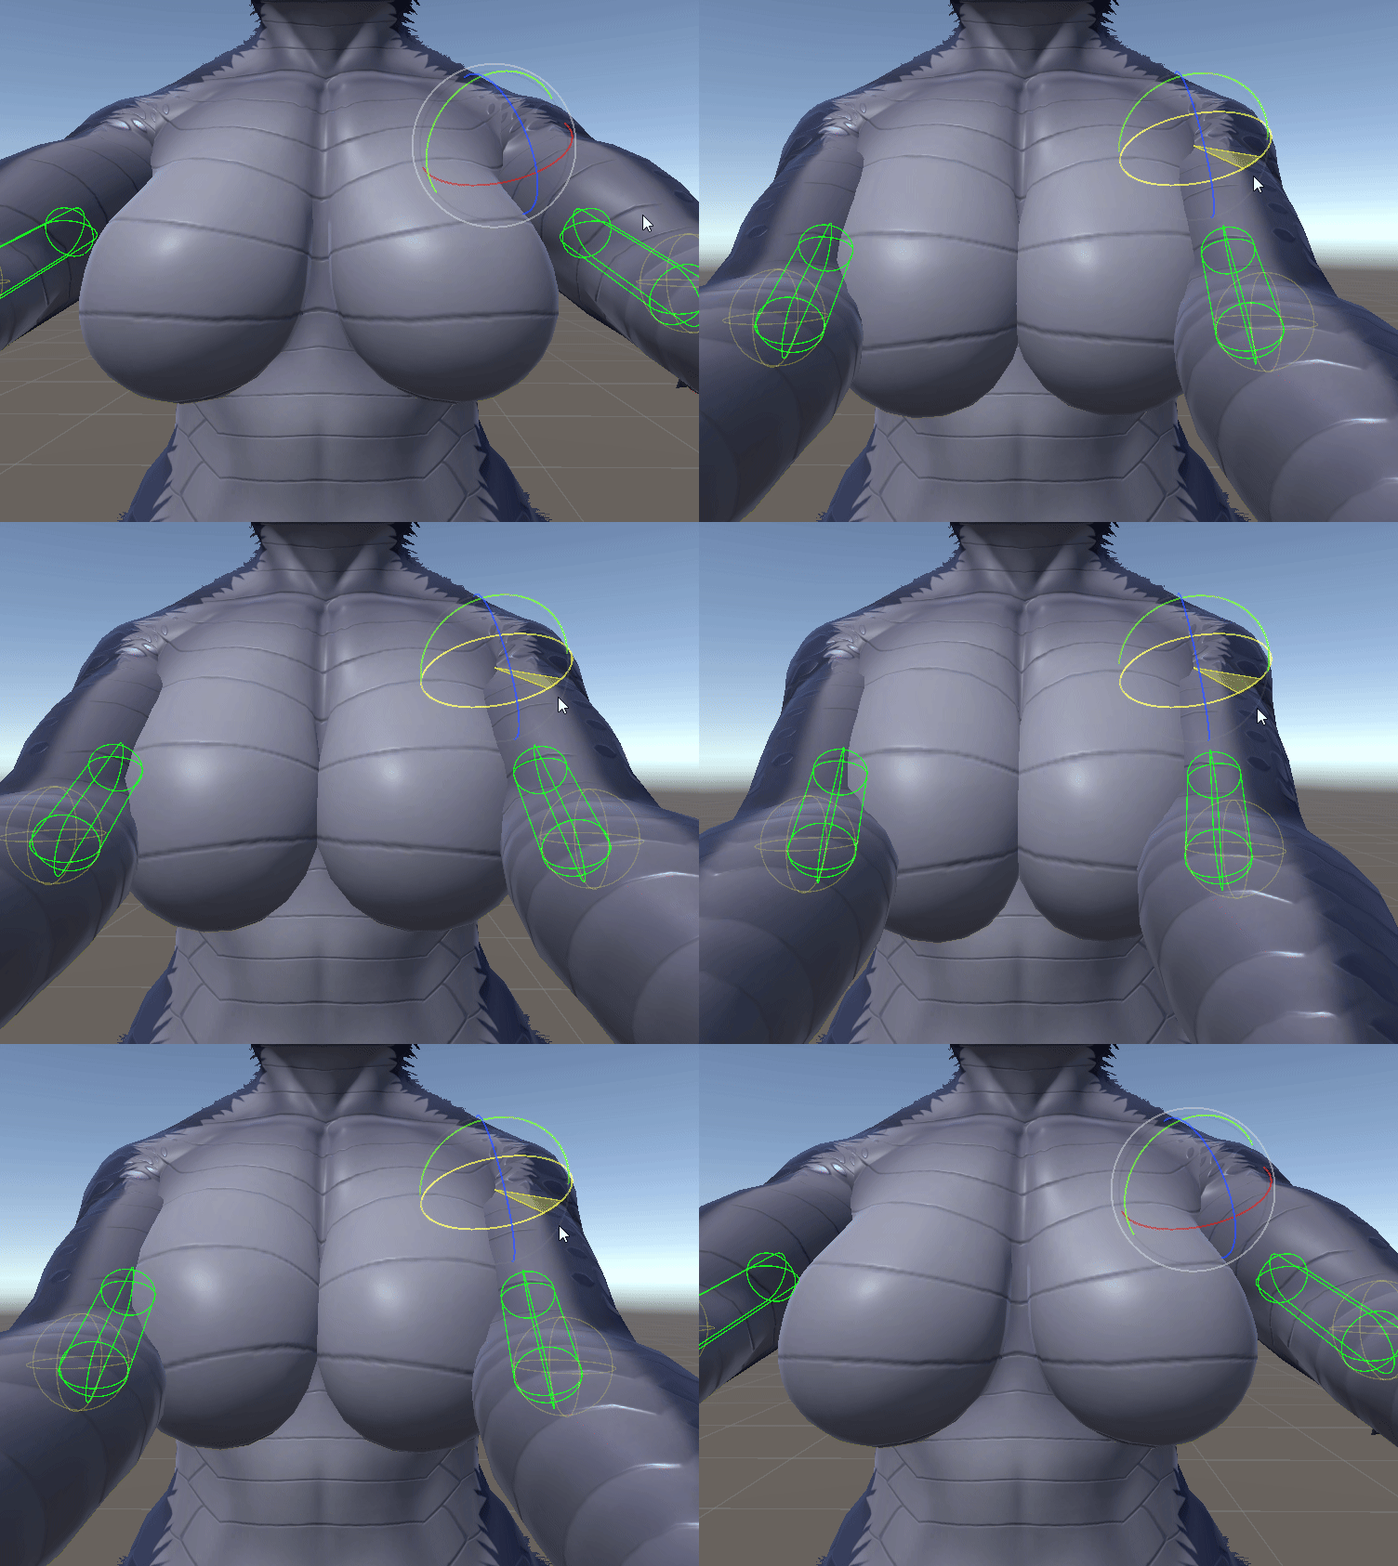
Press is mostly for fun. “In” is also fun, but extremely useful for tank tops/clothing and preventing them from clipping. Here’s how it works:
When the left boob reaches the center, the left “In” blendshape activates based on the proximity to the center. When the right boob reaches the center, the Right “In” blendshape activates based on the proximity to the center.
When both left and right activate, a third blendshape activates to correct any issues that occur from both being active at the same time. These are all part of the Squish (Neutral) section.
Due to the B_Boob_Big blendshape changing the shape of the boobs drastically, I made another section (Squish (Big)) that corrects the shape of the boobs when these previously mentioned squish blendshapes are active, but these only incrementally turn on when the boobsize goes above 0.5.
The same “Press” and “In” system is present for pectorals, although simplified since the blendshapes affecting size didn’t seem to require any correctives. Equality!
I realize this seems like an incredible amount of work just for a dumb gimmick, and might complicate things greatly for anyone trying to make assets for this model, but making these blendshapes only took me a few hours. It might take much more time for anyone not experienced, but I believe these blendshapes can be transferred to whatever clothing you’re making using “Rinvo’s Blendshape Transfer”, although keep in mind the mesh needs to be manifold for the addon to work. (having these fur cards, not to mention both the chest and boobs mesh merged to the model makes this model non-manifold, so uh…there might be a few issues that need fixing before this works.)
Jiggle:
Boob_Jiggle_L and R: This controls the weight of the rotation constraint on the left and right boob. It’s activated by either the Body/BoobJiggle parameter OR the Press Squish_Press value in order to prevent the boobs from moving around when press is active.
Pecs_Jiggle: Controls the rotation constraint weight value on the pecs using the Body/BoobJiggle parameter.
And that’s everything inside the giant direct Blendtree.
Tail and Random Layers
This layer controls the tail animations. Using the Random layer, a parameter randomly chooses to play the idle animation for the tail every once in a while. If Rage mode is active, it plays the Rage mode animation, then moves to the Rage rest, which is just the rest animation with the spikes out. There’s also a rage version of the idle animation, otherwise the spikes would retract when playing the idle animation.
Sound
Naturally, This layer controls the sound playing using VRC Animator Play Audio, and only has one sound: the rage mode. This sound can be toggled off in the menus.
Wing_L and Wing_R
These Layers control the wings opening or closing and are driven by gestures. They are in separate layers than the Hands layer because I do not like to use “fist” or “open” for animations within the same layer. Doing so makes it much harder for the gestures to return to an idle state when using index controllers, and makes it more likely for them to get “stuck” in a certain state.
Eye Trails
You might want to change the eye trail color. To do this, you can go to the “Trails” object and select both TrailL and TrailR. In the inspector, you’ll see the gradient color there. You can change it here, though you also might need to change the material itself, “EyeTrails”.