This section will walk you through how to use Substance Painter to customize your avatar.
Universal Substance Painter Projects
The first thing to know about Substance Painter is that you cannot open newer projects with an older version. Attempting to open a Substance Painter 2026 project with Substance Painter 2024 will not work.
Thankfully, someone made a plugin that allows one to save a project to a Universal Substance Painter Project file which can be opened with most versions of Substance Painter.
This plugin can be found here. The install instructions for this plugin can be found here
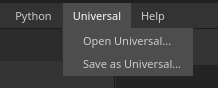
Once installed, you'll see a new drop down menu named "Universal" which allows you to open a Universal Substance Painter Project File even if your Substance Painter version is older than the project.
Warning
This plugin only works if the person who originally made the project includes a .USPP file.
Additionally, if your Substance Painter version is too low, certain features may not be able to be converted.
I've made most of my projects with a relatively old version of Substance, so this step may be unnecessary in a lot of cases.
Danger
Once a Universal Substance Painter Project is opened, I strongly advise you to immediately save the project as a regular Substance Painter file, or else your changes may not be saved in the event of a crash. Autosave may not function until you save the project normally.
Opening the file
When opening a Substance Painter file, you should see something similar to this:
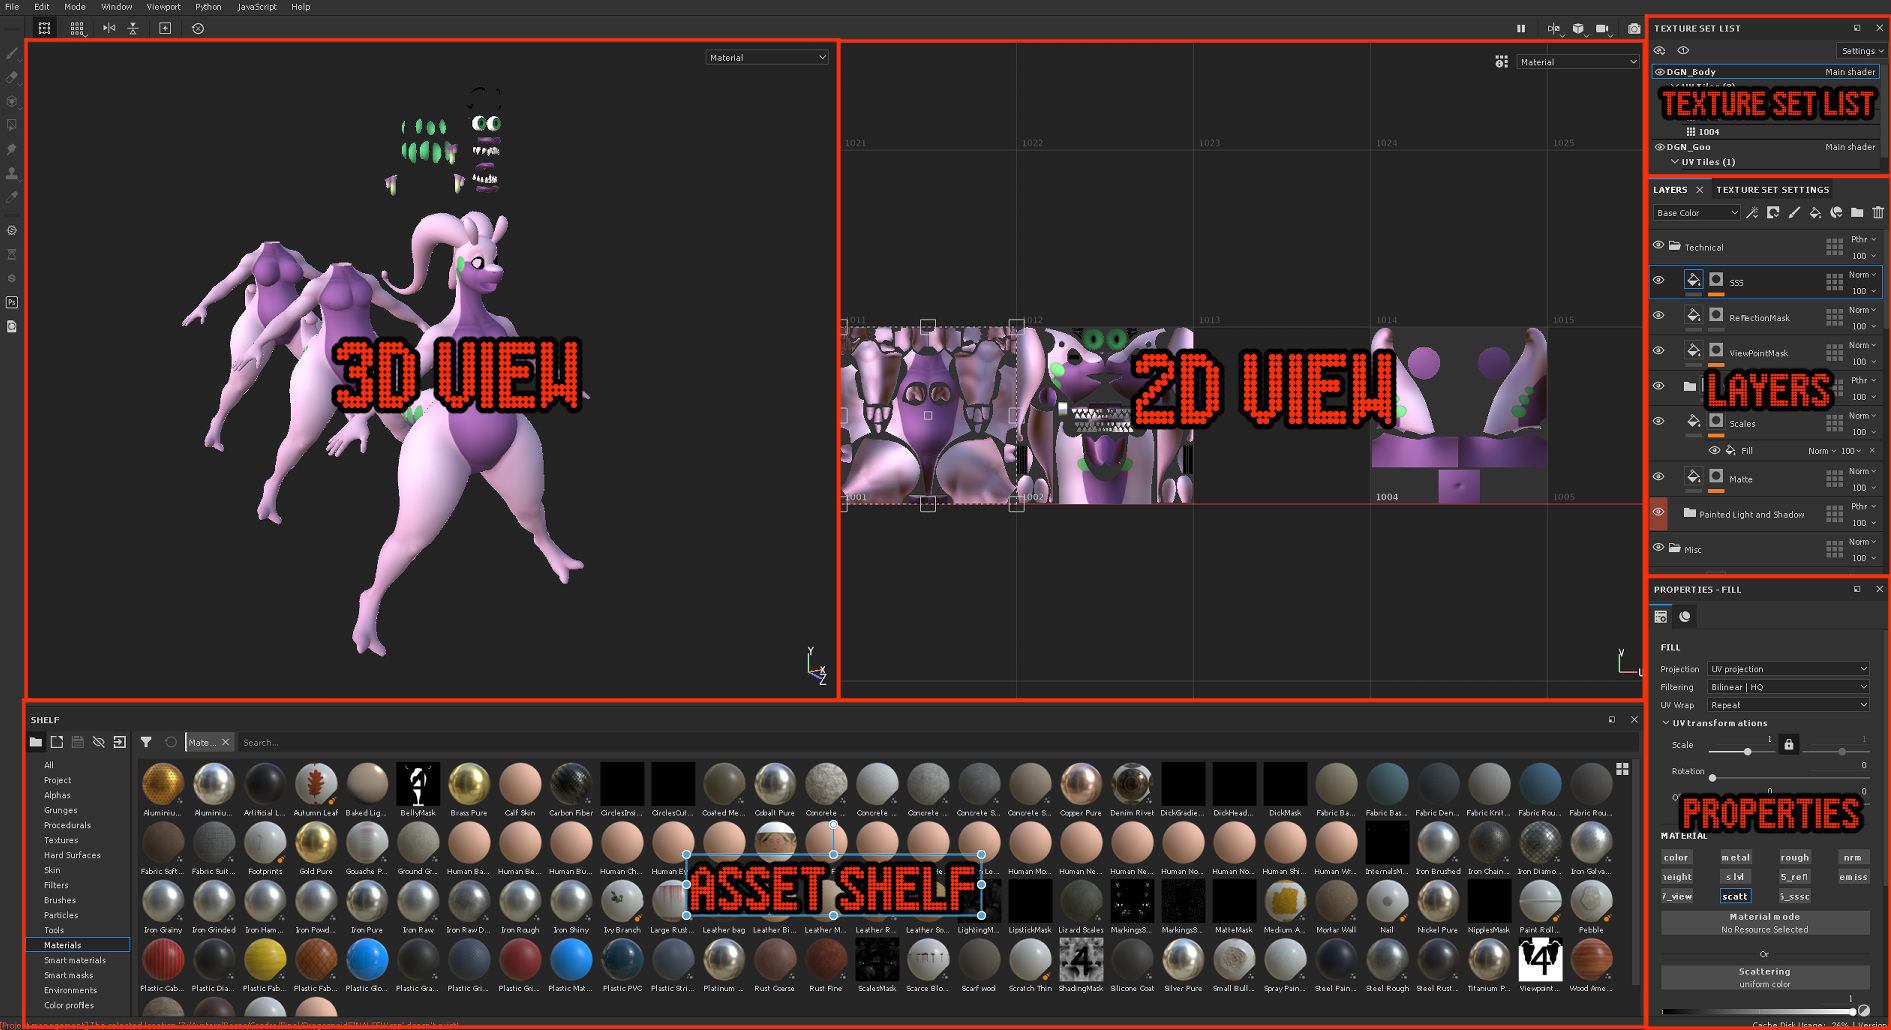
it might look a bit creepy, but things are “exploded” in order to more easily paint them.
Tip
You can navigate using alt and left click to rotate, Alt and middle click to pan or alt and right click to zoom. You can also zoom with the mouse wheel.
Texture set list
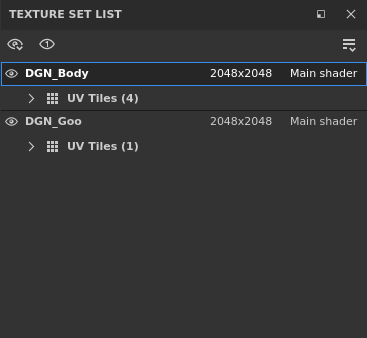
Using the Texture set list, you can navigate between materials by clicking their respective names. You can also hide any material you’re not working on by clicking the eye icon next to it.
Fill Layers
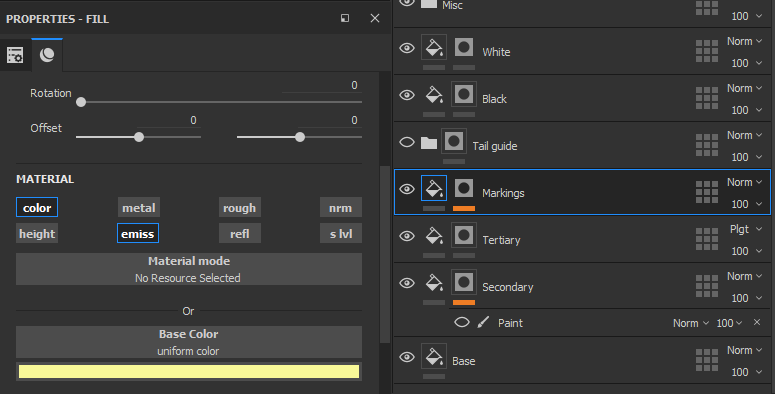
Working in Substance Painter usually involves fill layers (the bucket icon) and masks (the circle/square icon). That means one color per layer, and one mask per layer that determines where the color is shown.
We work this way because paint layers (as opposed to fill layers) are kind of destructive. That is to say, a paint layer saves each stroke with what setting it had at the time it was painted, and cannot be changed later. On the other hand, fill layers allow us to change the color and other settings at any time, but requires a mask in order to tell it where that color should be on the model.
By clicking a fill layer, you can change the properties of it, like the color.
Warning
You CANNOT paint on the model when the fill layer’s properties are selected. You have to have the mask selected in order to paint on the model.
Material Channels
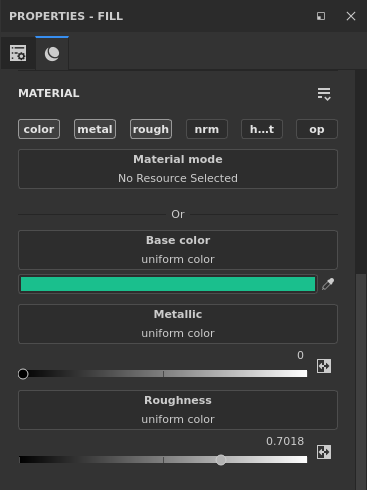
When Selecting a fill layer, you'll notice Multiple options in the properties, like COLOR, METAL, ROUGH, NRM, etc.
| Fill Layer Properties | Texture Set Settings |
|---|---|
 |
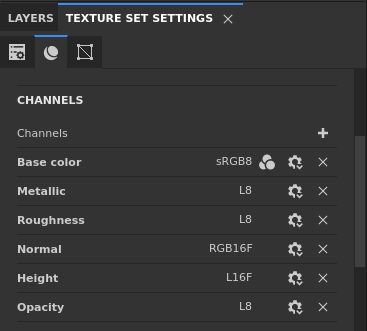 |
These are the available channels you can use. Channels contain certain properties, like the color, metallic or roughness values associated with that fill layer.
These channels are specific to each material, and can be added or removed from the material entirely in the Texture Set Settings page, but you shouldn't mess with them unless you know what you're doing.
Using Masks
Fill layers fill the entire texture with your chosen properties, but masks dictate where the fill layer's contents should show up on the model.
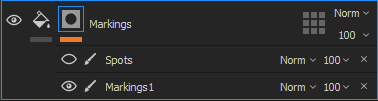
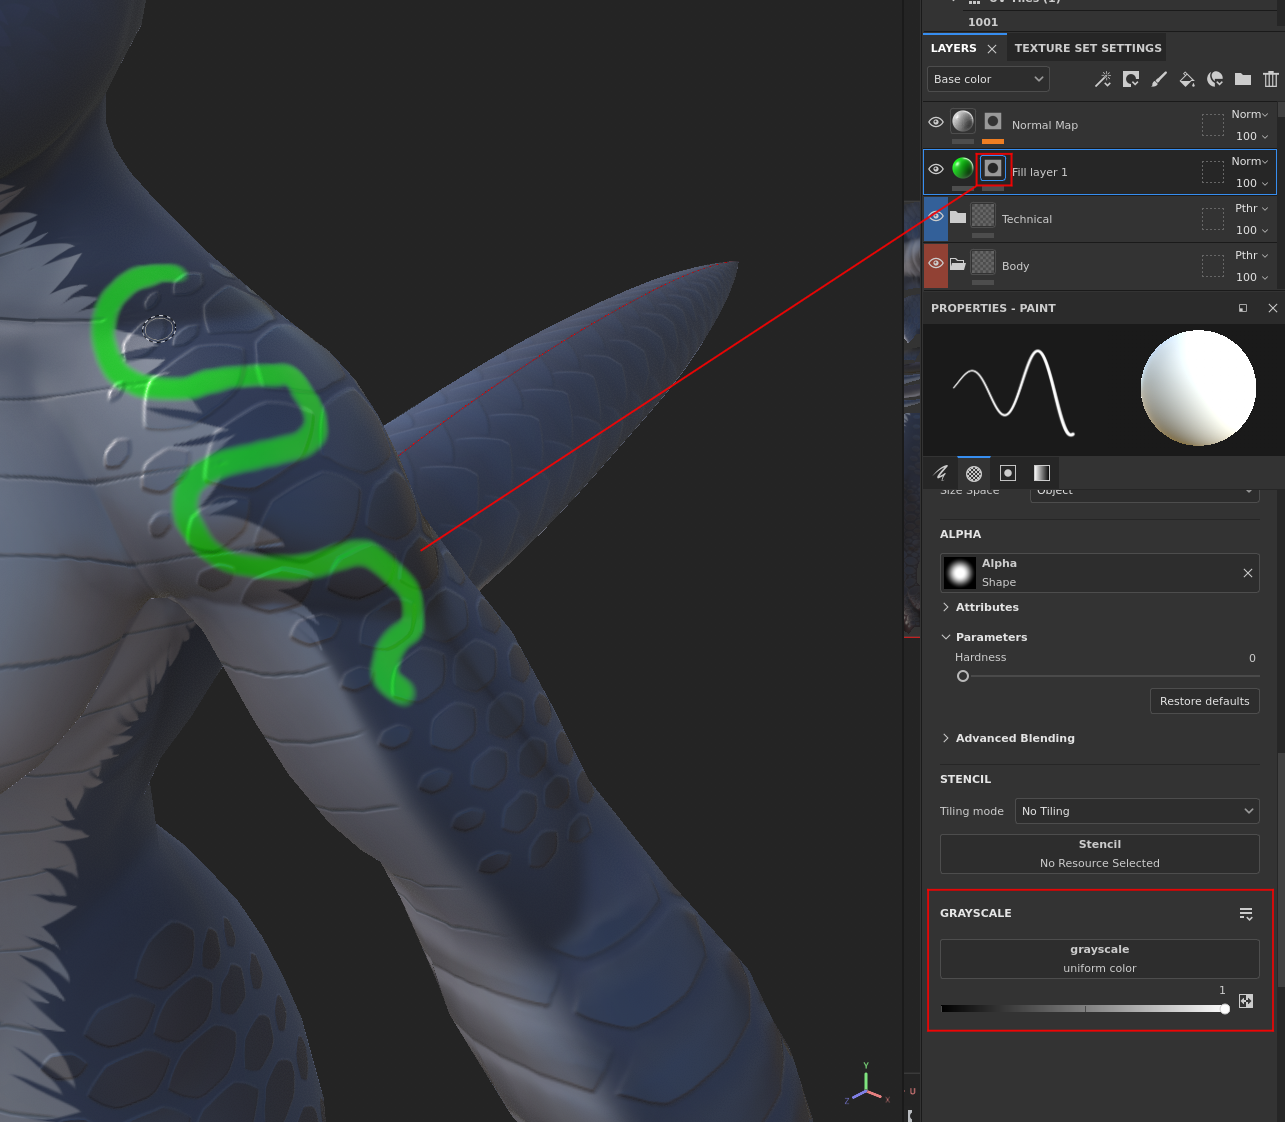
Clicking the mask slot allows you to effectively paint on the model. The contents of the fill layer will then show through the mask
Masks work with black and white. In the PROPERTIES - PAINT section, you can decide whether to paint in white or black on the mask. Painting in WHITE will let the fill layer through the mask, and painting in BLACK hides the fill layer where you paint. Though, I highly recommend working with pure black and white, if you want to paint with lower intensity, you can always change the opacity value on the layer itself, or using the “flow” and “stroke opacity” value on the brush you’re using.
Tip
Holding CTRL and moving your cursor left or right will change the brush size. Holding Ctrl and moving your cursor up or down will make the brush softer or harder.
Creating and using a Fill layer
In most cases, you can use the existing layers to make changes, but sometimes, you might need to create your own. To create a fill layer, press the paint bucket icon. The position of the fill layer matters here. Ideally, you would create it underneath the shading and lighting layers.
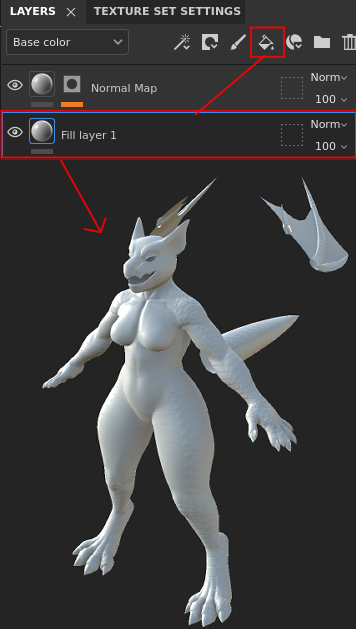
When creating a fill layer, it will fill the entirety of the material with what's set in the "PROPERTIES - FILL" section, which, by default, is colored a grayish white.
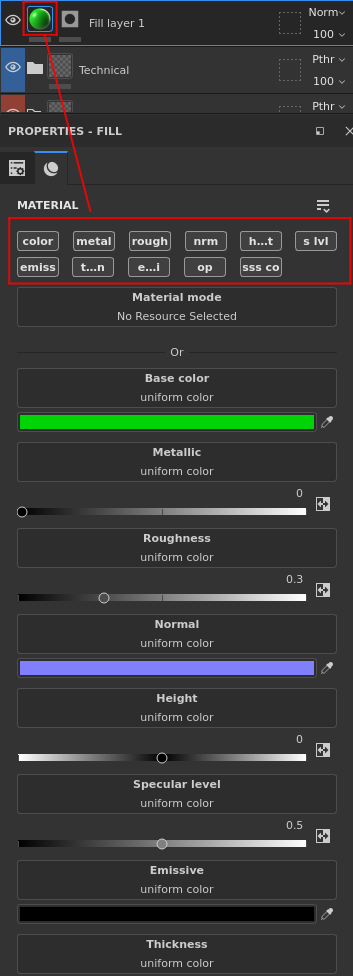
By clicking the fill layer, you can decide what channels you want that fill layer to control. Do you want it to be a different color? to be shinier? to be more metallic? Click those options at the top to add or remove them.
Warning
you should only keep the channels you want to affect and remove everything else, or it'll overwrite other things you might not want to affect!
Once you're happy with what you want your fill layer to affect, you can add a black mask.
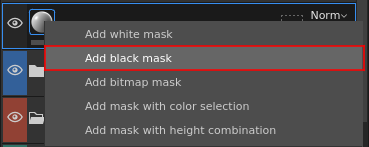
Once you add a black mask, your fill layer's content will only appear where you paint. Remember, you can only paint while the MASK is selected.
Success
We've looked at how to edit and create fill layers, how to change colors and other properties, along with what masks are and how to paint with them.
It should be enough for basic modifications, but some projects have a bit more going on under the hood. I suggest heading over to 🌳 Substance Painter Advanced next.