Here, we go over the process of customizing and exporting the Drakonoid from Blender.
Customization Menu
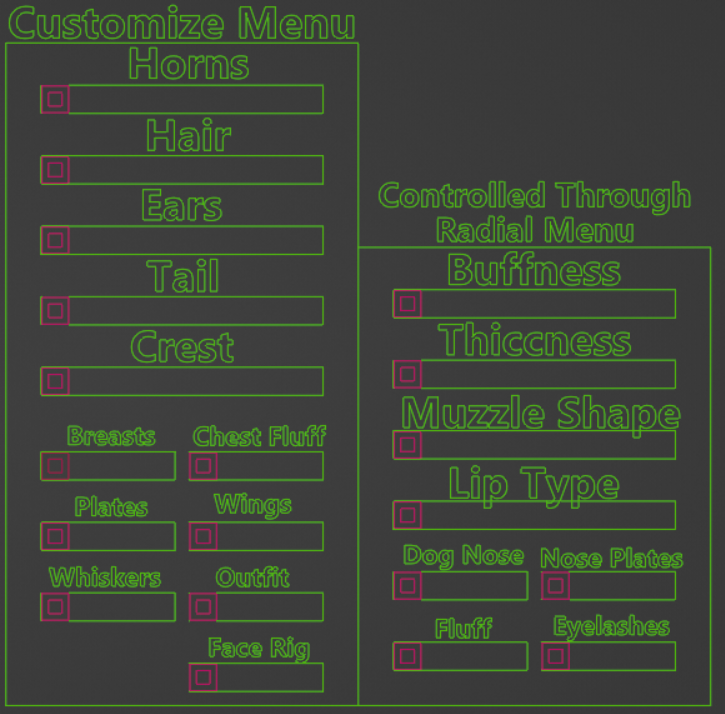
The options on the right will be included and customizable in-game. The right menu’s inclusion is only there for previewing in Blender.
Danger
The chest size slider should be left as default when exporting!
Unity expects the default scale of the bones when it imports the FBX. If the bones are scaled differently, that size will be the new “default”. This means corrective blendshapes will not activate at the right size in the radial menu and might cause clipping!
I strongly suggest leaving the “Outfit” and “Wings” option turned on once you’re done, even if you don’t want it on, as you can turn it off in VRChat, and not exporting this might look weird when you turn them on in VRC.
Keeping Track of Chosen Options
So you have something you’re happy with. Great! You’re almost done. If you were to export now, the model will be very unoptimized. There’s just a thing or two left to do that will ensure everything will work great.
Before we begin though, keep note of which option you’ve chosen in the hierarchy. You’ll know which one when it’s highlighted like so:
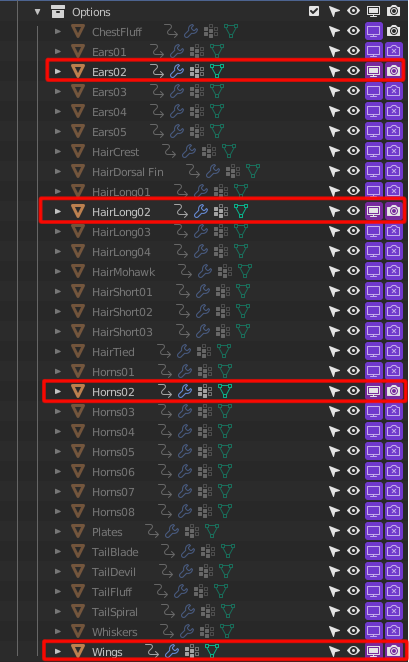
For this example, we have Ears02, HairLong02 and Horns02, and Wings. This will be good to note when selecting materials and looking for Blendshape fixes.
Note
At the time the old guide was written, Unity did not, to my knowledge, import Blendshape values. I have not set up this model with this feature in mind.
Joining the options with the Body mesh
This is EXTREMELY IMPORTANT
We need to combine all the options you’ve chosen into one “Body” mesh, with the exception of the Outfit, which must remain its own separate mesh.
Go back to Object mode, make sure nothing is selected by clicking in empty space. Select all the meshes that apply to your model while holding shift (if in the 3D view) or CTRL (if in hierarchy); Ears, Hair, Tail tip, Horns, Whiskers, Plates, Crest, Chest Fluff, Wings. Do NOT select the Outfit or the Armature/Bones. You can undo a selection with CTRL+Z. If you’ve got chest fluff or plates, keep in mind it’ll be easier to select them in the hierarchy than in the viewport because the outfit might be hiding them.
You should have something that looks like this:
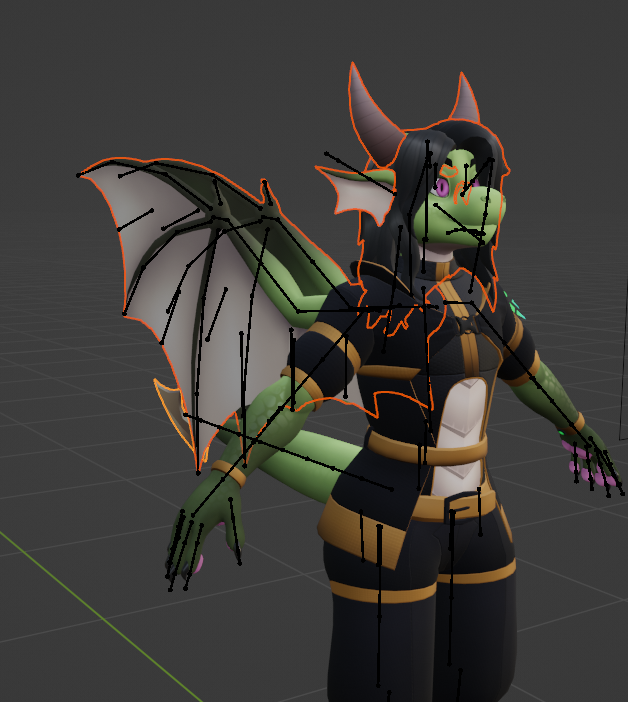
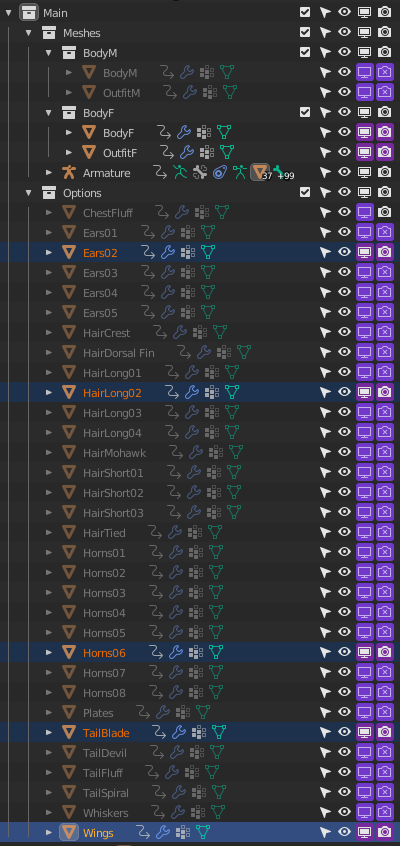
Then, and ONLY then, add the Body mesh to your selection. In Blender, the thing you LAST selected will be the “Active” object, which is to say the other things will merge into it, rather than the Body merging into something else. This is important because we want the mesh to be named “Body”. It also ensures that we preserve the order in which the shape keys are listed. The Body should be a lighter orange than the rest.
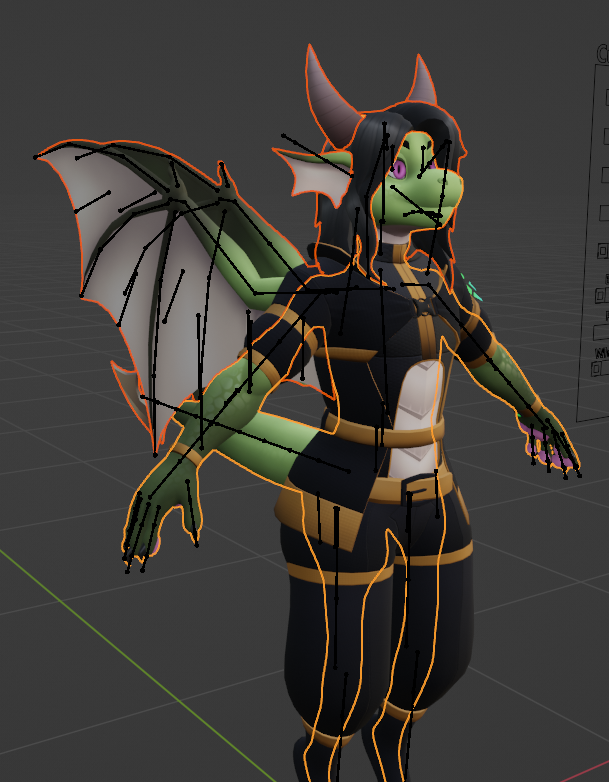
With the Body now selected, make sure your mouse is inside the viewport (which is the 3D space) and press CTRL+J. This will join all the options you selected into one “Body” mesh. All your options will merge into either BodyF or BodyM, depending on which one you chose. You’ll end up with something like this:
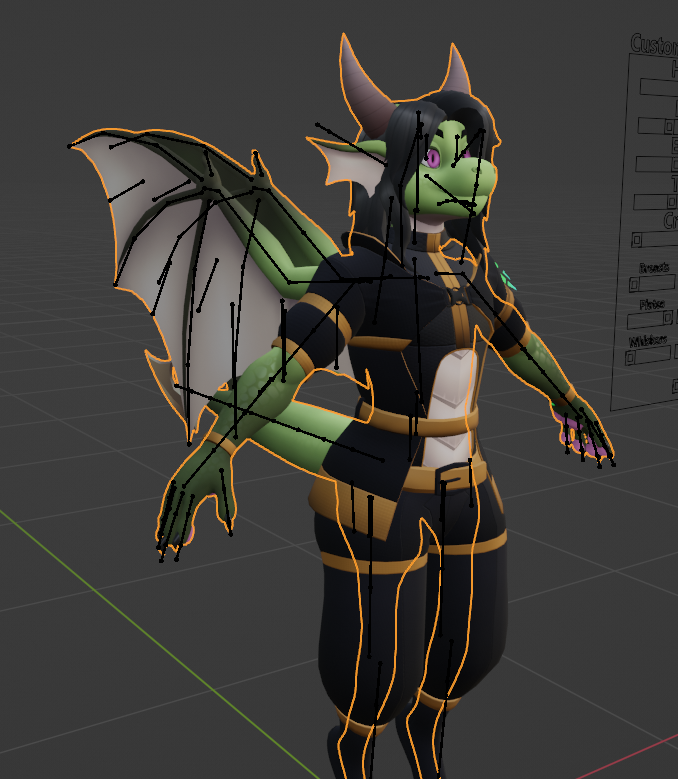
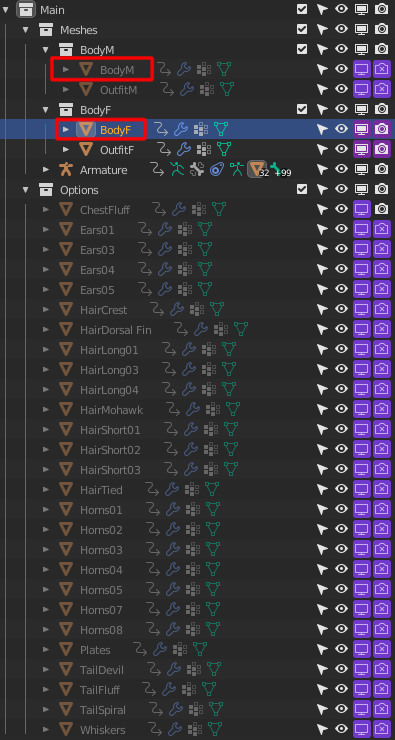
Nothing in “options” should be left except the ones you didn’t choose. You should be left with BodyF or BodyM, Outfit, and Armature.
If you want multiple horns, this is where you could use the slider to make another set of horns appear, then merge that set with the body as well. Doing this might not work well with anything else, as the slider’s position deactivates bones that aren’t used, so I would not suggest doing this for having multiple hair styles, for instance.
Exporting from Blender
You are now ready to export the model! However, you need to export in a certain way in order for unity to interpret the model correctly and to ensure useless bones are not exported.
Select everything currently visible in the scene. Put your mouse in the viewport and press “A” on your keyboard to select everything.
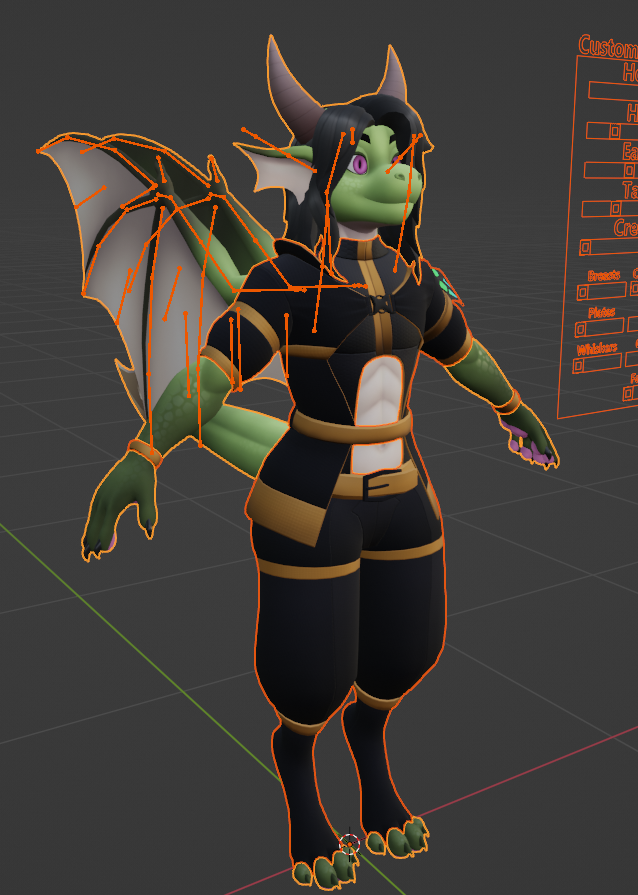
Once that’s done, go to the top left and click File>Export>FBX.
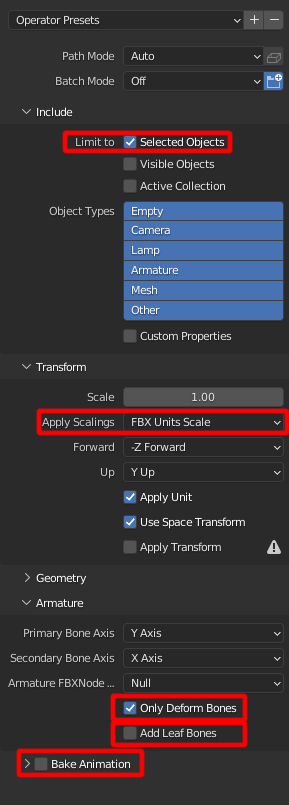
You need to save the FBX somewhere outside of your Unity project for the moment. Name it “TDR_DrakonoidCustom”. If you want to export it directly into the Unity project, make sure to replace “TDR_DrakonoidCustom” in Assets>TDR_Drakonoid>FBX.
Warning
you don’t need to remove the menu to export to any other platform! THE MENU AND ALL USELESS BONES ARE ALREADY DELETED ON EXPORT! Deleting the menu only makes it harder and more time consuming to work on the model!
Note
After exporting, you can go back to Blender to undo the previous merge actions. I would suggest not keeping it merged in case you want to add or remove things in the future. [!Info]- Export settings Explained (Optional)
If you’d like to know why these export settings matter and why I use them:
Selected Objects
We need to make sure that only Selected Objects (or what’s visible) are exported, otherwise the entire project, including the substance setup, will be exported. We don’t want that to happen. Make sure it is CHECKED
Apply Scalings
We want the “Apply Scalings” option to be FBX Units scale or FBX All, because otherwise, Unity will interpret 100 centimeters as 100 meters, or something along those lines. This setting ensures Unity gets the scale right.
Apply Modifiers
“Apply modifiers” is situational. It’s usually a bad idea to have this enabled because certain modifiers can’t be applied with blendshapes, and you know what happens when you try to export with this setting on and with one of your meshes having a modifier that can’t be applied with blendshapes? All of your Blendshapes get deleted on export in order to apply the modifier. It’s pretty common for beginner avatar makers to run into this issue at some point.
If the modifier can be applied with blendshapes, it might not give the result you want, for example: “apply modifiers” when a mask modifier is active will delete the mesh that’s currently being hidden by the mask modifier.
Deform Bones
We want to export with only Deform Bones CHECKED, because some options on my avatars, like hair and ears, have unique sets of bones that are useless depending on what you chose and will only make your avatar unoptimized. I have used drivers to automatically set the deform value to “off” on bones that are not needed for your chosen options. These useless bones will be discarded on export thanks to this option. If you’re exporting avatars from other makers, you might want to consider unchecking this unless the maker specifies to check it.
Leaf Bones
Leaf bones add extra bones at the end of each chain of bones. This is normally used to get the endpoint position of a bone, as Unity can only tell the position of the start of the bone, not where it ends. This is mostly useful in the context of Physbones, but it’s easy enough to manually add an end bone when needed. Nobody in their right mind should ever leave this on, as it tends to add hundreds of useless bones. This is not needed and would create unnecessary bones that will hinder performance. leave it UNCHECKED.
Bake Animation
I have created all visemes and poses for the bones using animations in blender, in case I needed to access them later. Having “Bake Animation” on would export these animations. These are not needed as the required animations are already in Unity. Exporting with this option active might pose your avatar in an undesired way on export, and will take significantly longer to export. Leave it UNCHECKED.
Success
To import into Unity, head to 🥡 Unity Import Process.
For info on retexturing, head to 📗 Substance Painter Projects.