This is the FAQ section.
How can I have multiple custom Drakonoids in the same project?
Unfortunately, the process is a little more complicated than I’d like for someone who’s newer to Unity, but it is possible. You need a fresh project, or at least the dynamic bones you need have to be intact. First, export the model from blender, with the same export settings I explained in the guide, except you’ll export with “only deform bones” unchecked, and put it in your Drakonoid project’s FBX folder under a unique name. In this example, I named it “TDR_DrakonoidCustom1.
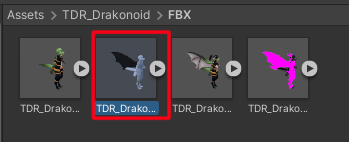
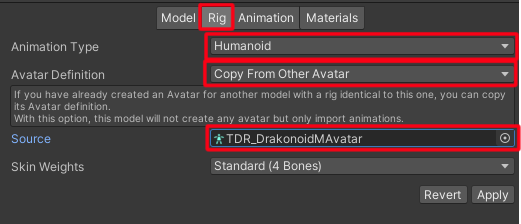
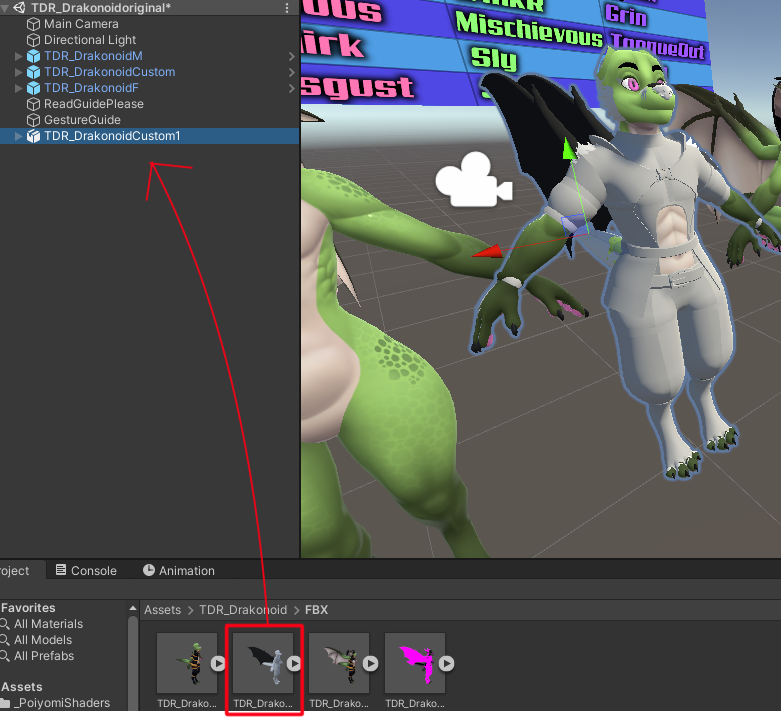
In Unity, click the FBX and under the “rig” section, change the animation type to “Humanoid”, and copy the avatar definition from one of the others and apply. Once that’s done, drag the FBX into the Hierarchy in unity.
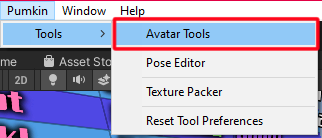
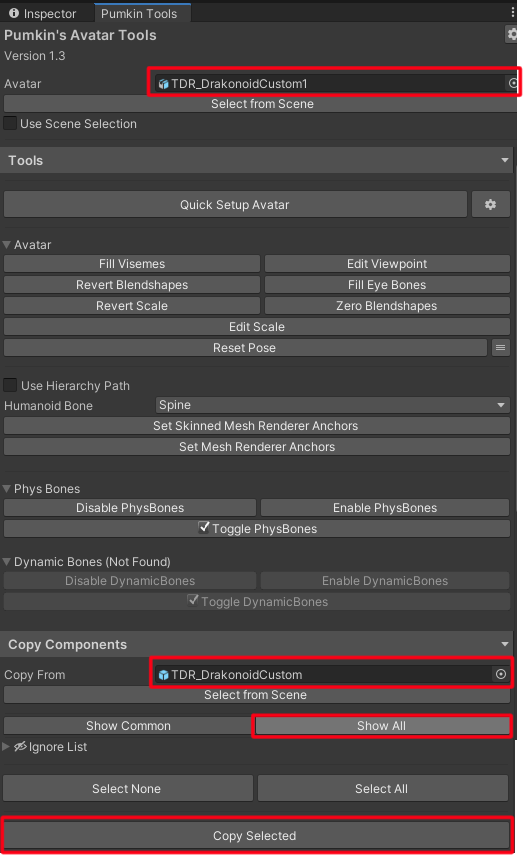
You will need PumkinTools to copy all of the Physbones and other components from TDR_DrakonoidCustom to your own. Make sure “show all” is clicked, otherwise constraints won’t be copied. Then, go back to blender and export your custom model with “only deform bones” checked, and replace the FBX you previously exported. It should give you a new custom Drakonoid to work with.
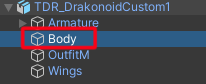
By default, the “Body” mesh will be “BodyM” or “BodyF”, you should rename it so that animations work. Hide the outfit, make sure all the face meshes are assigned, all that stuff explained in the 📑 Avatar Documentation/👥 Avatar Bases/🐲 Drakonoid/🥡 Unity Import Process#Fixing Import Issues section. Also make sure you don’t have an extra Body or outfit mesh in there, just in case. Pumkintools can transfer Meshes, so, better safe than sorry.
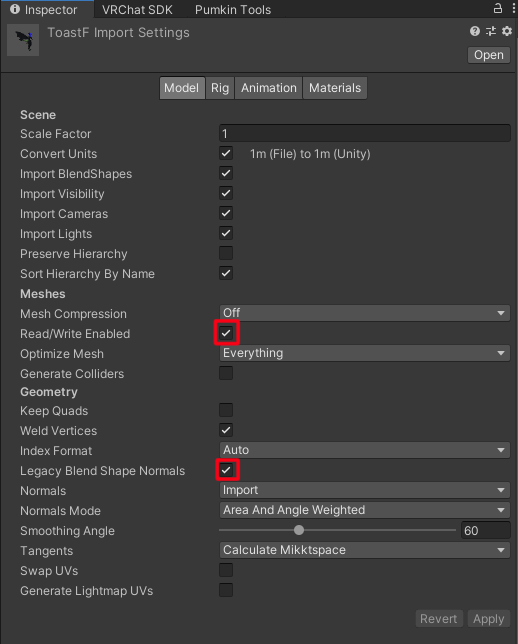
One last thing, when inspecting the FBX, make sure Read/Write is enabled, as well as Legacy Blend Shape Normals. Otherwise, your model will be listed as having a million polygons, and the shading will behave weirdly when a blendshape is activated.
Do I have to do twice the work in Substance in order to customize both the male and female versions?
Not really! If you made your own intricate markings and don’t want to do them twice, you can export the mask you’ve made to a file, then import it to the other project. Some things might not look right if you worked around the chest area, but it should save a lot of time. Once in the other project, click “import resources” and import the mask you made. Once that’s done, right click and add a fill effect on the mask of whichever layer you want to transfer, and put the mask you exported in the “color” slot. If you need to adjust anything on it, use a paint effect on the mask and put it above the fill effect. You can also turn a folder into a Smart material, but I’ve had bad results with it in the past.
Why didn’t you just put every option in one Unity file?
It would be incredibly unoptimized. It would also be irresponsible of me to make a base that a lot of people might use if it has over 90,000 polygons and over 10 materials and skinned mesh renderers when realistically, people would only stick with one version that they like and never touch the rest. Having a lot of options is great, but it shouldn’t come at the cost of everyone else’s performance. I believe this gives the best of both worlds, with having a lot of options but remaining optimized by having most of the extra mesh options in a blend file. Sure, people might be afraid of Blender, but I spent a lot of time on this guide trying to make the process as easy to follow as I could.
“I don’t care about being optimized, I want to have every option available at the same time!”
Sorry, that tends to make vrchat worse for everyone but you, so you’ll have to work for it. Having this option be less accessible makes it less likely that everyone will lag from using my work. Please be considerate.
How come this isn’t quest compatible?
As much as I want this model to be optimized, quest avatars are very restrictive to work with. It was enough work just doing the 2 avatars, working with 4 of them would be a mess. If it ever happens, it’ll have to be much later. No promises.
Can I commission you?
I most likely won’t be open for commissions in the foreseeable future.
Can I turn this into a V-tuber avatar?
Yes! Please do.
Will you add any extra options in the future?
Probably! If someone suggests a specific style of horns or tail and I like it a lot, I might add it. I’m a bit limited on what I can add to the “assorted” material, but horns can be stacked in the UVs. I might also add a tank top and shorts eventually. I will be using this model myself, and anything I make for myself, I plan on adding to the base, which might not be much, but still. After releasing this model, I plan on taking a break. so please don’t flood my inbox with suggestions
Why are there two different versions of the model? I’ve seen people do one model that has both in one! (Outdated info)
This one is a bit tricky to explain. Doing this is twice the work for me, so I would love to only have to work on one. The only reason I don’t want to is because of a bug that has plagued Blender for years. The problem has to do with blendshapes, which lets you “Save” custom positions of every vertex, and normals, which is, in oversimplified terms, what determines the angle at which light hits a polygon, and whether or not it is being lit up.
You see, normally in software like Maya, Blendshapes, or Shapekeys, are actually duplicate, separate meshes that you can work on. This allows you to adjust things like sharp edges and normals separately from the main mesh, and it gets saved for each blendshape. In Blender, a Shapekey is handled within the same mesh. This makes it a lot easier to work with, but currently, it is not possible to edit normals or sharp edges per Shapekey in blender. Why does this matter? because if I have a blendshape that turns a flat piece of paper into a sphere, the sphere’s normals will still be the same as they were when it was flat.
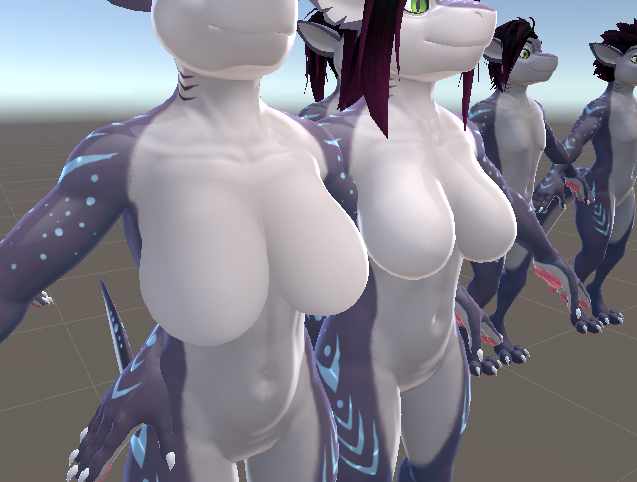
On the left, the boobs were made using a blendshape, with the default mesh being flat. on the right, it shows what it SHOULD look like. It might not look that different from this view, but it becomes jarring at certain angles.
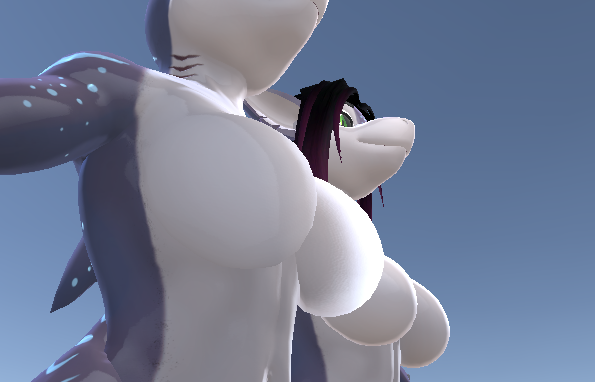
As you can see, the normals behave as if it was still just pectorals. This is because normals aren’t being saved per-blendshape. This is also why you get errors in Unity saying “couldn’t generate normals for blendshape [x]”
“isn’t there a way around this?”
There is, kind of. I’ve worked enough with Maya to know I never want to touch it again, so scratch that option out. I wouldn’t want to inflict that kind of pain on my clients anyway. Maya is inaccessible for most people, and it is much, MUCH less user friendly than Blender.
The other way to deal with this is to use Unity’s “recalculate normals” option, but this comes at a cost. You’ll get normals that match the Blendshapes, but you’ll lose any custom normals you might’ve had on your model, including sharp edges.
“What’s a sharp edge…or a custom normal?”
Normals are usually smoothed out, otherwise your model would look like a disco ball, which is not usually the intended effect. The downside to this smoothing is that it can smooth out things that shouldn’t be smooth, like a cube or corner. To prevent that, we have a threshold slider that smooths everything past a specific angle, or we can mark edges as sharp. It is much easier to control sharp edges when you assign them as sharp. This makes things like the iris, or armpits, the crotch or hair look much better. There is a way around this, by using the split edges modifier in Blender, you can separate the edge. This forces it to be sharp, and by unchecking the “merge vertices” option in Unity, you’ll be able to keep sharp edges with the “recalculate normals” feature.
Custom normals are a bit different. When making things like fluff, it tends to have different angles than the surface it’s resting on. This means it doesn’t blend in very well. To fix that, you can make the fluff “copy” the normals of the skin, so that it seamlessly blends in. It’s also used in certain models like in Guilty Gear to “trick” lighting on a face, anime-style. Unfortunately, that information is lost when using “recalculate normals” in unity.
Therefore, in order to keep good looking normals on breasts and on the fluff, and to keep sharp edges, I decided to make 2 separate models.