Note
If you're unfamiliar with using Substance Painter, head to the 🌱 Substance Painter Basics section.
You might notice the textures looking very pixelated.

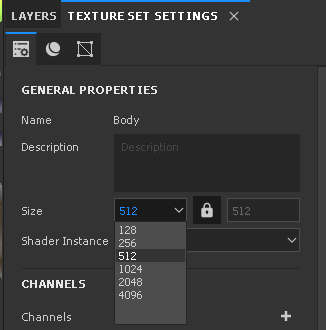
This is because the texture set settings was set to 512, which you can increase here:
Emissions
The project was made well before I had a good workflow for textures. some modifications are needed for emissions to be exported correctly.
By default, the emission color matches the intended glow color. This is an issue because we would need to export twice to get the desired results.
To fix this, simply change the marking glow color from blue to pure red, and the eyes from their default color to green. It should look like this while viewing the emissive channel:
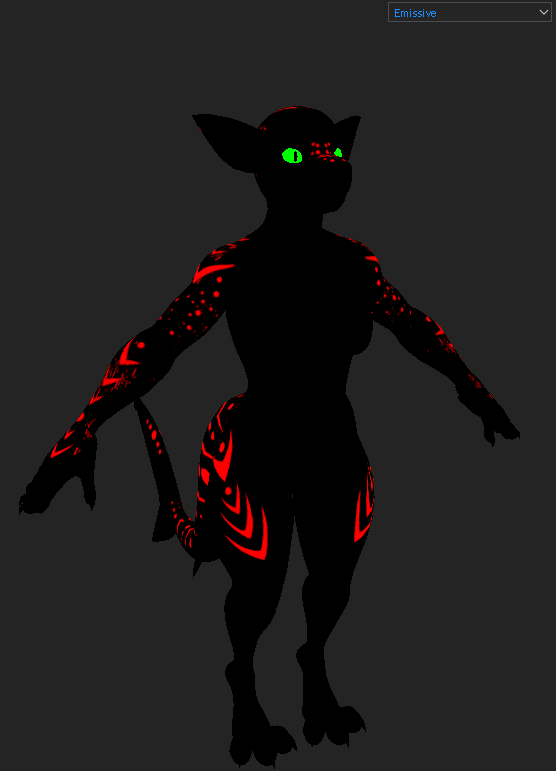
You can get a pure green or red by changing these RGB values when clicking the emission color.

Emission (Old Instructions)
This was written before I understood how to use masks.
Take note that the eyes need a different emission Texture. The body's emission layer has that glowing wave effect. We don't want that to affect the eyes (unless you do), which is why there's 2 different emission layers. All that means is you should probably set the emission color to black on all the eye layers before exporting. You can later export a second emission layer for the eye if you want, though you can change the color in unity so it shouldn't be necessary.
Export Template
There isn't really anything special to this one, but it should look like this:
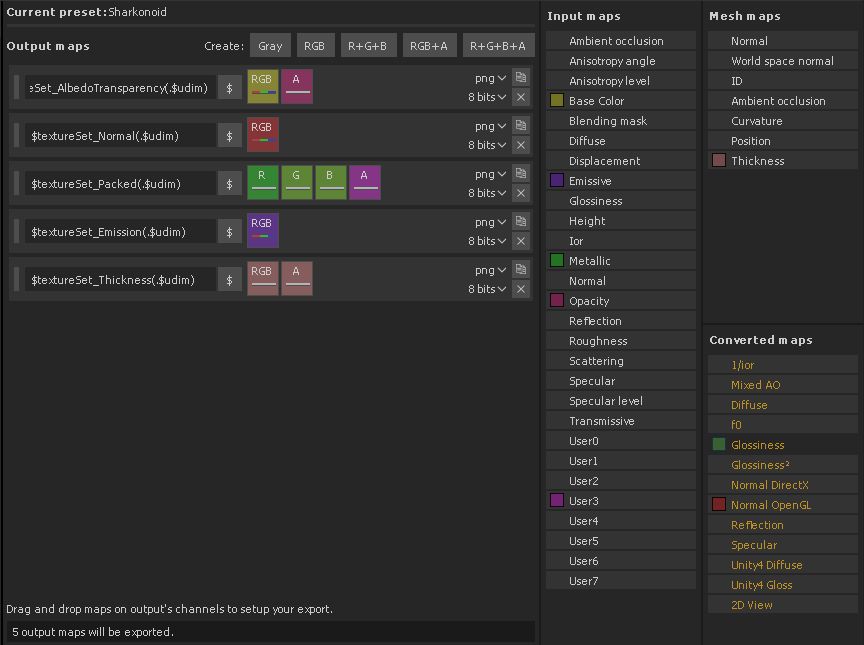
The Alpha channel of "Packed" Doesn't really have anything. User3 is a leftover from the duplicated template I used, but it can be empty. Note that the textures in Unity may not have matching names.