Note
This section assumes you've already made the Unity project, imported the 📦 Prerequisite Packages and opened the scene. If you're new to using Unity for uploading avatars, follow the 🟥 Unity And VCC Setup
Replacing the FBX
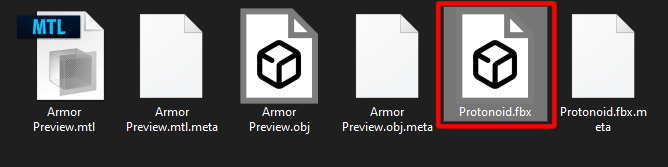
Using your exported FBX file, simply browse to your Protonoid’s project folder in explorer (not inside Unity) and OVERWRITE the existing Protonoid FBX with the one you exported from Blender. All the useless bones will be discarded. This should leave you with an avatar that only has the needed Physbones and regular bones. I set it up in a way that makes it so that you are able to overwrite the FBX more than once. Just make sure to include the HUD when you export, or else the parent constraint present on it might disappear.
Do note that you will need to name your .FBX file a certain way in order to replace it. “Basic” refers to the Armored version, “Casual” refers to a version that has clothing, and “Skull” uses the Skullhead.
Unfortunately, you cannot replace the FBX directly inside the Unity application, as it will instead create a duplicate version with _1 at the end. Which is why we need to do it in Explorer. In Unity, browse to Assets>TDR_Protonoid>FBX, right click “Protonoid” and click “Show in Explorer” to open the folder it is contained in.
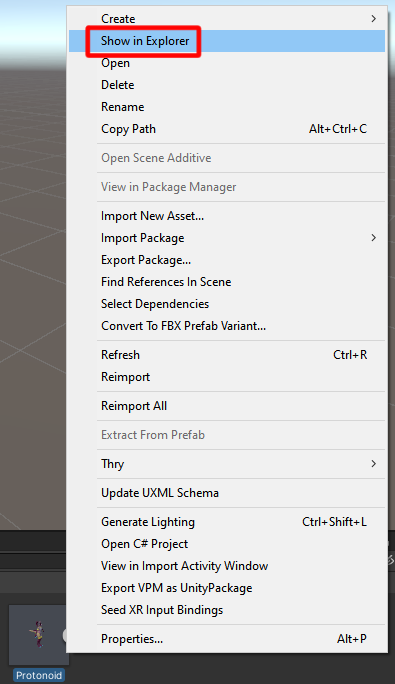
You can now take the custom Protonoid FBX that you exported and replace the one in this folder with it. (V2 will have multiple FBX files here rather than just the one like in this picture)
We’re almost there!
Fixing Import Issues
If the armor is showing up by default, you might have accidentally merged the armor into the body. If the avatar disappeared, you might have forgotten to uncheck “Apply modifiers”. If your avatar is stuck in T-pose in VRChat, you might have forgotten to export the Armature, and might have to reimport the Unity Package. It might not be too late, export it correctly, and then reload the scene. If constraints, physbones and contacts reappear, then you're good to go.
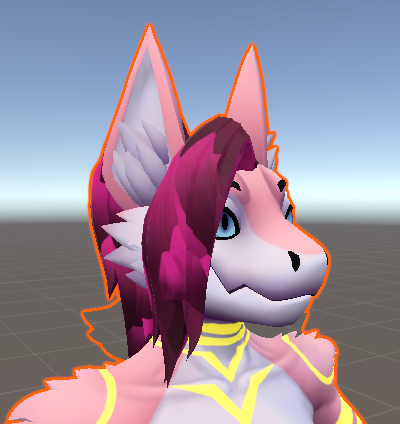
Though most likely, you might end up with something like this:
Note
Your avatar’s head might also have disappeared if using the casual pack, due to the material order changing.
It shouldn’t be too much of a hassle to fix. Go to Assets>Materials to find all the materials. They should be all named accordingly. You should have one material for the body, one for the Armor, and one for the Hair.
if one is missing, simply drag and drop it onto the corresponding mesh.
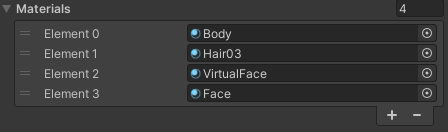
The order of these slots may change, but for the Body, the first slot should be the Face, then Body, then Hair.

Warning
If using the Skull version of the basic pack, you will see 4 different slots in the above picture. In order for the face shown in the armor to work, we need both materials named "Face" slotted in. One is in TDR_Protonoid>Materials and the other is in TDR_Protonoid>Materials>OutfitPack.

For the Armor, it should be Armor, InfinityPoiyomi and Transparent.

For the Casual pack’s body, it should be something like this. If VirtualFace is in the wrong slot, it will make that mesh invisible.
Face Tracking
Don't forget, if you have face tracking, you'll need to follow instructions in 🟧 Unity Project Setup#Face Tracking!
That should be it! That is, unless you want custom textures.
Texturing your Protonoid
Continue to 📗 Substance Painter Projects