📚 Understanding Poiyomi
Poiyomi is a popular versatile shader. In simple terms, shaders control the way textures, color and such are presented on your model.
A lot of people use Poiyomi for their avatar bases, me included. In this section, I will explain some fundamental knowledge needed to use the shader. I will briefly go over the basics that someone completely new might need to learn in order to use the shader.
Note
Poiyomi has its own detailed documentation website that explains every feature! I will often link to it to prevent unnecessary work. In most cases, you can learn what every feature does just by reading the documentation.
Danger
If using the latest version of Poiyomi, certain features on the shader may be broken until the material itself is updated to the latest version of Poiyomi.
The Basics
Locking/Unlocking materials
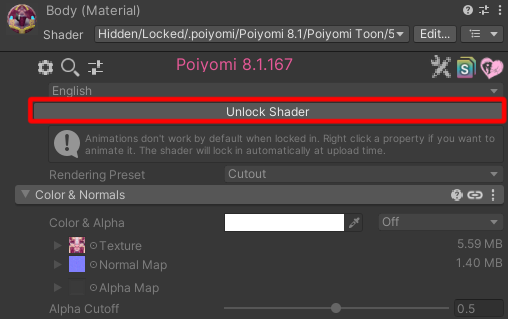
Locking a Poiyomi material enables the optimizer, which removes any unused function for that material and locks properties, preventing you from changing them (unless they have the "animated" property).
In order to make modifications to the material, you need to unlock the shader.
About unlocked materials
Keep in mind that testing the avatar with an emulator like AV3 or Gesture Manager in Unity while the shader is unlocked will not work as intended. If you intend to test the avatar, LOCK the shaders first. Some tools automatically do this for you, but you should still keep it in mind if something isn't working.
It can be useful to test something in game as well, as some things can be broken on emulators but run fine in-game.
Replacing textures
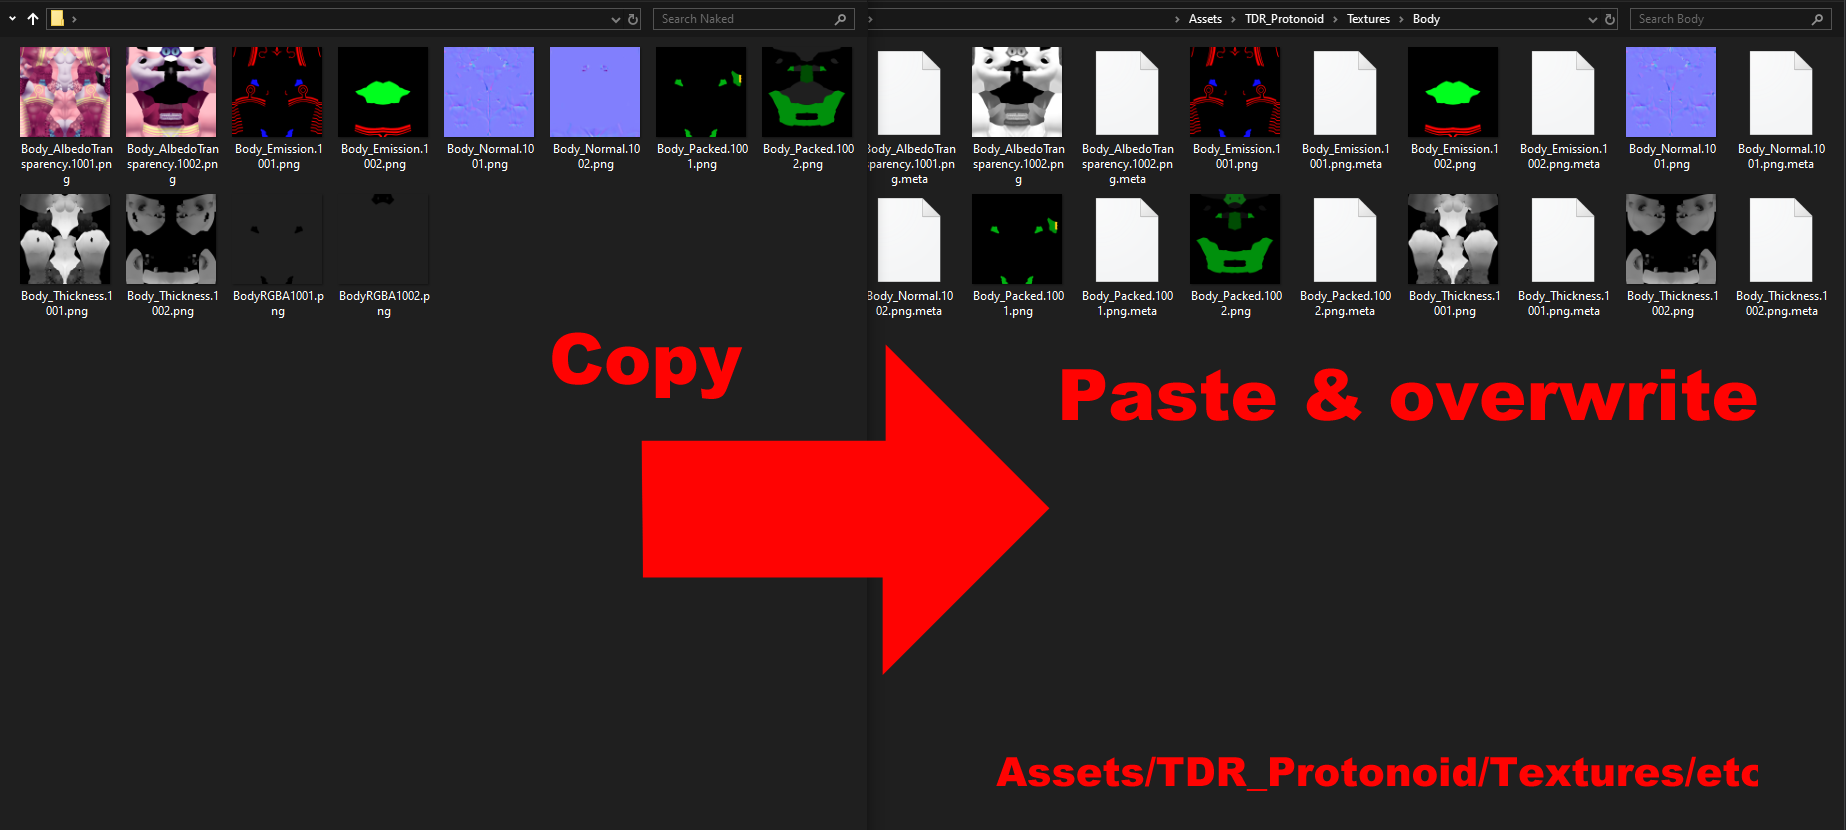
Instead of replacing each texture slot manually in Poiyomi, from the Drakonoid onward, my guides instruct to instead copy your exported Substance Painter textures and replace the ones in the Unity project ==using your file explorer==, rather than in the Unity editor itself, as it is much faster and retains crucial import settings related to the textures used.
Warning
Attempting to do this inside the Unity editor will just create copies of the textures, and won't replace anything.
Note
Not all avatar creators expect you to do this, but it should be the preferred method, as import settings for textures are important to keep.
For a lot of people, replacing the original textures with the ones created in Substance Painter is all that's needed. For those who want more unique or complex effects, some additional setup may be required.
Search

This shader has many features! A search box is available at the top to more easily find what you're looking for.
Info button

Each feature in Poiyomi has a dedicated button that points you to the appropriate page in the documentation. If you want to learn what a feature does, make it a habit to click this.
Section Header Boxes
Section Header Boxes In Poiyomi Docs

Poiyomi is a modular shader. Things that aren't being used will be discarded. If you want to use a certain feature, you will need to click the checkbox in order for it to stay when locking.
Note
when working with an avatar base, the relevant features are already checked by the avatar maker, so this tip only applies to features you want that aren't already included/checked.
Common types of textures
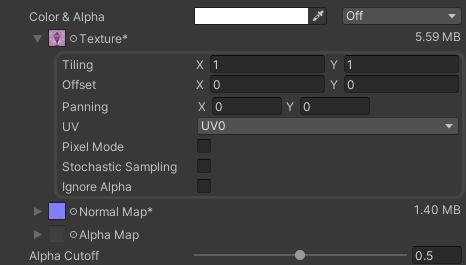
In order to properly customize your textures, it's good to know what kind of textures exist out there.
Albedo Transparency
This common map controls color and opacity.
Normal map
Controls the direction of the surface normal at the pixel level. This map essentially allows creators to transfer finer details from the high poly sculpt to the lower poly version of the mesh.
Reflections and specular
In Poiyomi, this map will define which areas appear metallic and shiny/reflective, and where specular should show up on the model. The way it's set up varies wildly depending on the shader used.
AO Map
Ambient Occlusion calculates how exposed to ambient light a mesh is. This can be baked into a map using Substance Painter or Blender and when slotted into a shader, will obscure areas that wouldn't normally receive light to give a more realistic look.
Emission MAP
Controls the COLOR of the emission on the model.
Emission MASK
Controls WHERE the emissions should show up on the model, and with how much intensity it should glow.
Notable Features
Animated
Animated in Poiyomi Docs Allows properties on the shader to change through animations. This is important to be aware of, if an avatar maker set a value to be animated, it'll have the "A" or "RA" icon next to it. This also tends to mean that changing this value most likely won't have an effect in-game, as it's controlled by an animation.
Hue Shift
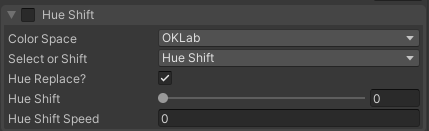
Hue Shift is a quick and dirty way to change the color of a texture, and is often included into any section that involves color. You can also make the color change over time with the Hue Shift Speed setting.
Detail Map
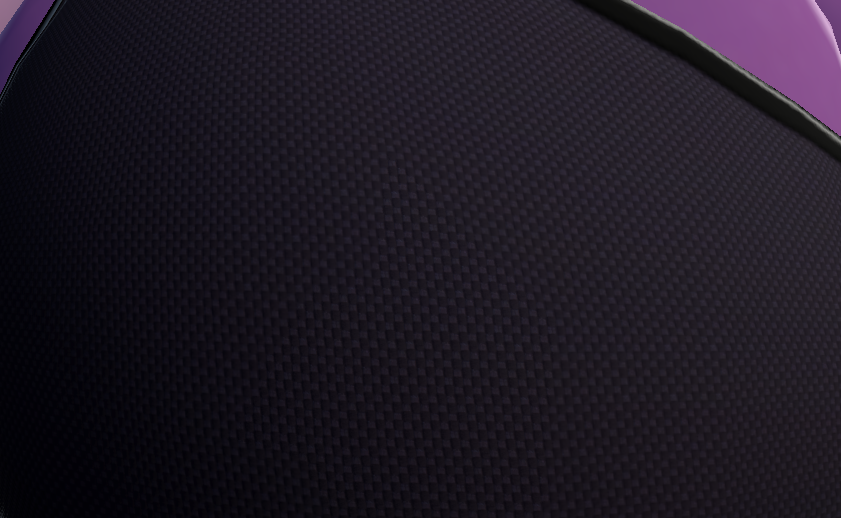
Detail maps are often used for adding intricate details that repeat using a small and lightweight texture or normal map. You can isolate where that tiling texture appears with a mask.
Warning
Turning this feature on will change the color of the material, even if nothing is slotted into the detail texture slot. If only a normal map is used, I strongly advise to set the intensity of the detail texture to 0.
Decals
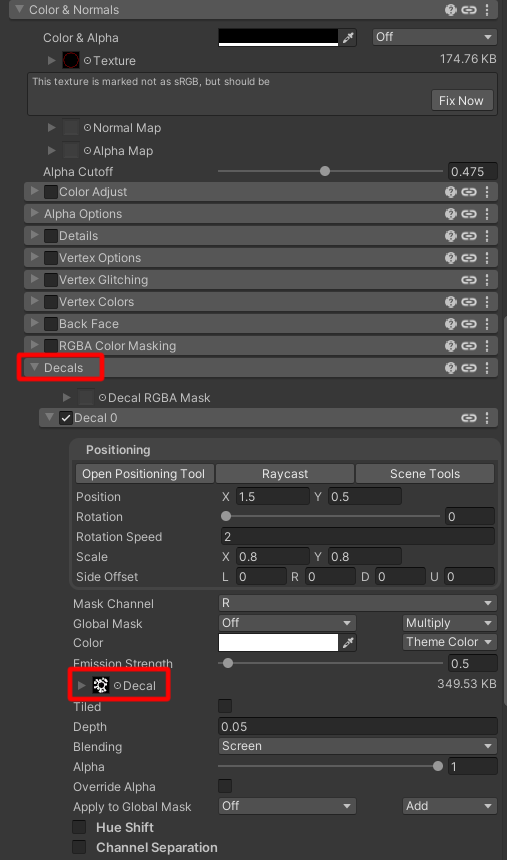
Decals is one of Poiyomi's greatest features. It allows you to add another texture on top of the main one in a material. You can use it for stickers, or an alternate texture entirely. It can be added to global masks, can be rotated, symmetrized, can have layer effects applied to it, can change the alpha value of the material, emission, retains its detail regardless of the base texture's original resolution, and this makes it very versatile. I use this extensively in my more recent bases.
Matcap
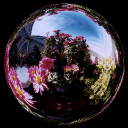
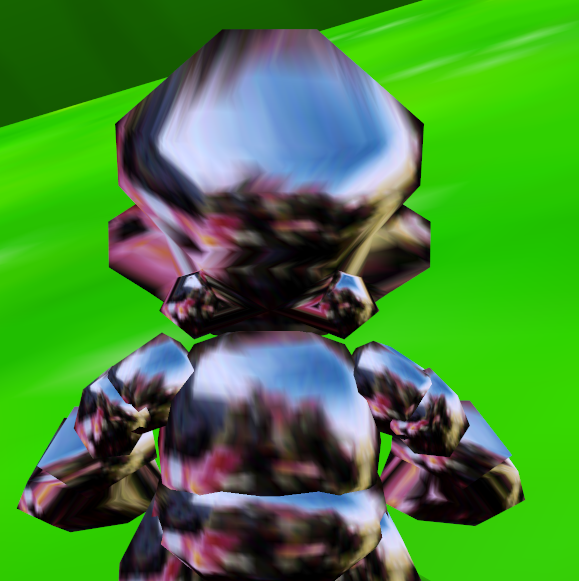
Matcaps are a quick and old-school way to give materials a certain look. It works best for reflective or metallic surfaces. The best example I can think of is the metal cap from Super Mario 64. (Image Source)
| Matcap used | Result |
|---|---|
 |
 |
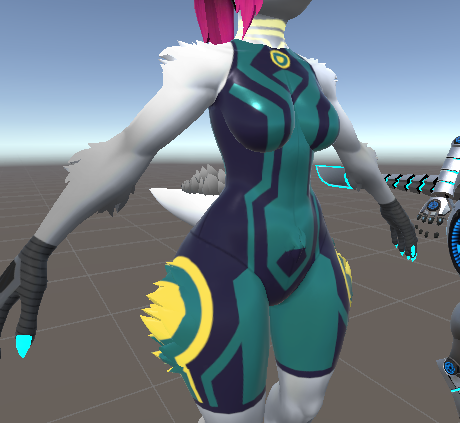
Most people might avoid using matcaps, and instead put all their faith into metallics and specular, but if worlds have very poor lighting or reflections, or even with good lighting, matcaps can help make certain materials look a little less bland. Feel free to experiment with these, as different matcaps can give a vastly different feel.
| Without a matcap | With a matcap |
|---|---|
 |
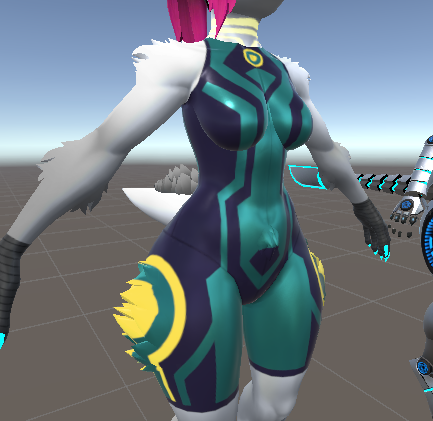 |
As a quick and dirty demonstration, you can see how the matcap (on the right) gives a much more interesting look to the skin-tight suit than without.
Rim Lighting
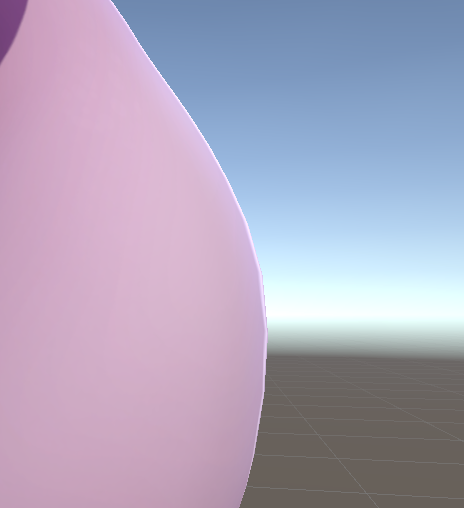 Adds a fake rim light around the model, which can help make it pop out in a lot of environments. Can be set to be hidden in shadow
Subsurface Scattering
Subsurface Scattering in Poiyomi Docs
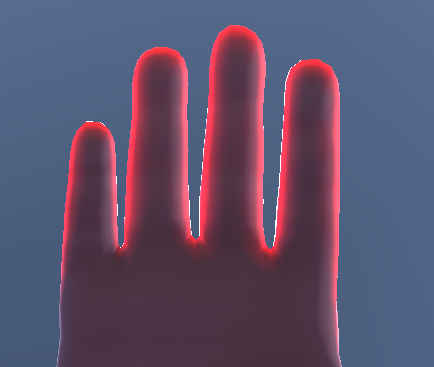
Gives the illusion of light scattering through the mesh when holding it up in front of a light source.
Note
The texture slot expects the alpha channel to be the thickness, the color itself is what shows on the mesh. In most cases, this will be red.
Metallics and Specular
Metallics and Specular in Poiyomi Docs
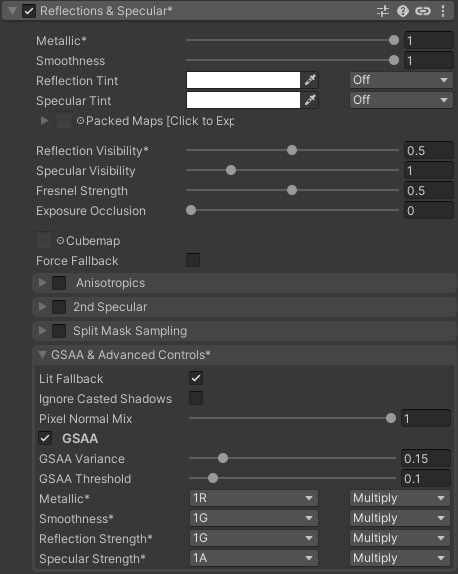
This feature underwent a lot of changes throughout Poiyomi's evolution, and is often misunderstood. This feature expects a very specific setup. Poiyomi does provide an export preset, but it's not as set it and forget it as one might think. hence why I go into more detail here.
The RED channel is reserved for controlling how metallic a surface is. The GREEN channel is reserved for how rough/shiny a surface is. The BLUE channel is reserved for how much the reflection probe shows up on a surface. The ALPHA channel is reserved for controlling how much the light affects the mesh. Default value is 1.
The issue is that even when using Poiyomi's provided exporter, it still requires some manual setup, which a lot of people are unaware of. As a result, reflection strength and specular strength are often incorrectly set up or missing.
When exporting from Substance Painter:
Red: Metallic
Green: Glossiness. NOT roughness.
Blue: By default, expects one of the user channels, meaning you would have to manually assign which area is reflective, but you could set this to glossiness if you want shiny areas to also be equally reflective. This may not be ideal in some scenarios. Instead of reusing the green or red channel, you could use this slot as a different custom mask and point Poiyomi to the green or red channel instead when it asks for the reflective channel.
Alpha: Later Substance Painter versions have a dedicated "Specular Level" channel, which can be used. Note that Substance expects the default value to be 0.5, while Poiyomi currently expects 1 to be the default. Realistically, you only really need this channel if you're trying to create a "matte" effect, like a pure black void or a green screen on a localized part of your model. You can also use it in combination with an AO map to prevent obscured areas from receiving light (such as underneath the chin), but in general, this channel in often optional.
Masks
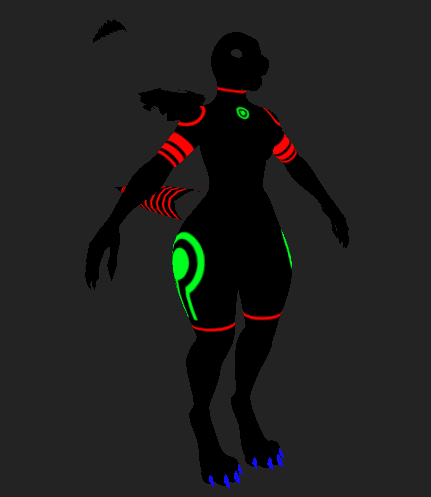
In order to work with shaders, it's in your best interest to become familiar with the concept of channels and masks.
Channel
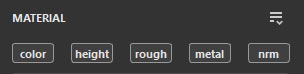
In Substance Painter, a channel is essentially a property that determines a value on a pixel, like how red, green, blue or transparent something looks, or how metallic something is, but it can be anything you want. When these channels are enabled, they will be added to the current fill layer, and you can change these settings there.
What is a mask?
A mask is essentially a way to assign data to pixels, where for instance, black would be equal to 0, grey would be 0.5, and white would be 1.
When we plug that mask into a mask slot, it tells the shader "areas where this channel is 1 will have the effect applied at full intensity, and areas where this channel is 0 will not have the effect applied".
Mask and colors
Most image textures have 4 channels: Red, Green, Blue, and Alpha. These channels are separate, meaning that we can use each one as a mask without them affecting each other. In other words, masks are an effective way to cram multiple data channels into a single texture. You can use these 4 channels to control 4 different shader features to certain areas on your mesh using only 1 texture.
This is how Metallics and Specular work on Poiyomi, for instance. It is also how I set up 4 different emission "zones" on some of my models. Each channel controls its own emission slot.
Emissions
Emissions control the “glow” effect commonly used in avatars.
Note
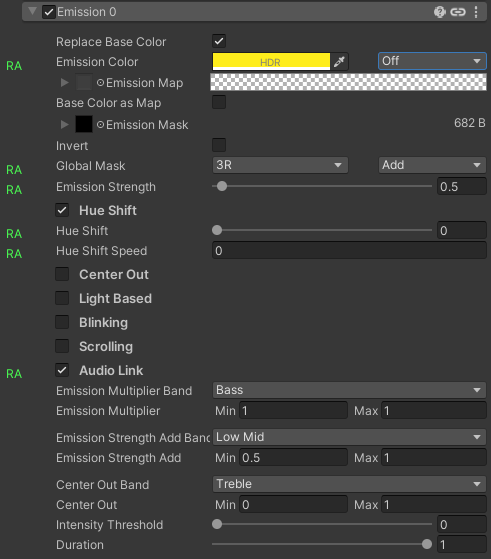
Emission MAP refers to the color of the emission. Emission MASK uses the RGBA channels to tell where the emission should or shouldn't be. Do NOT use an emission mask to determine the color of the emission!
Internal Parallax
Internal Parallax in Poiyomi Docs
This feature is often used to simulate an "infinity mirror" effect.
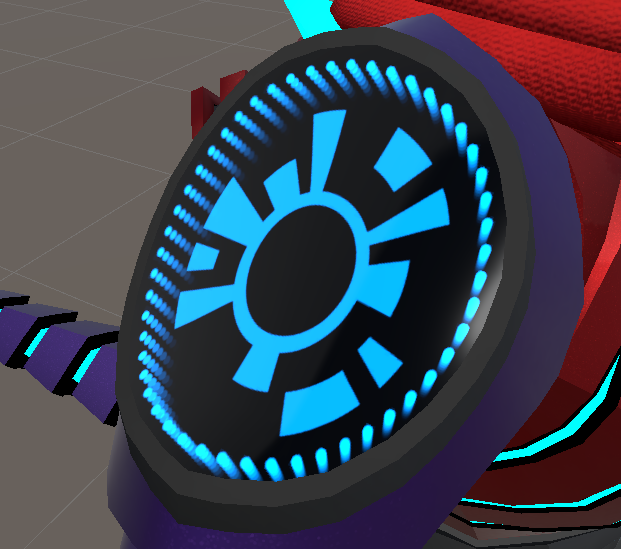
Settings used for the example:
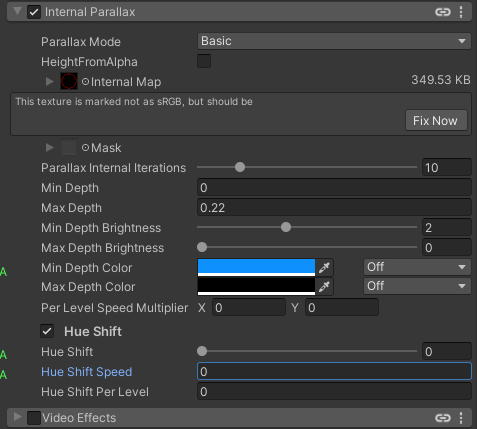
If you want the color to change depending on depth, you can play around with “hue shift per level” or “Max depth color”. You can also change the depth and amount of times the texture repeats with max depth and Parallax Internal Iterations.
AudioLink
This preview contains flashing lights! Click here to show

Used for audio-reactive effects. The "Audio Link" checkbox near the bottom of the shader options should be checked to enable functionality.
It's common to use the emission slot for Audio Link effects. For an easy setup, change the dropdown menu next to "Emission color" to "ColorChord" or "AL Theme" to one of the 4 options.
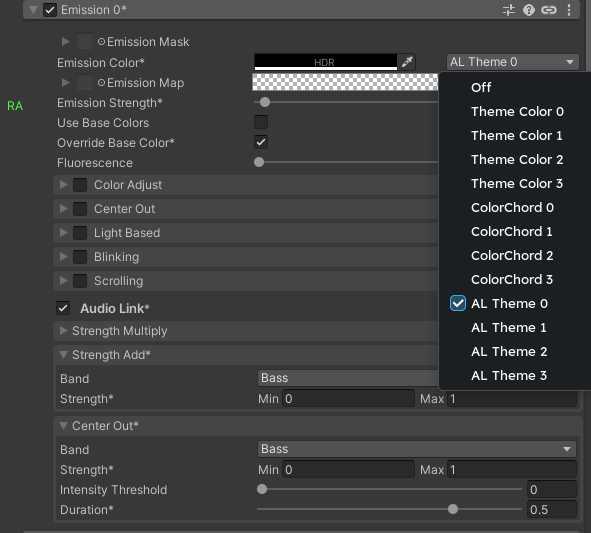
The "Audio Link" section of this slot gives more granular control and extra options. Multiply will darken the emission according to the selected band. Add will brighten the emission according to the selected band. Center out will add a "ripple" effect that travels across your mesh according to the selected band.
Global Themes
This option lets you assign 4 colors that can be accessed by any section where you can choose a color. Allows you to change multiple sections that use the same color at the same time.
Global masks
This section allows you to assign 4 different masks which can be used almost anywhere a mask is needed. A drop down menu named "Global Mask" allows you to use any channel from those masks. You can animate which mask is being used, which is extremely useful.
Material Linking

You might have noticed this blue chain icon. This is to show that this section of the material is linked to multiple other materials. If you change it here, it’ll change it for everything else it’s linked to. It’s enabled for certain sections to make it easier to change things that need to have the same settings without having to juggle a bunch of different materials.
UV map slots
Models can have more than one UV slot, which can be useful in certain situations. Poiyomi allows you to select which UV map should be used for each texture. in most cases, you don't have to mess with this. In the VRChat space, it's pretty common to use the second UV map for UV tile discard, but avatar makers might have their own workflows that use it a different way.
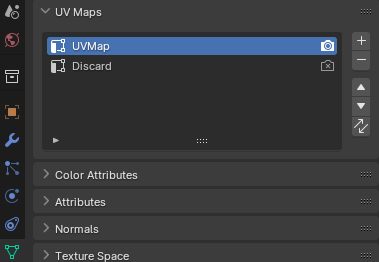
UV Tile Discard/Dissolve (Advanced)
UV Tile Discard in Poiyomi Docs
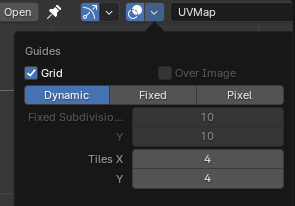
This feature allows us to hide or show certain parts of the model based on which UV tile it’s located in. Blender can let you show this repeating UV grid in the top right. Set the tiles to 4 if you plan on using UV tile discard.
| Example |
|---|
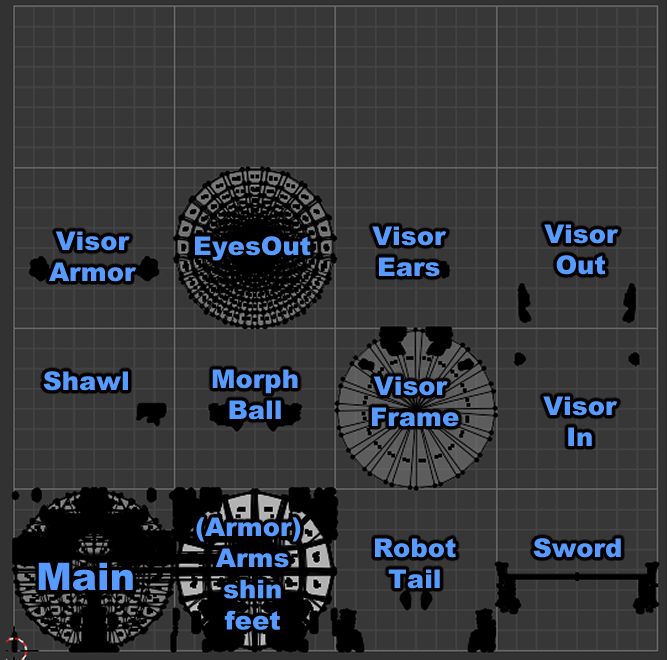 |
Each tile has 2 numbers: one for the row and one for the column. Bottom left is 0,0. The one to the right of that is 0,1, and above the main tile is 1,0, and so on.
You can either use UV tile discard, which uses checkboxes, or UV tile Dissolve, which can gradually make the tile disappear with certain effects.
Renamed Animated (Advanced)
Rename Animated in Poiyomi Docs
Note
You might have noticed this all over in the materials:
 This indicates that the value is set up to be animated, but it’s a little more complicated than that.
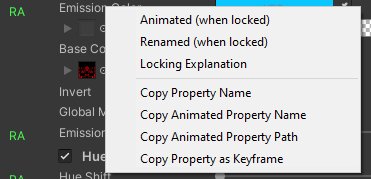
Right-clicking a value in Poiyomi gives you the option to animate it. When animating materials, it seems that Unity can’t tell material values apart from each other unless they’re on a different mesh. If you animate a material’s value and that value is on multiple different materials on the same mesh, that value will change for every material on that mesh. Hence why Renamed animated exists.
UPON LOCKING THE MATERIAL, the name of the material will be appended to the end of its animated property, allowing you to animate individual material values on the same mesh. This requires you to lock the material before animating.
Danger
BECAUSE OF THIS, RENAMING ANY MATERIAL TO SOMETHING OTHER THAN THE ORIGINAL WILL BREAK A LOT OF ANIMATIONS.
Vertex Colors (Advanced)
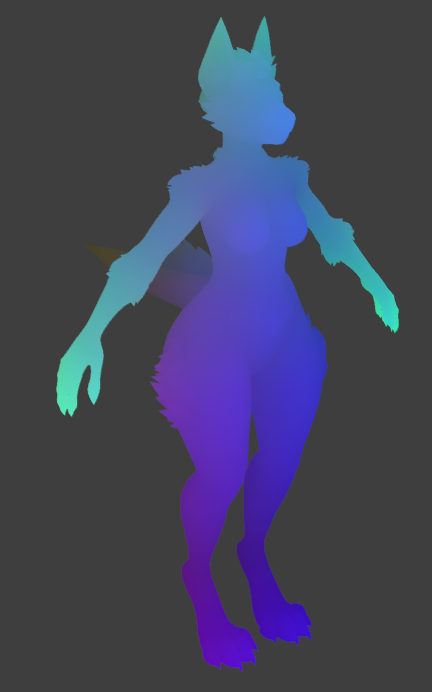
Vertices can store invisible color information. These colors can be used in Poiyomi in a few different ways, but you can think of it like having a mask without needing a texture for it. You can also use it to affect color in some way, but the places where Poiyomi lets you use it are a bit sparse.