Twist Bones
This guide was made before VRChat’s VRC Constraints. Whenever constraints are mentioned, use VRC Constraints instead. The process is the same!
Warning
Twist bones can sometimes invert on arms at certain angles.
Twist bones greatly improve deformation on bones like the thighs and forearm. They work by splitting the rotation across 2 bones. Normally, in 3D software, twist bones tend to be part of the same chain, like: Forearm>Twist Bone>Hand. In VRChat, we shouldn’t do this. Unity’s humanoid skeleton is sensitive to things interfering with the intended chain of bones.
But there’s a workaround. The Hand just needs to not be a child of the twist bone. That way, the intended bone chain is intact.
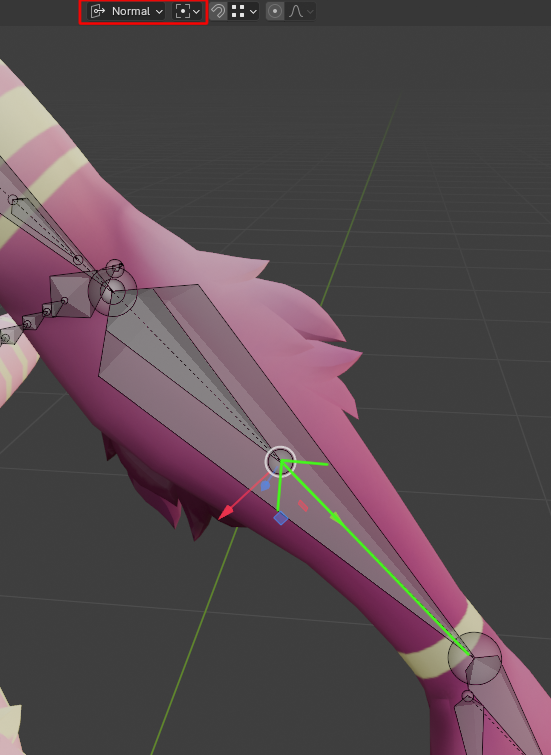
So, in short, if you want to make twist bones, it’s pretty simple. Start by duplicating the bone you want the twist bone on. Right click to cancel any translation that might occur. This will be the twist bone. In order to more easily differentiate the two, you can select the end of the twist bone and make it smaller by moving the END of it in “normal” mode
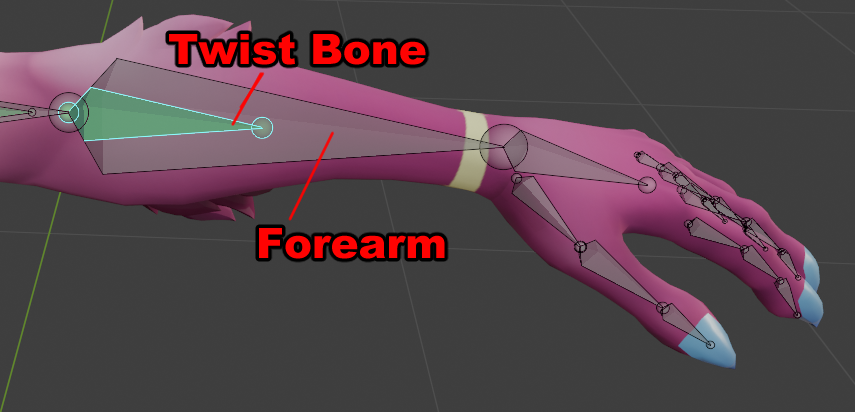
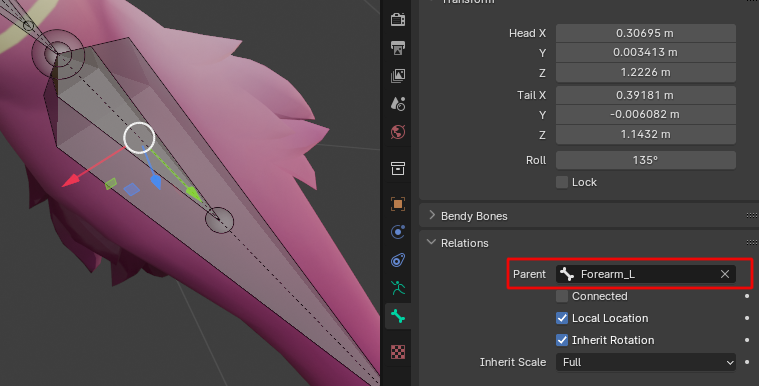
The next step is to fix the parenting. By default, duplicating a bone gives it the same parent, so you’ll have to change the twist bone to be a child of the original bone, in this case, the forearm.
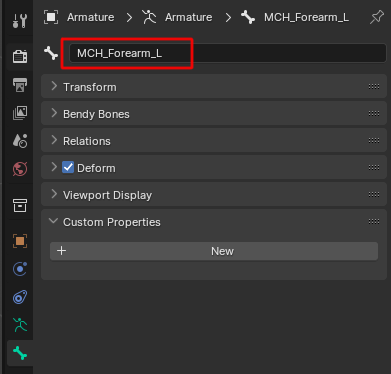
You will also need to rename the bone. Keep in mind that the name is important, as Unity interprets the bone chain in alphabetical mode. We can technically change the order of bones by unpacking the prefab, but generally, you want to avoid unpacking anything. It’s better to name the twist bone something that comes AFTER the original bone’s name alphabetically, or else you’ll get an error by the VRC SDK about possible problems with rotations. Some people use Z_ as a prefix to ensure it comes last, I tend to use MCH_.
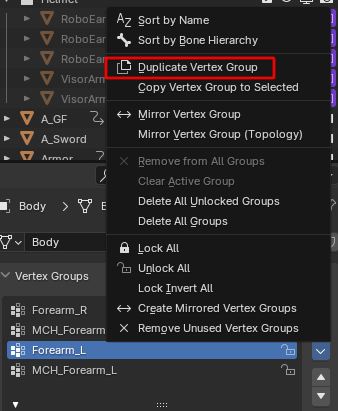
Once that’s done, it’s time to fix the weight painting. Look for the vertex group of the original bone.
Duplicate it, and name the copy the exact same thing as the twist bone you made.
Now both the twist bone and the original bone have the same weight painting. Make sure you do this for both left and right sides of your model.

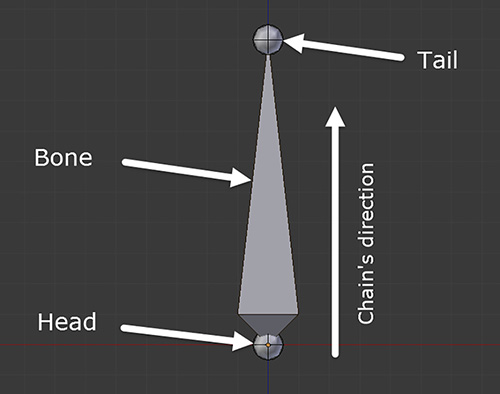
Next, you enter weight paint mode and use the gradient tool to remove weight. On the twist bone, remove weight from the TAIL of the bone, the part closer to the hand for instance. On the Original bone, remove weight from the HEAD of the bone. The part closer to the elbow.
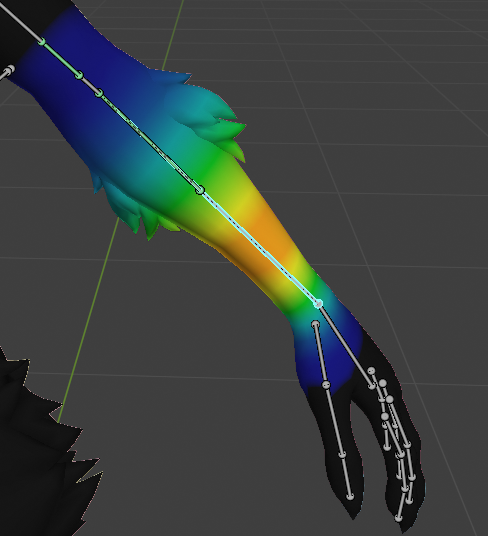
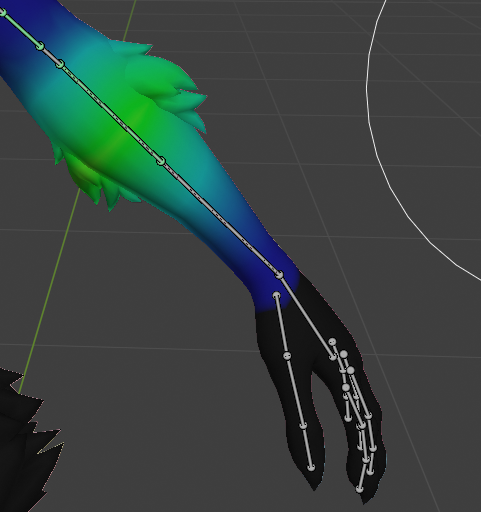
Left: Forearm. Right: Twist bone
When you’re done, they should gradually blend into each other somewhat smoothly. Keep in mind the gradient tool might not mirror properly. With symmetry on, use the smooth brush with low strength to mirror things to the other side.
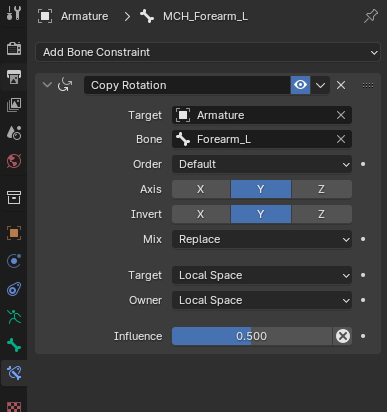
That should be it for Blender! If you want to test it IN Blender, you’ll need to use constraints. In pose mode, add a copy rotation constraint to the twist bone with these settings:
Once in Unity, add a rotation constraint to your twist bone with these settings:
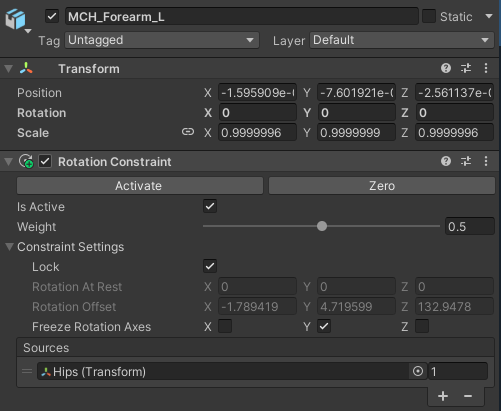
You can play around with the weight to your liking. REMEMBER TO UNCHECK X AND Z IN THE CONSTRAINT SETTINGS.
Setting the source as the Hips will PREVENT the bone from rotating on the Y axis. Freezing the other axes will let the twist bone follow the forearm.
The reason we don’t just use the forearm as the parent (set to -1) is that due to how rotations work, there’s an issue that occurs when the values cross over from positive to negative or vice versa. Our twist bone will “flip” once it reaches a certain threshold. By using a bone like the hip, which for some reason has very little rotation, it instead halves the value of the parent’s rotation, regardless of whether or not it’s negative or positive, because it’s always halfway between 0 and the parent’s value. There’s still a flip that occurs once it crosses 360 degrees, but in my experience, it’s so far from the resting position that you have to REALLY twist it to notice it.
That’s all for twist bones. It works best on Forearms, Upper Arms and thighs. Keep in mind that with the VRC constraints update, you can put about 100 constraints on your avatar before it affects ranking, which is really generous.
For corrective bones rather than twist bones, which you would use on elbows, butts or knees, it’s pretty similar. Instead of being a child of the forearm, it would be the same child as the forearm (in this case, upper arm), and the constraint would have the forearm in the source instead of the hips. Unlike twist bones, none of the rotation axes should be frozen when making corrective bones. Make sure the corrective bone doesn’t point “outwards” and instead has the same orientation and position as the bone it rotates with, or else rotations won’t match properly. This isn’t nearly as effective as corrective blendshapes, though, especially for knees.