Note
This section assumes you've already made the Unity project, imported the 📦 Prerequisite Packages and opened the scene. If you're new to using Unity for uploading avatars, follow the 🟥 Unity And VCC Setup
Importing the Custom FBX
If you didn’t export it directly into the FBX folder in Unity, simply browse to your Dragoonoid’s project folder in your file explorer (not inside Unity) and OVERWRITE the existing Dragoonoid FBX with the one you exported from Blender. All the useless bones will be discarded. This should leave you with an avatar that only has the needed Physbones and regular bones. I set it up in a way that makes it so that you are able to overwrite the FBX more than once.
Unfortunately, you cannot replace the FBX directly inside the Unity application, as it will instead create a duplicate version with _1 at the end, which is why we need to do it outside of the application.
In Unity, browse to Assets>TDR_Dragoonoid>FBX, right click “Dragoonoid” and click “Show in Explorer” or “Open Containing Folder” to open the folder it is contained in.
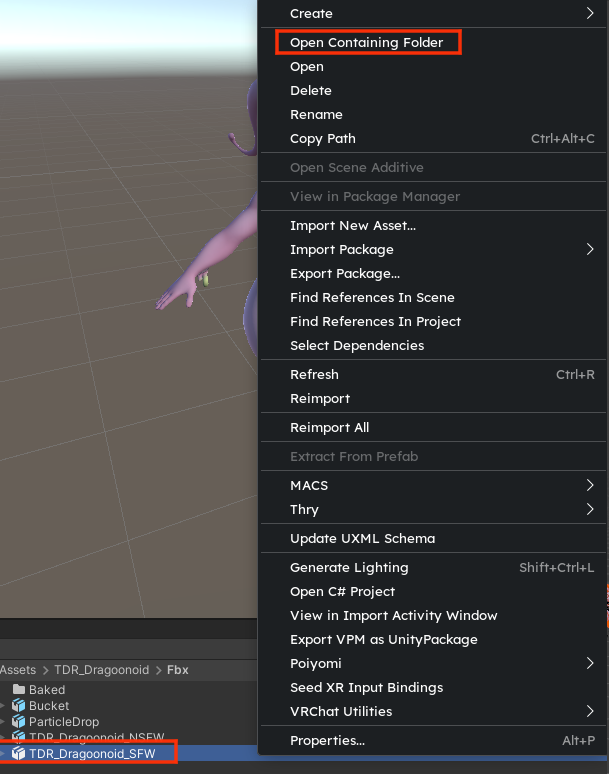
You can now take the custom Dragoonoid FBX that you exported and replace the one in this folder with it.

We’re almost there!
Fixing import issues
If you’re noticing some issues, I’ll try going over things that might go wrong to fix them.
If your avatar is stuck in T-pose in VRChat, you might have forgotten to export the Armature, and might have to recreate the Unity project. If you still have the project open, it might not be too late, export it correctly, and then reload the scene without saving. If constraints, physbones and contacts reappear, then everything should be fine.
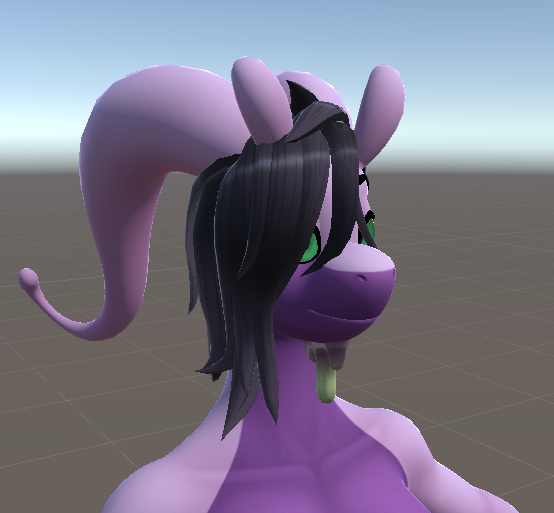
Though most likely, you might end up with something trivial like this:
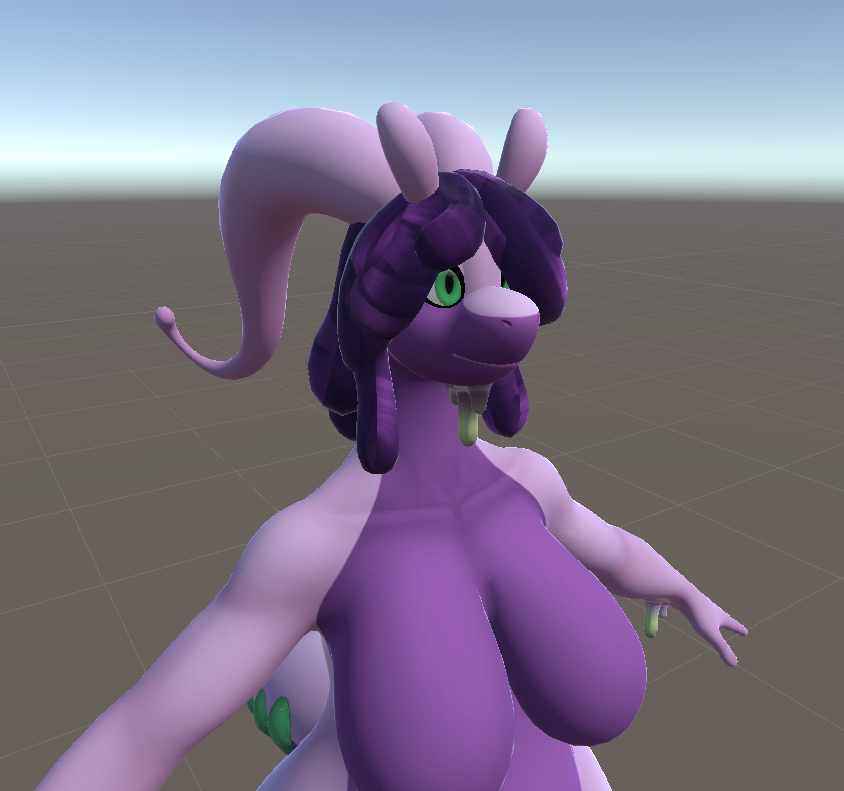
As you can see, the material does not match the current hairstyle. This is due to Unity assigning materials slots based on the vertex order. If that order changes, there’s no telling which material slot will be assigned.
It shouldn’t be too much of a hassle to fix. Go to Assets>TDR_Dragoonoid>Materials to find all the materials. They should be all named accordingly. You should have one material for the Body, one for the Face, one for Goo, one for misc (like the tail), and then the Hair.
if one is mismatched, simply drag and drop it onto the corresponding mesh.
Here’s how the hairstyles SHOULD look like:
| Hair01 |
|---|
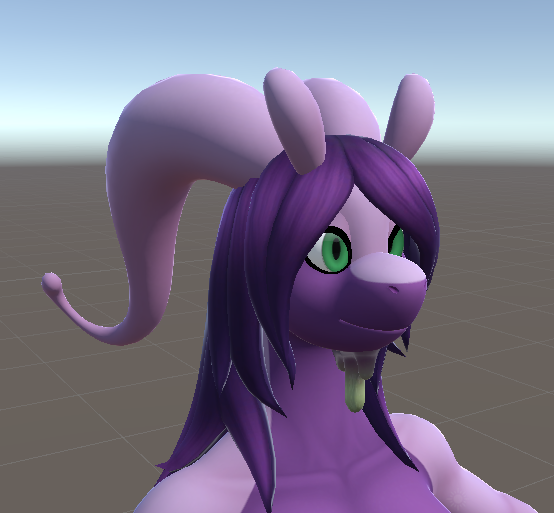 |
| Hair02 |
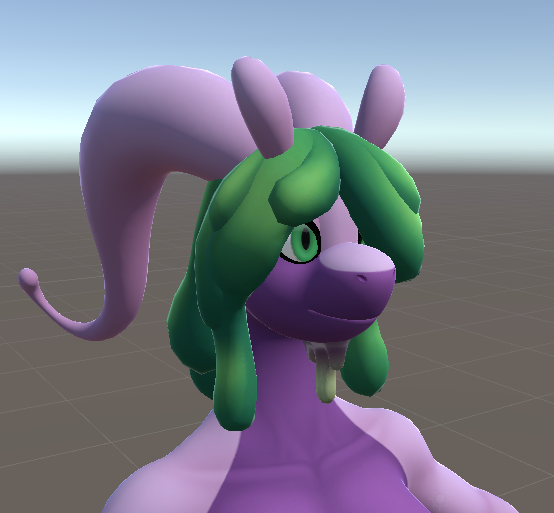 |
| Hair03 |
 |
For the Body, This is shown in the inspector when clicking the Body mesh:
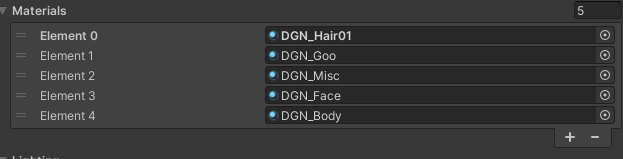
These can easily get scrambled if any material is removed or changed between exports of the FBX.
Replacing textures with custom ones
Once you’ve got all your textures exported from Substance, you can import them into Unity. The simplest way to do it would be to replace them in explorer like we did with the FBX, as there are specific import settings associated with each file that would be missing if we used a new texture. Each material’s textures are separated in their own folders in TDR_Dragoonoid>Textures.
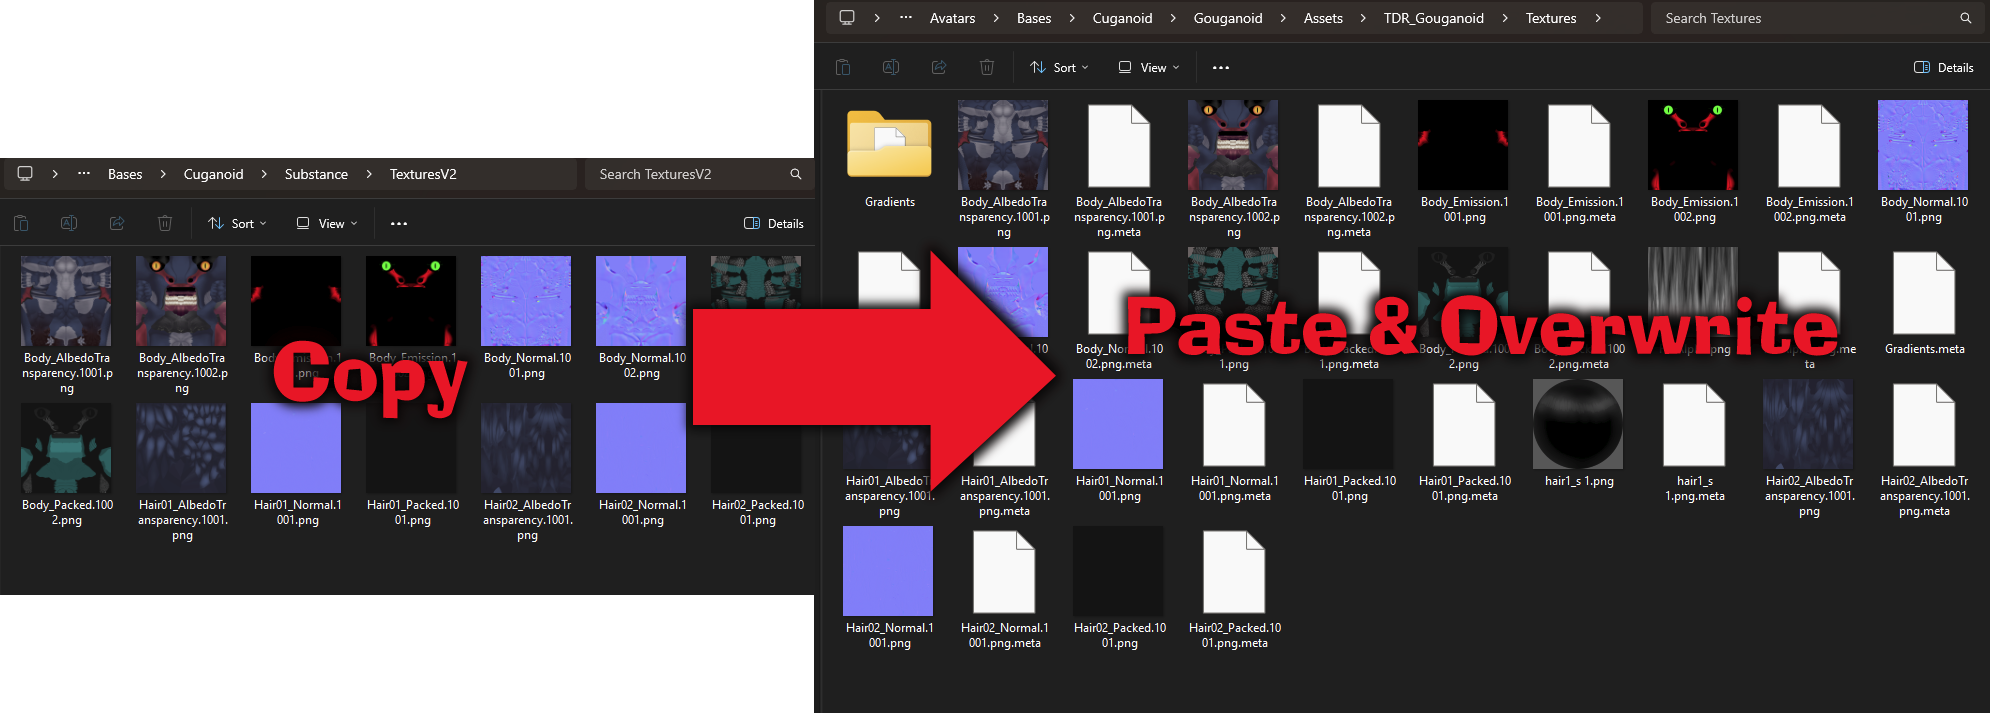 Navigate to the correct folder (TDR_Dragoonoid>Textures, and then Body, Clothing or Hair) and copy the textures you exported from Substance. Then, paste them into their matching folders. The next time you click into Unity, it should have replaced the textures.
Adding the correct physbone settings
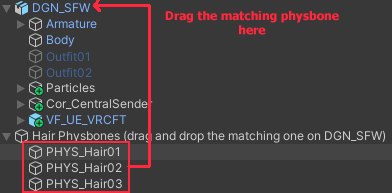
Each hairstyle has its own physbone settings, I've provided a folder with all 3. You'll need to drag and drop the matching one onto the avatar's prefab. This reduces the amount of physbone scripts and keeps the avatar at medium rating.
Face Tracking
Don't forget, if you have face tracking, you'll need to follow instructions in 🟧 Unity Project Setup#Face Tracking!